


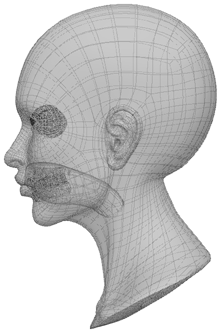
The mouth corner is the most complex modeling task in making a face, and the most important for having a good quality result in your final animations.
Lips: Model the lips in a closed position. Make sure that the lips are fleshy when they move, especially at the corners of the mouth. Be careful of sharp edges: if there are small edges on the mouth in its closed position, the edges will become more prevalent when the mouth is open (the area has a lot of elasticity).
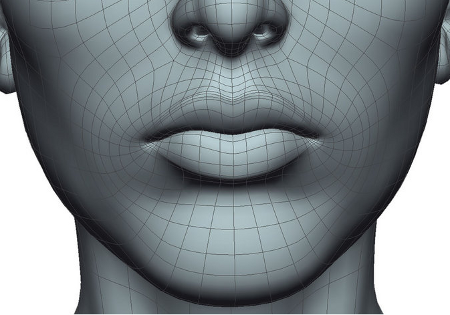
Edge Flow: The first goal of modeling the mouth corners is to have a good edge flow. Use smooth, highly detailed loops on the corners for that. Use quads as much as possible and have the flow lines of the corner be as clean as possible and well aligned.

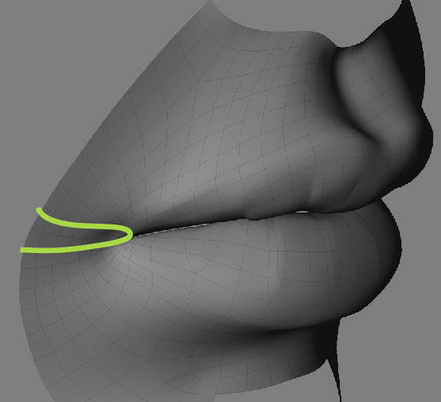
Corner Section Line: Carefully consider the placement of the mouth section line in the diagram below. Ideally, this line will be as close as possible to a horizontal plane.
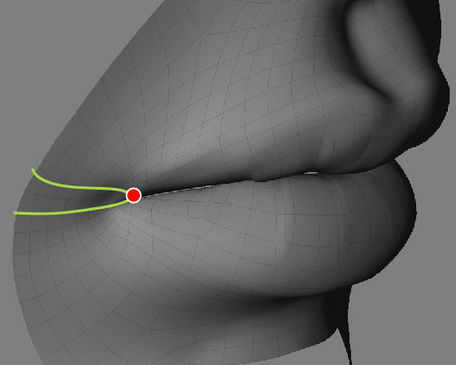
Having a mouth that deforms well depends a great deal on the location of the landmark that you pick for the mouth corner in Stage 3: Landmarks. When you pick the mouth corner point, be very careful that it is exactly in line with the crease that runs inward to form the lip division.
Corner Tip: Where you place the tip of this corner section is the most critical decision to make in the modeling process. Modeling it correctly will make animating the mouth simple and problem-free. Modeling it incorrectly will lead to problems in the animation process and will cause more mouth sculpting fixes later in the process.
The challenge with the corner tip is to model the surface flow so that it correctly describes where the lips are attached, and where they are separated.
Sticky Lips: These are the tricky areas in corner tip placement because artists often interpret photographs that demonstrate lip stickiness as showing the lips being fused together.
The following diagram shows how to avoid common errors and place the corner tip with sticky lip reference photography. Note the image on top is not a good reference for the neutral pose because the mouth is slightly open, but it is still useful for understanding what is going on.
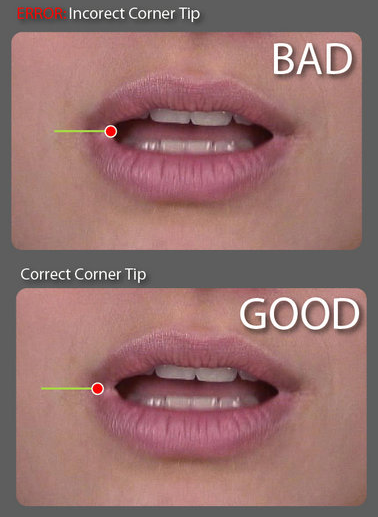
Placing the corner tip correctly means the mouth corner can spread apart properly as it opens, and not create a fused sticky mass.
You can tweak the behavior for lip stickiness later on using the Lip Stiction command — see Solving the Sticky Lips Problem.
The interior of the mouth should be fully modeled and shaded because this area is highly deformed and visible as the mouth moves.
Carry your flow lines into the mouth interior for best results: because Face Robot gives you so much control in this area, the immediate interior of the mouth will often be seen deforming.
The mouth interior should be modeled so that the inside of the lip is present and supports outward lip curling. For realism, tonsils and a uvula should be added to the roof of the mouth.
The inner lip should be a continuation of the parameterization and edge flow of the outer lips, taking care to create the proper volume and radius of the lips. The easiest way to work is to simply duplicate the last edge of the lips and pull them back slightly, model them in the correct shape, and then continue this process of duplicating the edge and modeling till the entire inner mouth is complete and you have reached the beginning of the throat.
 Except where otherwise noted, this work is licensed under a Creative Commons Attribution-NonCommercial-ShareAlike 3.0 Unported License