Before you start, there are some sections of information that you need to review to understand the modeling requirements for the head and the stage process involved for Face Robot:
Getting Started with Face Robot, which describes a basic interface and workflow overview, as well as information about loading Face Robot scenes into Softimage.
Doing the Pre-Flight Check, which gives you a quick check list for the modeling requirements for heads to be used in Face Robot.
In this first stage, you will load the head and required face parts (eyeballs, teeth, and an optional tongue) into Face Robot. If you don't have all the parts yet, you can create eye sockets, eyeballs, and a mouth interior using Face Robot (see Creating Face Parts).
When you have picked all the parts, a diagnostic is run that verifies that the face parts are valid for Face Robot to process. If there are any problems, the diagnostics will inform you. You won't be able to proceed until Face Robot has verified that all face parts are okay to use.
After everything is okay, Face Robot can scan the head and parts. Scanning freezes the modeling stack for the face parts, so any modeling you've done up to this point is baked into the mesh. Scanning also removes constraints and freezes any animation on the face parts.
You can change the geometry (such as moving points) and topology (such as adding or removing points or polygons) of the face parts until you scan them. (see Step 5 in the following procedure). However, once you've scanned the objects, you cannot change the topology anymore, only the geometry.
Make sure that you have loaded these objects into Face Robot before you go to the next stage:
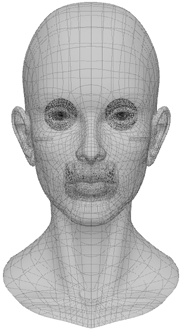
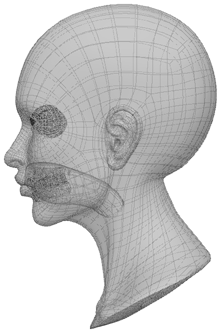
A complete head with neck and a mouth interior. Holes are either closed or there is one neck opening.
Upper and lower teeth objects ("dentures") placed in mouth area.
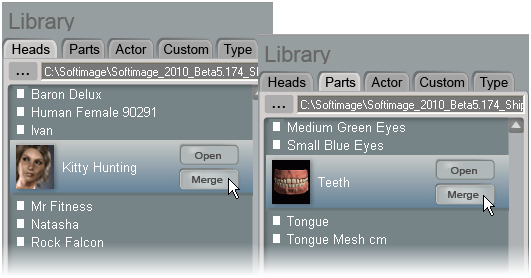
Load the head, two eyeball objects, and upper and lower teeth objects into Face Robot in any of these ways:
Choose File  Import from the main menu bar and choose the appropriate file format from the submenu for your model.
Choose File Open from the main menu bar to open a Face Robot scene — see Loading and Saving Scenes in Face Robot.
Choose File Import Model from the main menu bar to import a model.
On the Stage 1: Assemble panel, click the tabs in the Library section to load existing geometry. You can load in:
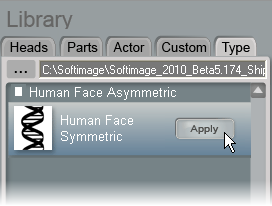
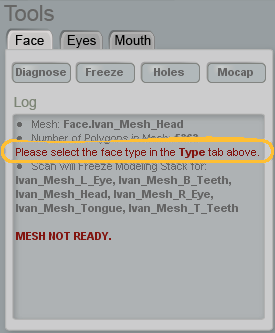
On the Type tab, select a DNA file to determine whether the face is symmetrical or asymmetrical — see Selecting a DNA Type.
Click the Pick Objects button to go to the next panel: Stage 2: Objects, then return to the next step below.

After you've picked the objects and returned to this panel, you can check the Tools area for a diagnosis on the face objects.
You may need to fix holes or freeze the transformation — see Diagnosing the Face and Fixing Problems for information on how to do these things.
When you have fixed the problems and the face has been diagnosed as "READY TO SCAN", click the Scan button.
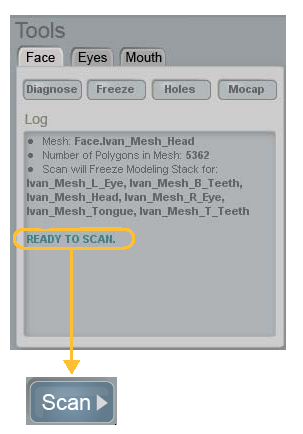
Scanning freezes the modeling stack for the face parts, so any modeling you've done up to this point is baked into the mesh. Scanning also removes constraints and freezes any animation on the face parts.
After the scanning is finished, the Stage 3: Landmarks panel opens.
 Except where otherwise noted, this work is licensed under a Creative Commons Attribution-NonCommercial-ShareAlike 3.0 Unported License