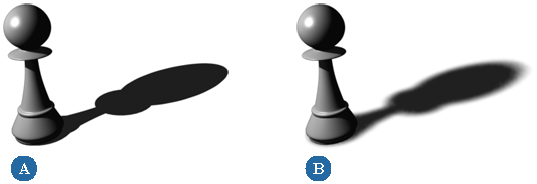
Shadow mapping, also known as depth-mapped shadows, uses a modified z-buffer (depth) algorithm to create shadows more quickly but less precisely than those created with raytracing.

This algorithm calculates color and depth (z-channel) information for each pixel, based on its surface and distance from the camera. Before rendering starts, a shadow map is generated for the light (if one does not already exist).
This map contains information about the scene from the perspective of the light's origin. The information describes the distance from the light to objects in the scene and the color of the shadow on that object.
During the rendering process, the light will be cut off at the distances specified by the depth map. This saves a tremendous amount of rendering time because the renderer needs only to check the depth map to determine which parts of a surface are shadowed and which aren't.
Keep in mind that the more lights used to generate shadows, the longer the render times.
Select a light and open its property editor by choosing Modify  Shader on the Render toolbar.
In the Light property editor, click the General tab and select Shadows Enabled.
To use shadow maps, click the Shadow Map tab and select Use Shadow Map.
Set the Resolution to determine the quality of the shadow map (width and height of the map buffer). A high-resolution setting increases memory usage and rendering time.
Raising the shadow map resolution should not be the first thing you do to solve shadow problems, such as artifacts. Try adjusting the Bias parameter, which does not add to your rendering time.
Set the Bias to control the distance offset to add to the shadow map.
Bias is a number that gets added to each distance measurement in the shadow map. Essentially, it pushes the shadow's start-distance further out from the light. Increase the bias to slide the shadow further away from the surface casting the shadow, for cases where the shadow starts too soon. Modifying the Bias helps to eliminate shadow overrun (self-shadowing) or shadow artifacts if the shadow map algorithm fails to generate the depth value accurately.
Generally, a scene built on a larger scale might need a higher bias, and a scene built on a very small scale might need a lower bias.
Set the Softness to determine the type of shadow. A value of 0 results in hard-edged shadows. Higher values create longer, smoother shadows, but take longer to render.
Set the Samples to adjust the shadow's resolution. High sample values yield a higher render quality, but increase rendering time.
Before rendering, choose Render  Renderer Options from the Render toolbar to open the mental ray Render Options Property Editor for the current render pass and set the following options:
On the Shadows tab, select Enable to activate shadow maps. If your scene has motion blur, you may want to enable the Motion Blur option.
Select the objects whose shadows you want to cast and display their Visibility property editor. Click the Rendering tab and make sure that both Shadow Caster and Receiver options are enabled. For more information, see Shadow Casters and Receivers.
To view the shadow map in the render region, draw a region (press Q), choose Render  Regions
  Active Viewport Options and select Use Current Pass Options.
 Except where otherwise noted, this work is licensed under a Creative Commons Attribution-NonCommercial-ShareAlike 3.0 Unported License