You can set clusters of tagged points to define specific areas of a cloth. For example, you can create a flag or curtains blowing in the wind or have a corner of a blanket bunch up as a character grabs it. To do these local effects, you create clusters of points where you want to have the effect on the cloth object.
Activating a cluster means locking its points so that the simulation doesn't affect them. Activated clusters may be static or subject to any type of deformation. A decay factor defines how the assigned values are propagated to the cloth vertices near the clustered vertices. Changes in the cluster list are also supported.
Another useful way of using clusters is to animate their activation. By animating the Nail parameter, you can animate the effect of a cloth being pinned down and then released. An activated cluster (Nail is on) is not affected by the cloth deformation: it is either locked in time or moves according to the original animation or deformation of the model. A deactivated cluster (Nail is off) behaves as all the rest of the cloth model with its deformation being driven by the cloth simulation (see Pinning an Object).
Select a cloth object (one that already has cloth applied to it) — see the procedure on Creating a Cloth Simulation.
Select existing clusters on the cloth object or tag the points you want to use for clusters (press T and select the points).
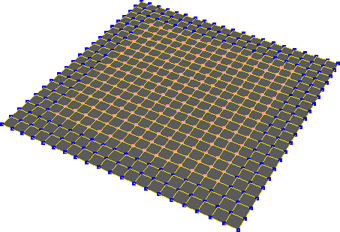
Choose Create ClothLocal Cloth Cluster from the Simulate toolbar. In the Cloth property editor that opens, set the parameters.
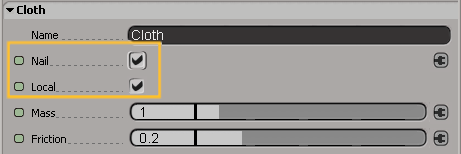
The Nail option keeps the cluster nailed to its location with no influence from forces. It also makes the cluster move or deform according to any animation.
The Local option activates local physical properties of the cluster for the cloth.
If you want to keep an object pinned down and then release it, animate the Nail parameter's activation (on and off).
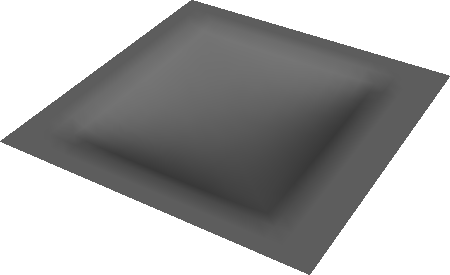
Cluster is deformed by gravity applied to the object (Nail option is off). The Nail option is on for the rest of the cloth object so that it stays put.
In the explorer, you'll see a Cloth icon under each cluster that has the cloth cluster command applied to it — see Finding Cloth Elements in the Explorer for more information.
Here's a short example of how to pin an object with the Nail parameter.
Make two clusters on an object that already has a cloth operator applied to it: one cluster for the main area and one for the area you want to pin.
Apply the Create Cloth Local Cloth Cluster command to each cluster.
When you play the simulation, the pinned cluster moves and deforms because of the skeleton-envelope relation. The cluster that is not pinned deforms due to the cloth simulation.
You can also animate the cloth model or the clusters themselves.
If you are using an animated cluster center for the cloth object, you need to create and animate it before you apply cloth.
If you create the cluster center after you have applied the cloth to the object, the cloth operator doesn't know that the cluster is animated because of the order in which the operators were applied.
A quick workaround for fixing this problem is to open an explorer and change the order of operators so that the cloth operator is above the cluster center operator.
Suppose you want to pull a towel by animating the position of a cluster on the cloth. Here's how you do it:
 Except where otherwise noted, this work is licensed under a Creative Commons Attribution-NonCommercial-ShareAlike 3.0 Unported License


