Stitching allows you to join two NURBS surfaces together so that they can move as if they're one piece of cloth. This is especially useful if you want to join a sleeve to a jacket.
Stitching works only with NURBS surface meshes because cloth works only on single geometries. All NURBS surfaces must first
be part of a single object created by using the Create  Surf. Mesh Assemble command from the Model toolbar before you can use stitching (see Assembling Surface Meshes [Surface and Curve Modeling] for more information).
Be sure you are not using tagged points or an activated cluster in the stitching process. If you sew two patches together and then create a cluster involving the stitched vertices, it's better to not activate that cluster (that is, don't select Nail — see Using Clusters for Localized Effects) because you could get unexpected results.
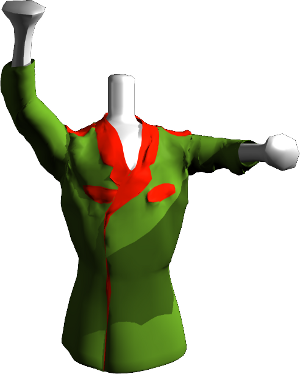
Cloth pieces stitched together and deformed on an animated mannequin.
Create a single NURBS surface mesh object from all NURBS surfaces that are to be part of the single object by using the Create Surf. Mesh Assemble command on the Model toolbar.
Select the NURBS surface mesh object and choose Create Cloth From Selection from the Simulate toolbar to apply the cloth.
On the Stitching page in the ClothOp property editor, select the Stitching option to stitch the NURBS surfaces together by overlapping their closest vertices.
It is useful to nail different patches along their borders for tailoring complete garments. Once vertex couples are stitched together, they are kept together for the whole simulation.
Set the Threshold for the minimum distance between vertex couples in order to stitch them together. You can tune this interactively.
 Except where otherwise noted, this work is licensed under a Creative Commons Attribution-NonCommercial-ShareAlike 3.0 Unported License


