There are a number of predefined models, skeletons to get you going with Softimage. These are available from the Get  Primitive Model and Get Primitive Character menus from any toolbar.
You can use these models to understand how characters can be set up in Softimage and to try out some of the many character animation tools available.
All predefined skeletons, bodies, characters, and rigs are implemented as models. For more information about working with models in general, see Models.
As well, most of the bipeds share the same basic hierarchy structure that you can see in the explorer, making it easy to share animation later, especially if you're using actions in the animation mixer.
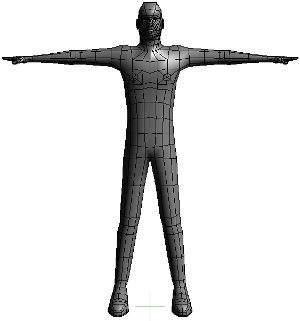
To start out, you can load predefined envelopes made of low-resolution polygon mesh models. These bodies can be used "as is" for subdivision, enveloping, and other animation, or they can be used as a starting point for modeling your own characters.
There are also envelopes that are higher resolution polygon mesh models that come with predefined UVs.
The Basic skeletons are simple skeletons, while the Complete skeletons include controls for rigging, such as facial nulls, fingers, and up-vector controls for the arms and legs. These skeletons are proportioned to match the predefined body envelopes.
Choose Get Primitive Model Skeleton - Man/Woman - Basic/Complete from any toolbar.
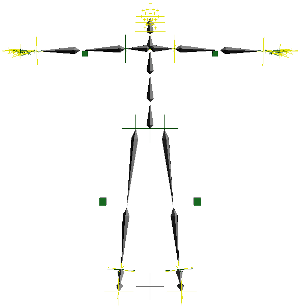
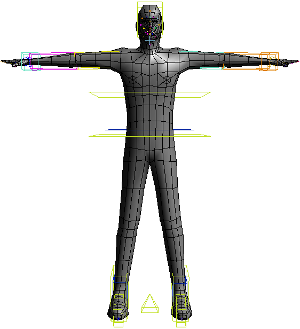
The rigs are skeletons that include control objects that you can position and orient to animate the various parts of the character's body. The predefined biped rigs are based on the default settings of the proportioning guide.
See Overview of Using the Predefined Rigs for more information on using these rigs.
Choose Get Primitive Model from any toolbar, then choose any of the rigs you want:
Biped - Rig: a basic human rig — see Creating Biped Rigs for information.
Biped - Box - Made of boxes, such as you may want to use for a shadow rig — see Creating Shadow Rigs for information.
Biped - SI|3D Skeleton: A simple SOFTIMAGE|3D-style skeleton (effectors are children of the last bone) — see Creating Character Hierarchy Setups from a Guide for information.
Biped - Skeleton - A simple Softimage-style skeleton (effectors are children of the chain root) — see Creating Character Hierarchy Setups from a Guide for information.
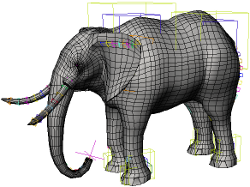
Quadruped - Rig: a basic rig for four-legged friends — see Creating Quadruped Rigs for information.
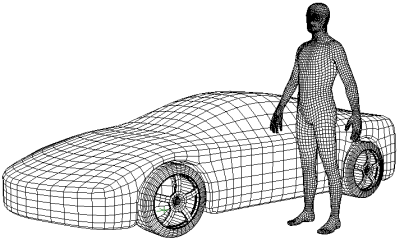
These include several bipeds of different sizes and with different setups, as well as a dog and an elephant.
All of these characters are rigged and tagged appropriately to be used with MOTOR (see Softimage® MOTOR (Motion Transformation) for Characters).
As well, they all have control rigs, groups for enveloped objects and other rig elements, custom parameter sets for rig elements, and character key sets in their models.
Choose Get Primitive Character from any toolbar, then choose any of the characters you want:
Biped: basic human with control rig and facial animation nulls. Male and female body geometry is available.
Biped Shadowed: Biped with a shadow rig. Male and female body geometry is available for both the biped and the shadow rig.
Biped Nulls: Biped with facial animation nulls (no body rig). Male and female body geometry is available.
Little Dude: a small-scale human with a control rig. Facial animation and hand/finger sliders are available in a custom parameter set.
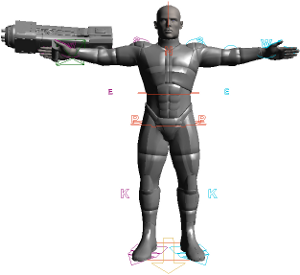
XSI Man: a muscular, higher-resolution male geometry with control rig, including a facial animation custom parameter set. Useful for games.
Here are images of a few of the characters on this menu:
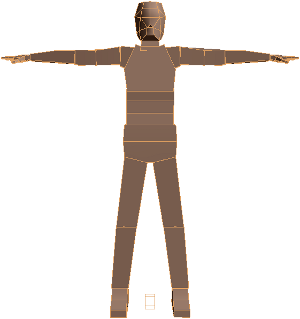
You can get going quickly on making characters by loading a predefined male body. This makes it easy to create any number of different characters using the same topology. The body is implemented in Softimage as a model. For more information about working with models in general, see Models [Data Exchange].
The Character Designer lets you get a generic male body, then use parameter sliders to interactively manipulate individual body and head features. You can create many bodies, each with their own distinctive look, yet have all bodies sharing the same underlying topology. The polygon mesh is designed to be used as the basis of a subdivision surface, and is suitable for enveloping.

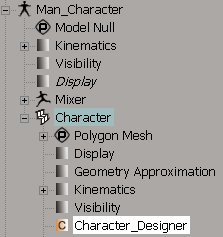
Choose Get Primitive Model Character - Man from any toolbar. A body is created and the Character Designer property editor opens.
Choose Get Primitive Character Man Maker from any toolbar. A body and control rig is created, and the Character Designer property editor opens. The model also contains
custom parameter sets with sliders for controlling the rig.
In the Character Designer property editor, the Overview page contains the main sliders that define the overall look of your character. If you want to further define the look, you can use the parameters on the individual facial feature pages (Skin, Head, Face, Eyes, Nose, Mouth, Body, Arms, and Legs) for more fine-tuning.
Use the sliders to control the size, position, and other attributes of the body and facial features. You can also transform and deform points and clusters manually, and still adjust the Character Designer properties.
All these parameters can be animated, which is useful to doing organic deformation effect. Have fun!
If you want to apply hair, there is a predefined cluster of polygons on the head that you can use (see Creating Hair [Hair]). This cluster is called Hair, and is found under the Character Polygon Mesh Clusters node in the Man_Character or Man_Maker model node.
When you are finished creating the character, select the Character mesh node beneath the Man_Character or Man_Maker model node and freeze it before enveloping to improve performance.
Remember that once you freeze, you cannot edit the character's individual parameters.
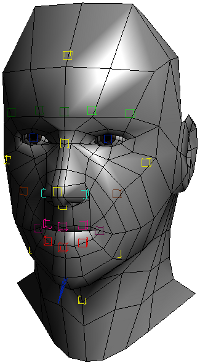
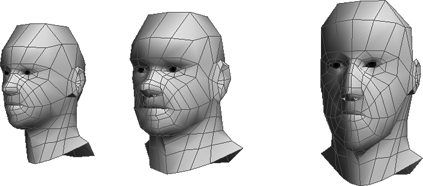
Using the Face Maker, you can get going quickly on facial animation by loading a predefined low-resolution polygon mesh head (male or female). This lets you can create any number of different faces with the same topology, allowing you to easily copy shape animation keys between them.
When you choose either of these commands, the Face Maker property editor opens, allowing you to use sliders to control the proportions and features of various parts of the face, such as the eyes, cheeks, mouth, ears, eyes, etc. You can also transform and deform points and clusters manually, and still adjust the Face Maker properties.
If you choose the Get Primitive Character Face Maker command, the face includes controls that are useful for lip syncing.
The faces are implemented in Softimage as models. For more information about working with models in general, see Models.
The Face Maker controls are a custom property applied to the root null of the model.
 Except where otherwise noted, this work is licensed under a Creative Commons Attribution-NonCommercial-ShareAlike 3.0 Unported License