The Render Manager > Scene Render Options
Choose Render > Render > Scene Options from the Render toolbar.
Options: Scene Motion Blur Settings
Motion blur is active for the scene by default, but to tweak the effect you can set scene-based motion blur options such as shutter speed and offset, and specify where on the frame the blur is evaluated and rendered. These are the primary settings for defining the motion blur effect.
Set the motion blur Speed for the scene. This setting specifies the time interval (usually between 0 and 1) during which the geometry and any motion transformations and motion vectors are evaluated for the frame. The motion data is then pushed to the renderer (by default mental ray).
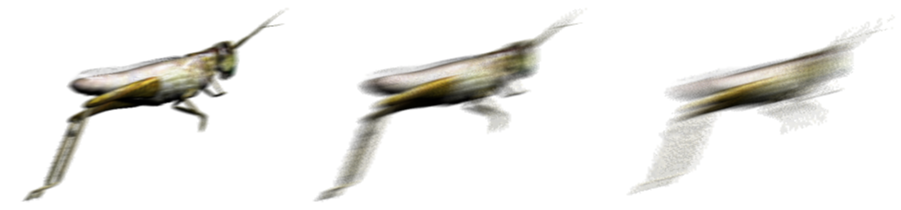
Longer (slow) shutter speeds (a difference of greater than 0.6) create a wider and/or longer motion blur effect, simulating a faster speed.
Shorter (quicker) shutter speeds (a difference of less than 0.3) create subtler motion blurs.
Shutter speeds higher than 1 produce intense motion blurs, but may cause artifacts to appear in a rendered image.
In the first image (left), a quick shutter speed (< 0.1) is used, then a slower shutter speed (middle), and finally (right) a very slow shutter speed (> 0.6).
Of course, all shutter speeds are relative to the speed at which the blurred object is animated. Objects that move from one end of a scene to another in a few frames produce a large amount of motion blur, regardless of the shutter speed.
Specify an Offset for the shutter's time interval which allows you to push the motion blur trails, even extend them into later frames. This can be a helpful option when you're trying to match rendered 3D objects to live-action plates.
Decide where on the frame the blur should be evaluated and rendered by setting an "on-frame" shutter mode.
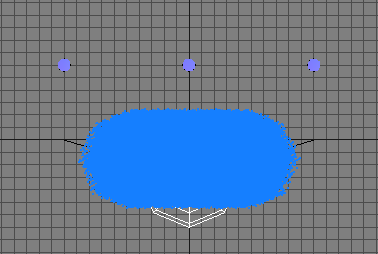
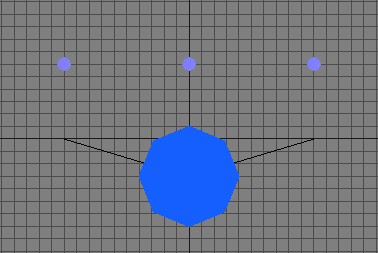
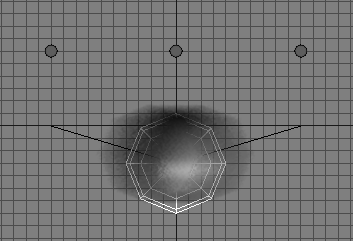
To illustrate the different on-frame behaviors, the images below use a set of still markers (representing frames) and an animated sphere that moves along a curved path such that on frame 0 it is over the first marker, on frame 1 it is over the second marker, and on frame 3 it is over the third marker. The sphere is animated linearly from -10 in X, at frame 1, to +10 in X, at frame 3, and you render frame 2.
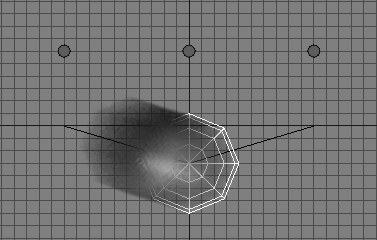
End on Frame: The blur starts prior to current frame and ends on the current frame. For example, if Speed is set to 0.5 and Offset is 0.0, the shutter opens half-way between the current frame and the previous frame, and closes on the current frame.
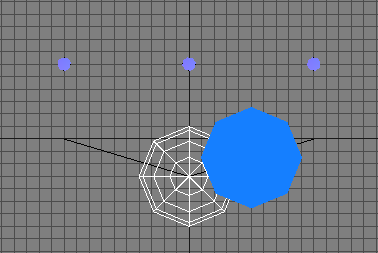
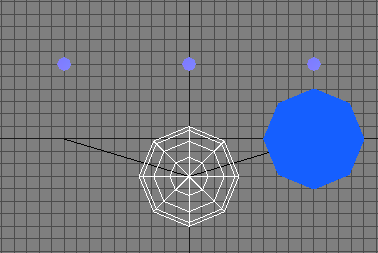
Start on Frame: The blur starts on the current frame and ends after the current frame. For example, if Speed is set to 0.5 and Offset is 0.0, the shutter opens at the current frame and closes half-way between the current frame and the next frame.
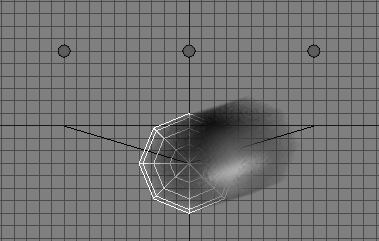
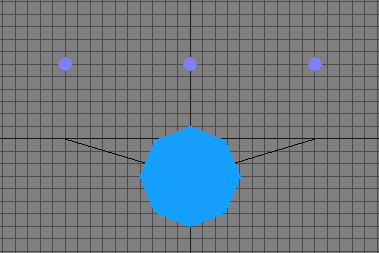
Center on Frame: The blur is centered on the current frame such that the shutter opens before the current frame and closes at exactly the same distance after the current frame. For example, if Speed is set to 0.5 and Offset is 0.0, the shutter opens three-quarters of the way between the previous frame and the current frame, and closes one-quarter of the way between the current frame and the next frame.
You may notice that the blur does not line up with the original object position. This is a limitation with Center on Frame that occurs when the blurred object moves along a curved path (as illustrated). The problem is that it is not possible to place the object exactly at the same position where it would appear if there was no motion blur, because the interpolation is linear between the two points on either end of the curve. In this case, you can do one of the following:
Motion Vectors and Compensation
Location: The Render Manager > (expand a pass) > mental ray > Framebuffer > Shadows [Properties Reference]
When you are rendering motion vectors (with motion or raster motion render channels) to be used in a post-processing tools pipeline, the on-frame placement of your blurred objects will be affected by the Compensate For Object Motion setting.
The Compensate For Object Motion option is enabled by default and it dynamically adjusts the shutter offset and close values so that the object is placed at (or as close to it as possible) the location where it would normally appear if there was no motion blur enabled. When off, there is no compensation and the object is always placed at the shutter close position.
Assuming the same example as above with the animated sphere, but this time the Speed is set to 1.0. You would get the following results:
For Center on Frame with Compensate For Object Motion on, the sphere will appear at X=0. When Compensate For Object Motion is off, the sphere will appear at X=5, since the blur at frame 2 goes from -5 to 5 in X.
For End on Frame there is no change, and the sphere will always show up at X=0, because the motion blur ends at that point (the blur goes from -10 to 0, for frame 2).
For Start on Frame, with Compensate For Object Motion on, the sphere will appear at X=0, but with Compensate For Object Motion off, the sphere will appear at X=10 (the blur goes from 0 to 10, for frame 2).
 Except where otherwise noted, this work is licensed under a Creative Commons Attribution-NonCommercial-ShareAlike 3.0 Unported License