


With pose offsets, you can offset all transformations (scaling, rotation, and translation) for an object. All transformations are calculated together as a whole instead of as independent entities, allowing you to easily offset an object in space.
Pose offsets eliminate the need for adding extra offset nulls or other objects or scripts that destructively process character animation to transform it to another space for blending with another clip. For example, you can use a pose offset when you're creating a transition between clips. You match the character's position in space from one clip to the other so that there's no sliding or rotating when the character goes to the next clip.
As with offset effects (see previous section), pose offsets sit "on top" of a clip's animation, so you can non-destructively add a pose offset to an action clip or a compound clip without affecting the action source. As well, the specified transformation offset is applied to the transformation parameters before any other value mapping effect, such as a clip effect or an offset effect.
Part of the pose offset process is choosing which objects to include in the offset. The mixer attempts to automatically determine which these objects are and activates an Xfo option (found in the clip's property editor) for their transformation parameters when the clip is created from the action source. If you have a specific setup or rig that's a little different, you can override this and specify exactly which objects are considered for the pose offset by activating their Xfo option manually.
Here's how the mixer determines what to consider for the offset:
The highest-level parent of objects in the clip whose transformations are locally animated.
Any objects in the clip whose transformations are globally animated.
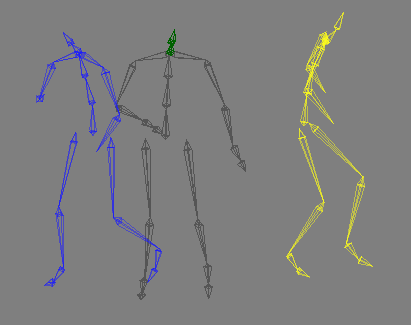
For example, you may have a hand effector that is parented under the character's "torso root", but is animated in global space (such as if it was imported from SOFTIMAGE|3D). In this case, the effector would need to have Xfo activated for it, as well as to its ancestor (the torso root).
Be sure not to have multiple clips overlapping on the clip you want to offset. You can mute them while you're doing the pose offset — see Muting (Deactivating) Parts or All of an Action Clip.
Right-click an action clip or compound clip to which you want to apply an offset and choose Clip Properties.
On the Clip Item Information page, select Xfo (or check) for each SRT parameter you want to include in the pose offset. The Xfo is actually set per object, not per parameter, so activating Xfo for one parameter may activate several. The pose offset is applied only to the parameters with Xfo active.
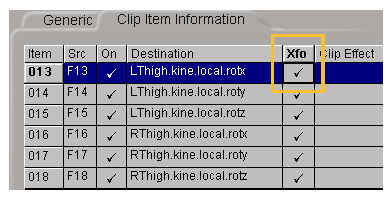
If you have any values set in the Clip Effect column (a clip effect or an offset), these are applied after the pose offset is calculated.
Select the clip and choose Clip  Select Driven Objects (Pose Offset Only) or right-click the clip and choose this command. This branch-selects all objects whose parameters have Xfo selected.
Using any or all of the Scale, Rotation, and Translation tools, transform the objects the way you want them for the pose.
Right-click the clip and choose Set Pose Offset. This calculates the pose using only the parameters that have Xfo activated for them. It makes the given clip match the current transformation at the specified time (using key time).
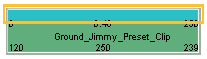
An aqua-colored bar appears above the clip indicating that there is a pose offset acting upon the clip. If there is also a clip or offset effect on that clip, the bar turns a bright lime green.
The Pose itself is a nested Static KineState you can see in the clip's property editor. It contains all transformation parameters that you can edit at any time to adjust the pose offset that you've saved.
Right-click the clip with the pose offset and choose Edit Pose Offset.
While you don't need to use ghosting for adjusting the pose offset, it can be of great help in seeing what you're editing if the clips are overlapping. To use ghosting, see Ghosting Clips.
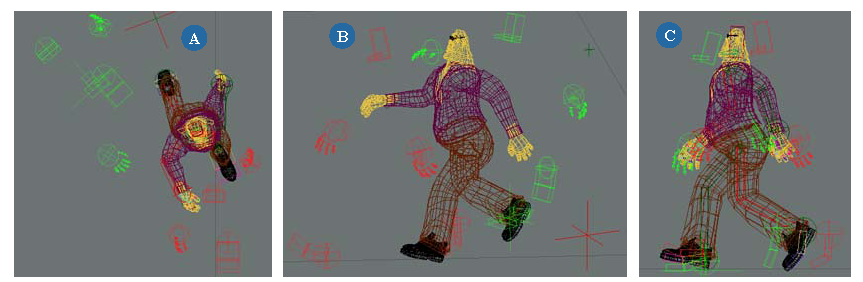
On the left, ghosting shows contribution from the first clip in blue.
In the middle, the character's current position is a blend between the two clips.
On the right, ghosting shows contribution from the second clip in yellow.
Interactively change any of the object's transformation parameters or change the values of the transformation parameters in the Static KineState property editor that appears.
Save the new pose by choosing the Set Pose Offset command again. This computes the correct offset to apply to make the clip match the current transformation at the specified time (using current or key time).
To create a smooth transition from overlapping clip A to clip B:
Ghost clip A's track so you can see where the object should be.
Solo clip B's track. Now the object is fully at the position driven by clip B.
Translate and rotate them to line them up the way you want with clip A's ghost.
Now unmute track A and you're done.

At the transition point between the first and second clip, the character is rotated and placed in space to match the first clip's pose.
Deactivating a pose offset removes the aqua bar from the clip, but the value map expressions for it remain so that you can activate it again.
 Except where otherwise noted, this work is licensed under a Creative Commons Attribution-NonCommercial-ShareAlike 3.0 Unported License