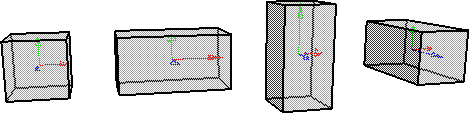
Scaling changes the size of an object. Unlike translation and rotation values which are absolute, scaling values are multipliers. A cube created at a length of 5 and scaled with a factor of 2 has a length of 10. Negative scaling turns an object inside-out.
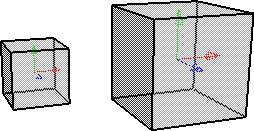
When an object is created, its scale is automatically set to 1.0.
Activate the Scale tool by doing one of the following:
If necessary, change any options:
The scaling modes control which axes the object is scaled along. For a description of each mode, see Scaling Modes.
You can restrict the scaling to specific axes. See Specifying Axes.
Activate COG to scale about the center of geometry.
Alternatively, set the pivot manually as described in Setting the Pivot.
Scale the objects using the mouse in the 3D views:
If you are using the SRT manipulators, click and drag on different parts (handles) of the displayed transformation axes to scale the objects in different ways.
For general information about the SRT manipulators, see Transforming Interactively with the SRT Manipulators. For specific information about the Scale manipulator, see Using the Scale Manipulator.
If you are not using the SRT manipulators, click and drag the mouse anywhere in the 3D views.
The function of the left, middle, and right mouse buttons depends on the tool, mode, and other options — check the mouse/status line at the bottom of the main window for details. You can also drag while pressing multiple mouse buttons simultaneously.
For objects, there is only one coordinate system used: Local. This is because objects are always scaled along their own local axes. Uni and Vol are actually modifiers that change the behavior of the scaling somewhat, but do not change the axes. When the Scale tool is active, you can set these modes using the buttons below the SRT boxes on the Transform panel.

For components, there are more scaling modes. See Transforming Components and Clusters [Modeling and Deformation Basics].
Local mode scales objects along their local axes. If both Uni and Vol are off, you can use the mouse buttons to scale along each axis independently.
Uni, or uniform, mode scales along all active local axes at the same time with a single mouse button. This avoids the annoyance of trying to drag the mouse while pressing two or three buttons (if you're not using the manipulators). You can activate and deactivate axes as described in Specifying Axes. You can also temporarily turn on Uni by pressing Shift while scaling.
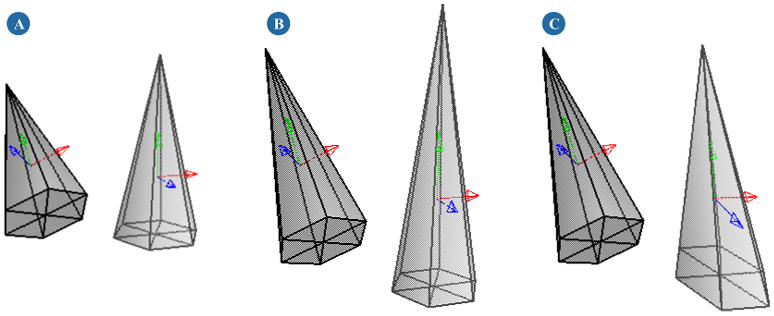
When using SRT manipulators to scale, there are seven handles that you can click and drag:
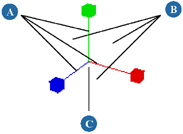
In addition to dragging the handles, you can:
Middle-click and drag anywhere in the 3D views to scale along the axis that most closely matches the drag direction.
Click and drag anywhere in the 3D views (except on the manipulator) to perform different actions, depending on the setting
for Click Outside Manipulator in the Tools  Transform preferences. See To choose the behavior when clicking outside of the manipulators.
Right-click to open a context menu, where you can set the manipulation mode and other options. If Click Outside Manipulator is set to either Select Tool or SI|3D-style Transform in your Transform Preferences, then you must right-click directly on the manipulator because those options use the right mouse button for other actions; otherwise, you can right-click anywhere for the context menu. Right-click again to dismiss the menu without choosing an item.
For information about using the SRT manipulators in general, see Transforming Interactively with the SRT Manipulators.
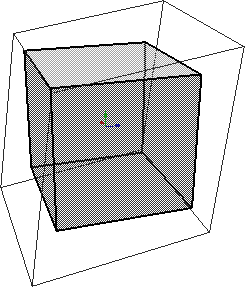
There are several possibilities for the center of scaling — the position that points move away from or towards as you scale up or down:
By default, the object pivot is the center of scaling. The object pivot is normally the same as the object's center, but you can change it and even animate it as described in Working with Object Pivots.
If Pivot Control - Active is off on the Pivot tab of the object's Local Transform property editor, the object scales about its center rather than its object pivot. Usually, an object's center is located in the middle of its geometry. However, this is not always the case, particularly if you freeze the transformations or manipulate the center directly. This has an effect on how the geometry appears to move when scaled, even if the center does not actually move.
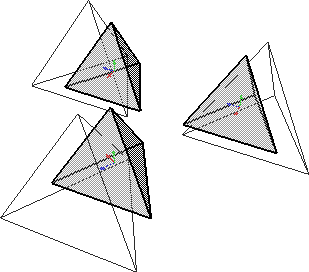
When COG is on in the Transform panel, objects scale about the center of geometry (the average position of all points). You can also use COG to scale multiple objects about their common center of geometry. The COG option takes precedence over the object center and the object pivot. Be aware that object centers may move if you scale with COG on.
You can temporarily change the center used for scaling interactively as described in Setting the Pivot. The tool pivot takes precedence over all other centers of rotation.
Shearing (Scaling Orientation)
You can shear an object by changing the orientation of the axes used for scaling. This distorts the shape of the object when you scale it.
Open the object's Local Transform or Global Transform property editor. It makes no difference which one you use because they share the same shearing values.
On the Scaling tab, set the orientation of the axes used for scaling by modifying the Scaling Orientation (Shear) X, Y, and Z values. These are angular offsets from the object's local axes.
Scale the object in one or more axes. Note that there is no shearing effect if you scale uniformly.
Hierarchical (Softimage) Scaling versus Classic Scaling
Hierarchical (Softimage) scaling uses the local axes of child objects when their parent is branch-selected and scaled. This maintains the relative shape of the children without deformation.
When the hierarchical scaling option is turned off, the result is called classic scaling — children are scaled along their parent's axes and may be sheared with non-uniform scaling. Classic scaling is recommended if you are exchanging data with other applications, such as game engines, motion capture systems, or 3D applications that do not understand Softimage scaling.
You specify which method to use for each child in its Local Transform property. You can also set the default value used for all new objects.
How Hierarchical and Classic Scaling Work
This section describes the technical details of hierarchical versus classic scaling, in case you need to write converters or process transformation data in the same way as Autodesk Softimage.