You can use gradients to create a number of different shading effects. Besides using them to texture objects, you can use gradients to drive other shaders' parameters. For example, gradients are commonly used to blend two textures together.
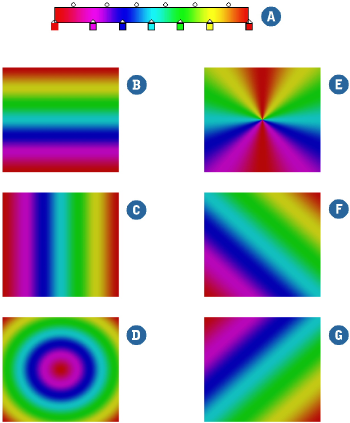
You can add gradients to your scene objects using the Gradient texture shader which provides you with a gradient control to set separate color and alpha gradients. You can create gradients of up to eight colors or alpha values.
The gradient texture shader applies a gradient texture to the surface of the selected object(s).
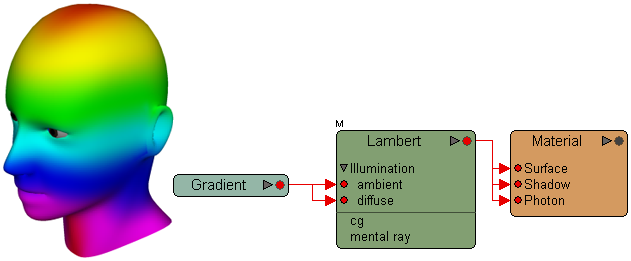
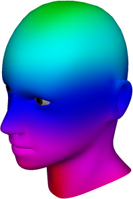
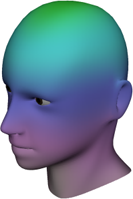
In this example, the head was textured using the gradient texture shader. A standard vertical gradient, set to the Spectrum preset, shades the head's surface.
The 2D gradient shader accepts a scalar or vector input that drives the color gradient that it outputs. This allows you to create gradients based on, for example, distance, vector coordinates, or in the case of the image shown below, incidence.
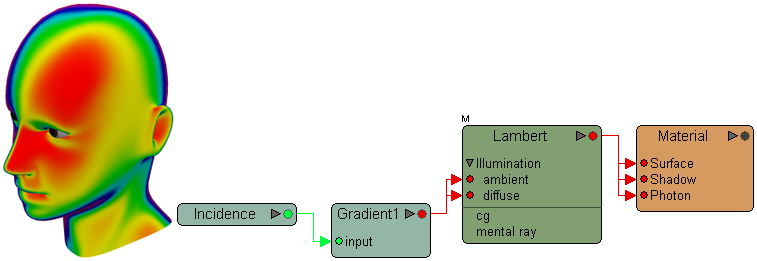
In this example, the head was textured using the 2D gradient shader whose gradient is controlled by an incidence shader. The incidence determines where the gradient colors are placed.
To connect a gradient texture or mixer shader to an object, use one of the texturing methods described in Applying a Texture.
Once the gradient shader is applied, open its property editor and define the gradient using the gradient controls as described in the following section.
Using the Gradient Controls to Define a Gradient
The gradient slider, in the Gradient texture or mixer shader's property editor, is where you create and adjust the gradient. It displays the gradient left-to-right from beginning (position 0.00) to end (position 1.00). By default, a new gradient shader displays a six-marker multi color RGBA gradient (on the RGBA Gradient tab) and a two-marker black-to-white alpha gradient (on the Alpha Gradient tab).
Although the following procedures explain how to define an RGBA gradient on the RGBA Gradient tab, the process for defining an alpha gradient on the Alpha Gradient tab is nearly identical. Defining an alpha gradient is described in Activating the Alpha Gradient.
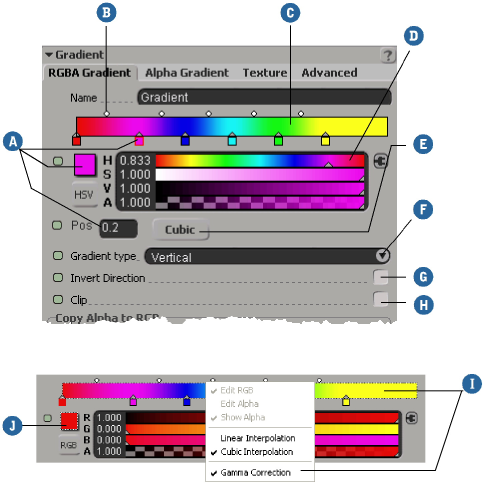
| Gradient Controls |
||
|---|---|---|
| A |
Color Markers |
See Adding Color Markers to the Gradient and Adjusting Color Marker Positions on the Gradient. |
| B |
Interpolation Markers |
|
| C |
Gradient Slider |
The gradient slider shows how gradient colors are blended together. |
| D |
Color Sliders |
Use the sliders to adjust the selected color marker's color. See Defining Color Properties [Interface and Tools]. |
| E |
Linear/Cubic Interpolation button |
Click this button to switch between linear and cubic interpolation. See Changing the Gradient's Interpolation. |
| F |
Gradient Type drop-down list |
Click the arrow to select a gradient type from the list. See Selecting a Gradient Type. |
| G |
Invert Direction checkbox |
Click here to invert the gradient's direction. See Inverting a Gradient. |
| H |
Clip checkbox |
Click here to clip the gradient so that the end colors are not displayed outside their active ranges. See Clipping a Gradient. |
| I |
Gradient Slider (with dotted highlight) |
Shows the gradient with a display-only gamma correction.
Note that switching the gamma correction off for a particular color widget is only turning it off locally for this widget. The global preference setting remains as is. See Display Preferences [Preference Reference] for how to set the color correction options. |
| J |
Color Chip (with dotted highlight) |
Shows the color with a display-only gamma correction.
Note that switching the gamma correction off for a particular color widget is only turning it off locally for this widget. The global preference setting remains as is. See Display Preferences [Preference Reference] for how to set the color correction options. |
Adding Color Markers to the Gradient
Click anywhere on the gradient slider to add a new color marker. By default, the marker assumes the gradient's color at the click-point. You can have up to eight markers on a gradient.
When you add a color marker, interpolation markers are automatically inserted at the midpoint between the new marker and adjacent markers.
Use the Color sliders (or other color controls) to adjust its color.
For more information on defining colors, see Defining Color Properties [Interface and Tools].
Activate the Clip option to prevent the first and last colors in the gradient from appearing outside of their active ranges.
When this option is active, the gradient color is set to black from the beginning of the gradient to the beginning of the first color's active range and from the end of the last color's active range to the end of the gradient.
When this option is inactive, the following occurs:
In addition to an RGBA gradient, the gradient shaders allow you to create a separate gradient in the alpha channel. This allows you to vary the gradient's alpha independently of its color.
For example, you might use a seven-marker RGBA gradient and a two-marker alpha gradient so that the gradient gradually becomes less transparent overall as it transitions from color to color, as shown in the following illustration:
|

|

|
| Color gradient and Alpha gradient: The same head now has the alpha gradient active, which gradually makes the RGBA gradient more opaque as it nears its end. |
||
From the Gradient (texture or mixer) property editor, go to the Alpha Gradient tab and activate the alpha gradient. The default black to white alpha gradient is displayed.
Use the gradient controls to define the alpha gradient the same way that you would to define a color gradient (described Using the Gradient Controls to Define a Gradient).
The difference is that instead of setting color values using color sliders, you set alpha values for each marker using a single Alpha slider.

The rest of the gradient parameters also work the same way for alpha gradients as they do for RGBA gradients.
You can animate color/alpha (square) and interpolation (round) markers, on both RGBA and alpha gradients, to vary their colors/alpha values and positions over time.
You can also animate the positions of interpolation markers. You do this by setting keyframes for any given marker's color, alpha, or position parameters.
As you might imagine, this can quickly become time consuming, which is why the Gradient property editor provides animation tools to key gradient markers for you. The following buttons are available:
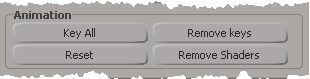
Click these buttons to quickly add keyframes to color and interpolation markers or remove animation and attached shaders from markers.
When you use the Key All and Remove Keys buttons to set or remove keys, only parameters on the current tab have keys set or removed.
For example, clicking the Key All button from the Alpha Gradient tab will only set keys for the alpha gradient's parameters. To key RGBA gradient parameters as well, click the Key All button on the RGBA Gradient tab.
From the RGBA Gradient or Alpha Gradient tab, do one of the following:
Click the Key All button to key all visible markers in the gradient. Square color/alpha markers' Color/Alpha and Pos values are keyed, and round interpolation markers' Pos values are keyed.
Select a square color/alpha marker or a round interpolation marker, and click the Color/Alpha and/or Pos parameter's animation icon.
Connecting Shaders to Gradient Markers
You can connect shaders to any of a gradient's color, alpha, or interpolation markers. Color and alpha markers can be connected from the Gradient property editor, while interpolation markers must be connected in the render tree. This allows you to, for example, create a gradient of textures.
To connect a shader to a marker's color/alpha parameter
From the RGBA Gradient or Alpha Gradient tab, click a color/alpha marker to select it.
Click the connection icon next to the Color/Alpha slider and select a shader from the menu. This procedure is described in Texturing Using a Shader's Property Editor.
Select the object to which the gradient shader is applied and open the render tree (press 7). From the Nodes menu, choose a shader to connect to any marker's color/alpha parameter. For more information about connecting nodes in the render tree, see Connecting to Collapsed Nodes, Port Groups, and Texture Layers [Materials and Shaders].