You can have Softimage automatically set a key each time you move to a new frame and modify the values of specific parameters as you interactively transform an object, navigate with the camera, or set property values in a property editor. For example, instead of clicking the keyframe icon in a property editor each time you want to add a key, you can let the autokey mode automatically record the changes that you make.
For information about autokeying camera navigation in particular, see Autokeying Camera Navigation.
As well, you can play back the animation with autokey on while you set values for parameters in a property page. The keys get set for the current time at which there is a change. This may be useful for roughing out an initial animation. You can then go back and clean up the resulting keys — remove extra keys, adjust the values of the ones you want to keep, and so on. If your scene plays back a little too quickly to do this effectively, you can slow down the frame rate — see Setting the Playback Speed Limit for more information.
Choose the keying method — for information, see Selecting Which Keying Method to Use:

If you select Key All Keyable or Key Marked Keyable, first make sure that the desired parameters are keyable (you can check this in the keying panel). By default only position and rotation parameters are keyable: if you want to autokey other parameters, you must explicitly make them keyable.
If you select Key Character Key Set, make sure that you have set up a character key set for your objects that includes all the parameters you want to key.
Move the playback cursor to a frame where you want a keyframe (where you want the animation to start).
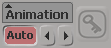
Click the Auto button in a property editor or the Animation panel.
Transform the objects as you want, set values for properties in property editors, or navigate with the camera (see Autokeying Camera Navigation).
Move the playback cursor to where you want the next keyframe and transform or change properties again. Every time you change a property value, it is keyed.
When you have finished, click the Auto button again to turn autokey mode off.
You can set a preference to always have autokeying on, which has the same effect as activating the Auto button in the Animation panel. The difference between the two is that setting the default mode is saved to your preferences file. You can also select the type of autokeying behavior you want.
In the explorer that appears, select Animation to open the Animation Preferences property editor.
Select any of the Autokey behavior options as described in Animation Preferences. The Auto button turns the appropriate color.
You can also select the Autokey Modified Parameters Only option to set keys only on modified parameters that already have fcurves instead of setting keys on all parameters.

When you're autokeying, you can set a highlight (and select its color) to remind you that autokey is active. The viewport in which you click is automatically highlighted, as well as the timeline.
Open the Animation Preferences property editor, as described above.
Select the Highlighting Color option, then click the color chip beside it to select a highlight color from the color editor.


 Preferences