Recording to disk enables you to (a) record many takes without stopping to free up memory, (b) record in real time sessions, (c) efficiently aggregate animation via mocap sources, and (d) open the recorded scene and continue working on it as opposed to rebuilding the scene from scratch.
The data you want to capture may be what you see when you look through a Director's camera (although sometimes, the Director doesn't want to shoot cameras at the time the actors are recorded—he's just collecting animation assets for later use).
For example, if you have a scene with motion capture data that shows a Character driven by motion capture markers and a skeleton and marker data driving a constrained camera (as shown in the top Viewer pane in the following figure), you can record the motion capture data, however, what you really want to record is the end result—the data recorded to the camera and the data recorded to the retargeted character. In the following figure, the bottom Viewer pane displays what you see through a Director's camera.

When you record data to disk, you need to specify:
The default naming convention is:
<Name>_<StartDate>_<StartTime>
Each take requires a unique name. You can customize tokens. You can add the track name, the timecode, the start time, the end time, the take name, and static text. The purpose of defining tokens for your recording tracks is to optimize recording file management.
You can use the following keys to define the naming convention for your clips:
You can also enter any alpha numeric string value (no special characters). If you do not enter an iteration value to keep the clip name unique, new clips overwrite current clips.
To record a Story Track to disk:
 ). If the Record to memory/disk option is set to Record to disk (
 ), proceed to the next step.
Refer to the procedure To set a recording path for a Story Track and to the procedure To set a recording path for a Story Folder.
 ).
).
The contour of the selected Track's Recording options button () changes from grey to green ( ) once the recording path is set.
The Track's Recording options dialog displays the recording path and any other changes you made to the track recording options.
The RecordClipPath field displays the Track's recording path.

 ).
).
The Transport Controls Record button turns red ( ), showing it is in a record state and the Record Mode button () in the Story window turns green (
 ).
).
 ) to start recording.
In the Story window, the Record Mode button is red ( ), indicating data is being recorded.
When you record to disk, an .fbx file template containing the Track's contents (such as bones) is created. When the recording is finished, the .fbx file template and the recorded track's animation are merged in an .fbx file.
In the motion capture example used, even though you are not hooked live to a motion capture system you are recording a live constraint. There is no actual data on the retargeting character or camera. MotionBuilder is writing this data on disk as it is being recorded.
The Story Tracks now represent the recorded data. The recorded data is inserted in the 3D record Editorial timeline. If you manipulate the objects, the animation is recorded.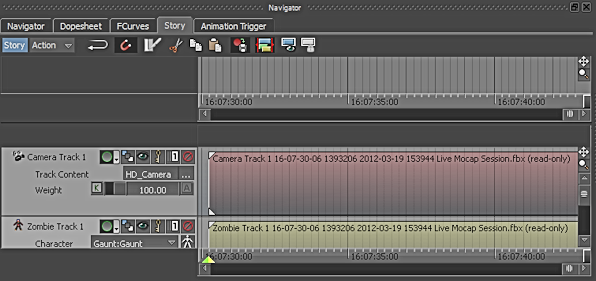
Story tracks representing the recorded data
<Name> <StartTCValue> <StartFrameValue> <StartDate> <StartTime> <TakeName>
 ).
).
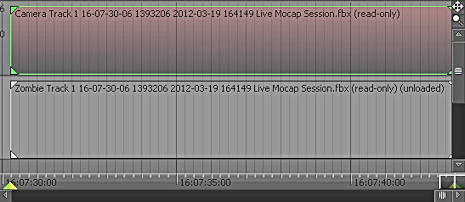
The Tracks in the Story window are now gray, meaning they are just a representation of the tracks recorded to disk. The Tracks are in fact unloaded.

To reload into the Story window the Story Track recorded to disk:

The following figure shows one Story Track was selected to be reloaded.
The recorded Story Track is loaded into the Story window, enabling you to edit the track. The Story Track is no longer gray, meaning it is loaded.
See Story preferences.
To record a Track over the current clip:
).
The new clip overwrites the current clip but not necessarily from the beginning to the end. The new clip overwrites the portion of the current clip whose end time equals the start time of the new clip. The original clip's data is still there. Only the representation of the original clip is changed.
 Except where otherwise noted, this work is licensed under a Creative Commons Attribution-NonCommercial-ShareAlike 3.0 Unported License


