


MotionBuilder enables you to view a live scene, record source data to memory, and record source data to disk. The ability to record to disk becomes crucial when dealing with very large scene files that can easily outgrow a system's memory limit. Instead of storing the data into the memory buffer, you can store the data in real time to disk and also choose to record discrete Animation track, Character track, and Camera track clip files to disk.
Although the default recording of tracks is set to memory, the advantages of recording to disk outweigh by far the recording to memory, especially if you have large scene files and deal with motion capture data.
Before you start recording, make sure the Story recording, clips, and Track preference settings are set to your needs.
To access the Story preference settings:
The Story preference settings display.
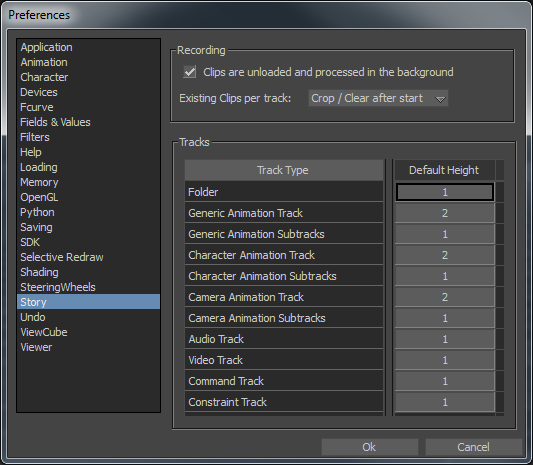
Story preferences
When you record data, you need to specify in the Story window:
You can set a track's ability to record boolean value to true. You can enter a value for the track or Story's Record to path, although the path must exist.
You can enter the clip naming convention using standard string formatting: Python : Track.ClipNameConvention = %s_%s %(Track.Name, Track.ClipNumber)
You can receive a callback after a clip is created.
Refer to the MotionBuilder SDK Help at: http://www.autodesk.com/motionbuilder-sdkdoc-2014-enu.
Before you begin recording, you need to set the recording path for your Story Folders and Tracks. The recording path needs to be defined for each track you want to record with the exception of tracks within a Folder. For example, you can set a path for a Folder in the Story window and have the Tracks within that Folder point to the same path. You can also set a path for a Folder in the Story window and another path for the Tracks within that Folder. This applies also to nested Folders and Tracks. Complete lower-level paths overwrite higher-level paths, while a hierarchy of incomplete paths is assembled to form a complete path. This enables you to specify only the subfolder in the track, while the folder contains the base path..
To set a recording path for a Story Folder:
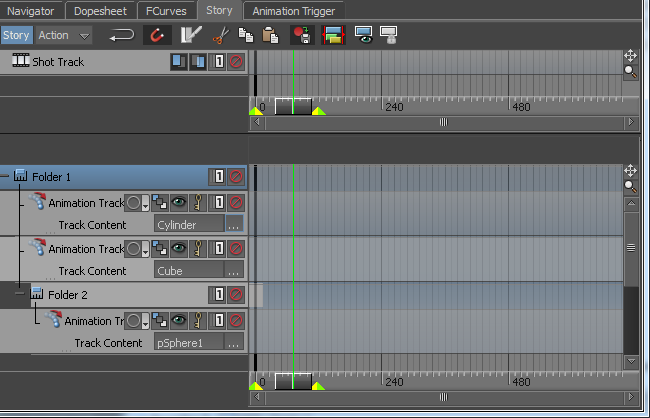
Story Folder shown selected
The Story Folders, unlike the Story Tracks, do not have a Recording options ( ) and Recording Options menu (
 ) that enable you to define the recording path.
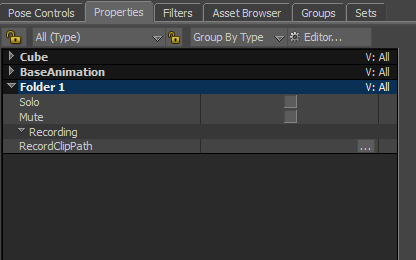
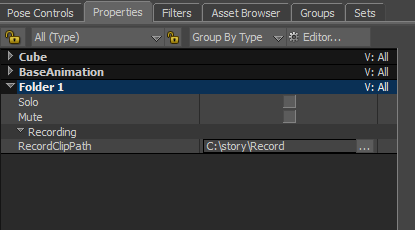
The recording paths for all Story Folders are set via the Property Resources window.
 .
.
The recording path is set and is now shown in the RecordClipPath field.
To set a recording path for a Story Track:
) or Recording Options menu () in the Story window.
), or Recording Options menu ( ) followed by the Recording options menu  .
.
The selected Track's Recording options window displays.
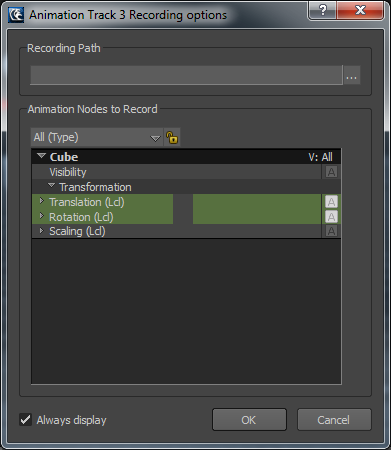
The properties shown in the Track's Recording option dialog are the properties that can be animated and therefore recorded.
The default activated ( ) recording properties shown in the preceding figure are the Translation and Rotation properties
.
Recording to disk enables you to (a) record many takes without stopping to free up memory, (b) record in real time sessions, (c) efficiently aggregate animation via mocap sources, and (d) open the recorded scene and continue working on it as opposed to rebuilding the scene from scratch.
If you have small scene files, if you want to see the results of the recording immediately, or if you do not need to concern yourself with memory, you can opt to record to memory or to disk but loaded back into memory.
 Except where otherwise noted, this work is licensed under a Creative Commons Attribution-NonCommercial-ShareAlike 3.0 Unported License