Use the Bump Map shader to create a three-dimensional texture effect on models from a normal map texture.
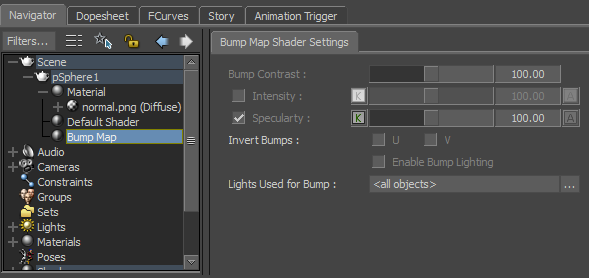
Bump Map shader settings
This lets you simulate roughness or smoothness, depending on how the texture reflects light, such as in the image below.
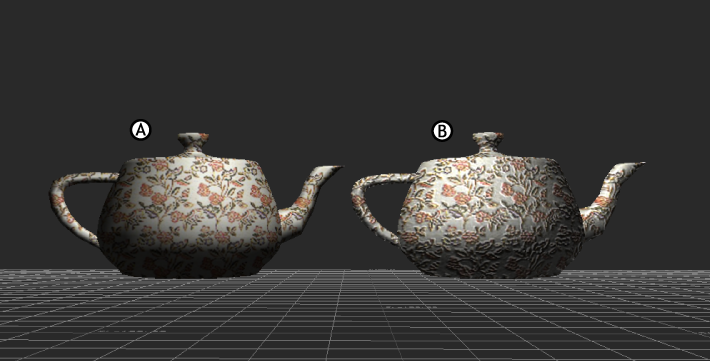
Bump Map shader A. An object with no shader. B. The same object with the Bump Map shader.
Use the Bump Map settings to create specularity effects and increase the contrast of the Bump Map texture.
The Bump Map shader works with either a black and white bump map texture or a normal map texture. These textures define the details for the shader. To associate a texture with a Bump map shader, see Creating a Bump Map.
The effect of the applied Bump Map shader texture is visible as soon as any lights are added to the scene. Otherwise, there is no effect in the Viewer window. When you translate the light, the bump mapping effect updates in real time.
Use the Bump Contrast slider, or enter a value in the Bump Contrast field to adjust the level of contrast created by the Bump Map. Increasing the contrast creates a higher texture relief.
Activate the Intensity option to apply the Bump Map’s color concentration as a map for the shader. Use the Intensity slider to manipulate the dark areas of the texture created by the Bump Map, which creates a high relief effect. The default intensity is 100%. You can animate this setting.
Activate the Specularity option to apply the Bump Map’s light reflection which define the Bump Map’s light peaks.
Use the Specularity slider to manipulate how the Bump Map reflects light peaks, to create matte or shiny effect. You can animate this setting.
Select either the U or V Invert Bumps option to choose which UV coordinate creates the Bump Map texture.
Choosing either U or V inverts the normals of the Bump Map in order to create the opposite texture effect. For example, raised textures appear lower and lower textures appear raised.
The U and V direction can be important if, for example, you were using a brick wall texture and you did not want the mortar to stand out beyond the brick surface.

Invert Bumps A. U is activated. B. V is activated. C. Both U and V activated.
Activating both the U and V settings flattens the texture’s appearance.
Activate the Enable Bump Lighting option to use a more accurate per-pixel lighting effect on the bump texture, instead of vertex-based lighting. Using Enable Bump Lighting creates a dramatic contrast on the object.
The Enable Bump Lighting option uses only one light to create its effect.
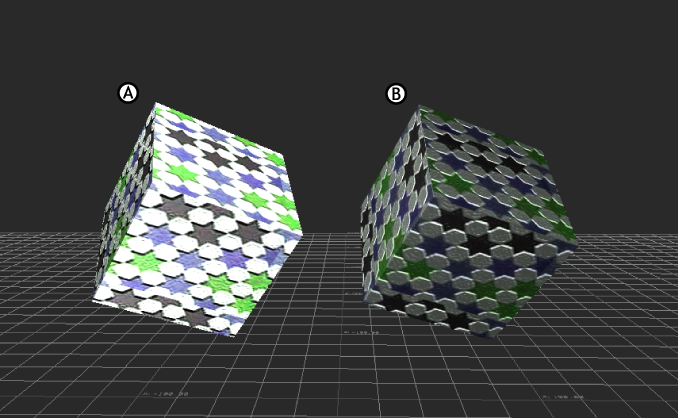
Enable Bump Lighting option A. Disabled B. Activated
The Lights Used for Bump field lets you select the lights that produce Bump Map textures. Alt-drag any lights in your scene into the Lights Used for Bump field. You can also click the Lights Used for Bump button next to the field to display the asset list, where you can choose from the lights in your scene.
 Except where otherwise noted, this work is licensed under a Creative Commons Attribution-NonCommercial-ShareAlike 3.0 Unported License


