In the following procedure, you adjust how the character’s feet touch the floor using the floor contact markers.
The floor contact markers are the blue and green markers that appear around the character’s hands and feet when you characterize your character model. These markers create an invisible grid that determines where the character’s feet come in contact with the floor.
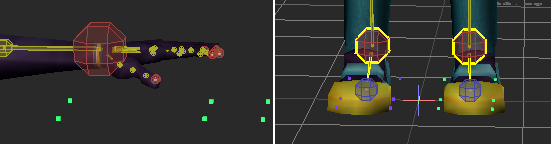
Green and blue floor contact markers displayed around Mia’s hands and feet
When no floor object is defined in the Mapping list of the Character Definition pane, the MotionBuilder grid is used as the floor. In this tutorial, the floor is not defined.
To adjust the foot floor contact markers:
See Create a Control rig.
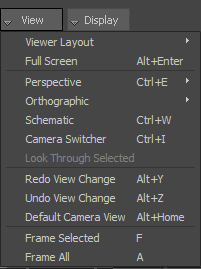
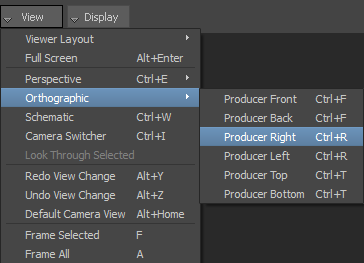
View menu options
The View menu contains options that define how you view your scene. You can choose the number of camera views, switch camera views, add cameras, and access other options related to viewing the scene.
 Producer Right (or click the Viewer window and press Ctrl-R).
 or Ctrl-drag) on Mia’s left foot and pan (
 or Shift-drag) as shown in the following figure.
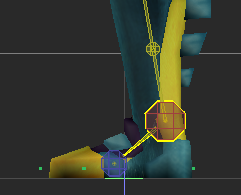
Moving one foot marker adjusts the other markers accordingly so that as you adjust the green markers on Mia’s left foot, the blue markers on the right foot are also adjusted.
 ) (or click the Viewer window and press T) to activate the Translate mode.
Producer Front (or click the Viewer window and press Ctrl-F).
or Ctrl-drag) on Mia’s feet and pan ( or Shift-drag) as shown in the following figure.
) (or click the Viewer window and press T) to activate the Translate mode.
Producer Front (or click the Viewer window and press Ctrl-F).
or Ctrl-drag) on Mia’s feet and pan ( or Shift-drag) as shown in the following figure.

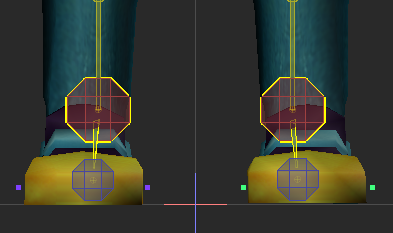
Markers translated at the edges of the feet


Character Settings pane A. Floor Contacts group of properties
 Except where otherwise noted, this work is licensed under a Creative Commons Attribution-NonCommercial-ShareAlike 3.0 Unported License


