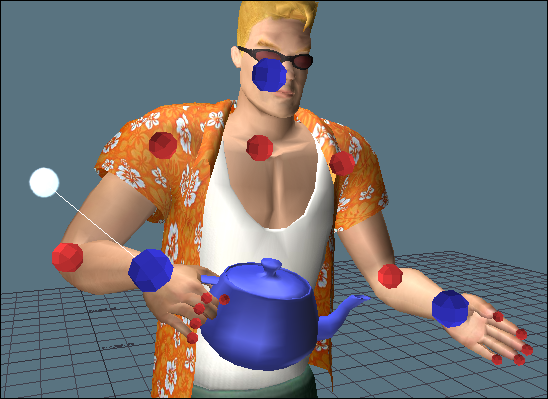
Handles are 3D controls that give you quick access to the manipulation of objects in a scene. There are two ways you can use a Handle. The first use is to let you select objects, and the second is to let you access specific manipulation modes for the objects.
For example, you can use the handle to select a group of objects that do not have a hierarchy relationship, for example, a character’s hand model and a teapot model.

Handle attached to the character’s wrist.
This way, a Handle lets you select and manipulate a group of unrelated objects.
The second use of a Handle is that once you add a Handle to an object, it lets you create Follow objects which let you create a Parent/Child relationship that can be used as an instant transformation pivot.
With both of these uses, Handles let you quickly establish links between objects, and then use the Follow object as a pivot. See Connecting a Handle to an object.
In the image above, a Handle is attached to the model’s wrist effector and a teapot model. You can then use the Handle to move both objects together.
Handles are Viewer window-based, which means the handle is applied directly to the object you want to affect in the Viewer window, and are created so you can easily select or disable them.
The Handle protrudes from the object, and always faces the camera. You can change the size, color, and position of the Handle, or attach an image to it to make it more easy to identify and select in scenes with many objects.
You can only see Handles when you are in X-Ray viewing mode in the Viewer window.
 Except where otherwise noted, this work is licensed under a Creative Commons Attribution-NonCommercial-ShareAlike 3.0 Unported License