The rotation of an object is its orientation in the scene. When you rotate an object, you are changing the properties that define its degree of rotation around each of the three axes.
To rotate objects, you must be in Rotation mode.
Rotation mode lets you change the orientation of selected objects in the Viewer window. To activate Rotation mode, select the appropriate button from the Transformation buttons, or click in the Viewer window and press R.
Activating Rotation mode makes Rotation rings appear on selected objects, so you can change the orientation of objects by dragging the rings.
For example, the following figure shows a sofa in the Viewer window with Rotation rings representing each axis.

Selected object in the Viewer window displays with Rotation rings for rotating on the X, Y, or Z axis
Three of the Rotation rings are color-coded to their specific axis. The red ring rotates the object along the X-axis, the blue ring rotates along the Z-axis, and the green ring rotates along the Y-axis. The brown ring rotates along a perpendicular angle from wherever the camera projects its angle.
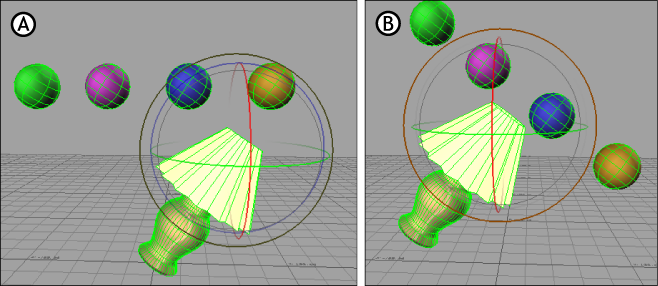
Rotate Around mode lets you take a group of selected objects, designate one object as the ‘manipulation point’, and rotate all other objects around that manipulation point.
In this mode, Rotation rings appear only on the manipulation point object, and as you rotate, the other objects in the selection rotate around it.

Rotation modes A. Rotate B. Rotate Around
This manipulation point creates a new center of rotation for the selected objects, replacing the local or global origin as the center of rotation.
This manipulation mode can be very powerful when used with effector pivots, for example to rotate a character’s entire foot around the toes.
You can also change the center of rotation for each individual object using the Rotation Pivot properties.
When you keyframe objects using the Rotate Around mode, remember that as the manipulation point rotates, the other selected objects rotate and translate.