The Definition tab provides a visual interface for mapping the structure of your existing skeleton. This process results in a HumanIK skeleton definition that is required to create a Control rig and retarget animation to and from this character's skeleton.
This tab has the following main areas:
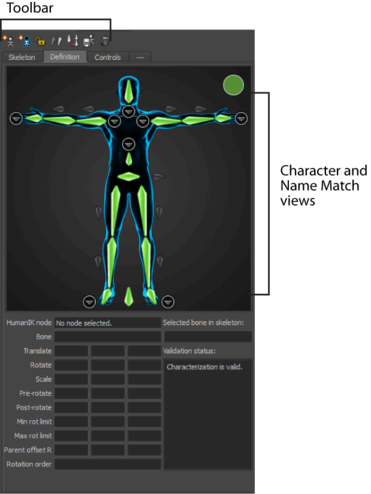
| To... | Do this |
|---|---|
| Create a new skeleton definition | Click  . .
|
| Map a bone | Select one of the following methods:
For more information on which bones map to which nodes, see HumanIK character structure. |
| Change a mapped bone |
|
| Clear a mapped bone |
|
| Clear all mapped bones in the current view (full body, hands, feet, or spine view) |
|
| Clear all mapped bones for the current character |
|
| To map mirror pairs of bones | See Activate and configure mirror matching. |
 Except where otherwise noted, this work is licensed under a Creative Commons Attribution-NonCommercial-ShareAlike 3.0 Unported License


 -click the cell and select