You can use the Character and Name Match views to map the bones in your character to their corresponding HumanIK nodes, and to view the information about the current mappings. Both views offer the same controls for mapping nodes, but display the nodes using different layouts.
Toggle between the views by  -clicking anywhere in a view and selecting either Character View or Name Match View from the menu that appears.
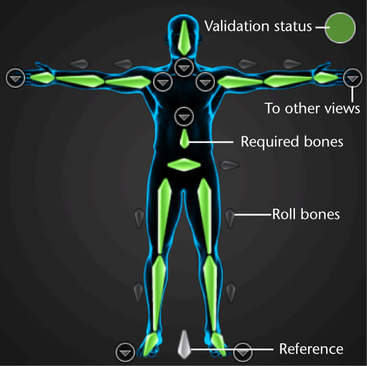
The main Character view lays out the HumanIK nodes in a schematic arrangement that indicates the placement of each bone in a biped. It provides a visual tool for mapping out the structure of your character, and gives you feedback on the status of the skeleton definition. See also the HumanIK character structure topic in the Help.

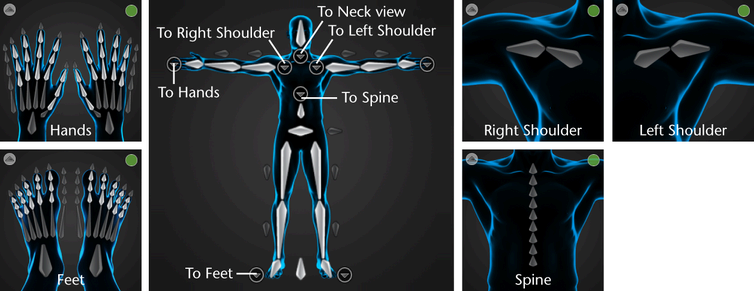
You can switch to detailed views of the hands, feet, spine, shoulders, and neck in order to map additional bones for those
body parts. Click the circular arrow buttons  to switch views to a particular body part, or
  to return to the full Character view.

A validation status indicator displays at the top right of the Character view.
For information on troubleshooting validation errors and on which bones map to each node of the Character view, see the HumanIK character structure topic in the Help.
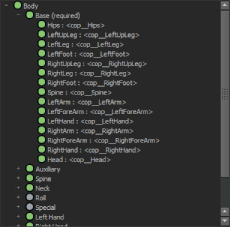
The Name Match view displays all bones in a list, grouped according to their related body part or IK effector. Use this view to get an overview of your skeleton definition at a glance, and to view the names of the bones assigned to multiple different nodes. You can map bones to the Name Match view using the same methods as in the Character view.

 Except where otherwise noted, this work is licensed under a Creative Commons Attribution-NonCommercial-ShareAlike 3.0 Unported License