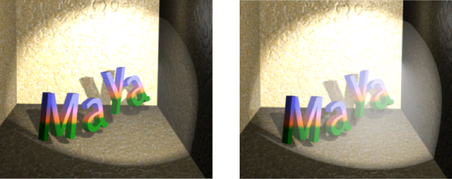
The Light Effects attributes control the appearance of illuminated (light) fog and optical light effects. (For information on optical effects, see Glows, halos, and lens flares and Optical FX Attributes.)
Avoid instanced lights when you create light fog. Copy the lights instead of instancing. For light fog, make sure that light fog is duplicated independently of the light because when you duplicate a light, its light fog is not duplicated with it.
Light Fog attributes are only available for point, spot and volume lights.
When you click the map button beside Light Fog, Maya creates a light fog node and connects it to the light. A fog icon, basically an extension to the light icon, appears in the views. After you have connected Light Fog to a light, click the button at the end of the field to access the light fog attributes.
The following examples show a Light Fog applied to a Spot light using the default settings of 1.0, and the Fog Spread and Fog Intensity setting changed to 2.0.

By default light fog is evaluated only at the boundary entry point. When the radius of the light fog is greater than the size of the volume fog, the amount of light illuminating the fog is the light intensity at the edge of the volume light (zero by default, but can be otherwise if the color ramp is edited). If you turn on Volume Samples Override on the Shape node (for example, sphereShapeNode) and increase the number of samples, the illumination of the volume light is better represented. Turning on Depth Jitter for the samples avoids stepping in these cases.
Determines how the fog brightness varies across the spot light or point light beam. A high Fog Spread value produces fog with uniform brightness shooting from the cone of a spot light. A low Fog Spread value produces fog which is brighter at the center of the spot light beam and foggier at the end.
The slider range for a spot light is 0 to 5. The default value is 1.
The Light Glow attribute is available for point, spot, area and Volume lights only.
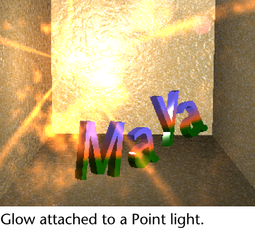
When you click the map button beside Light Glow, Maya creates an optical FX node and connects it to the light (a glow, halo, or lens flare). An optical FX icon attached to the light icon appears in the views. See Optical FX Attributes for details about setting these attributes.

Creates an intensity curve used to control the intensity decay for a spot light. This attribute is only available for spot lights. See also Create custom spot light intensity or color decay and Edit custom intensity and color decay.
Creates a color curve used to control how a spot light’s color changes with distance.
See also Create custom spot light intensity or color decay and Edit custom intensity and color decay.
The Barn Doors attributes are located in the Light Effects section of a spot light’s Attribute Editor and are used to square off the circular shape of a cone.
You can adjust barn door interactively. See Apply barn doors (shutters) to a beam of light.
The Decay Regions attributes let you separate a spot light’s beam into regions which are illuminated and regions which are not illuminated.
Click Use Decay Regions to turn it on and to set the Region 1, 2 and 3 Start and End distances for the spot light. Use Decay Regions is off by default.
You can adjust decay interactively. See Interactively set decay regions.