


The Sculpt Geometry Tool lets you manually sculpt NURBS, polygons, or subdivision surfaces quickly with the stroke of a brush. You simply paint the surface mesh using the Sculpt Geometry Tool to push or pull CVs (NURBS) or vertices (polygons and subdivision surfaces) to achieve the shape you want. The effect is similar to sculpting clay.
You can perform five different operations using the Sculpt Geometry Tool: push, pull, smooth, relax and erase. These operations move the position of the surface’s components to sculpt the surface shape depending on the surface type.
For polygons and subdivision surfaces, the vertex positions are changed when sculpting with the Sculpt Geometry Tool. For NURBS surfaces, control vertices have their positions changed as a result of sculpting.
When using the Sculpt Geometry Tool, either the vertices or control vertices will be affected depending on the surface type you’re working with (NURBS, polygons, subdivision surfaces). We’ve used the terms interchangeably to indicate the same thing.
You can push or pull a mesh in a configurable direction in the shape of the tool.
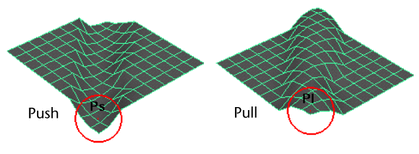
Sculpting simply pushes or pulls the surface’s vertices from their initial positions on the reference surface. The Maximum Displacement options controls how far vertices can get from the reference surface.
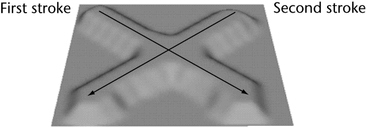
In this example, the two strokes both raise the surface to the maximum displacement distance, but not beyond it.
If you update the reference surface, the current state becomes the reference, and further sculpting will displace vertices from the new base point.
In this example, after the first stroke, the user updates the reference surface. The second stroke then applies the maximum displacement to it, going over the first stroke, which is now “baked onto” the reference surface.
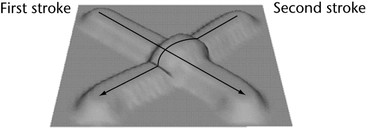
You can update the reference surface manually, or set the Update on Each Stroke option to bake each stroke onto the reference as you finish the stroke.
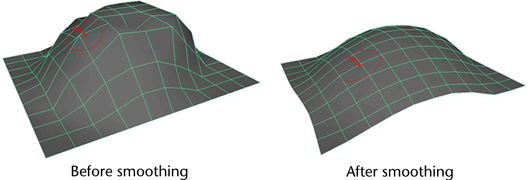
You can paint over bumps to smooth them out. This smoothing operation works by averaging the position of all features within the brush radius with all other nearby features.
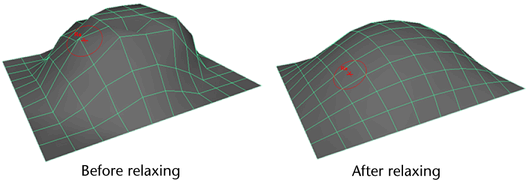
You can paint over bumps to relax the most out of place surface features. Unlike smoothing, Relax works by only averaging the largest surface anomalies so that the overall shape is maintained.
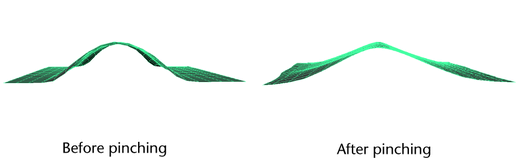
You can pull vertices inwards towards the center of the tool cursor. Pinching is useful for making an existing creases more sharply defined.
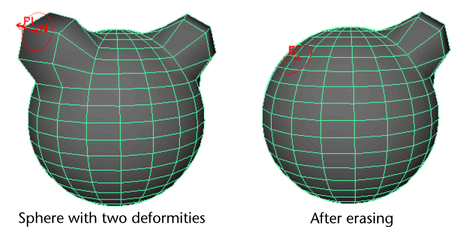
You can save the state of a surface and then later erase changes to the surface back to the saved state.
You can also turn on an option to save erase state after every stroke, which allows you to erase only the last stroke you made.
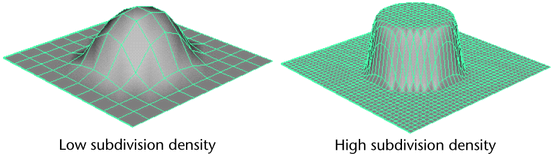
In general, it’s advised that you minimize the number of patches/polygons in your surfaces whenever possible. However, when using the Sculpt Geometry Tool, the more polygons a surface has, the more precisely it can deform to the shape of the sculpting brush.
Sculpting and construction history
If you don’t need to keep the history of the surface, consider deleting the history (select the surface and choose Edit > Delete by Type > History).
The Sculpt Geometry Tool does not create construction history of its own.