Prepare to use the Smoke effect
Before you use the Smoke effect, be aware of these issues:
- Use the Smoke effect on at most one object at a time.
To apply Smoke to a group of NURBS surfaces, first convert each surface to polygons and combine the surfaces. From the menu set, select Modify > Convert > NURBS to Polygons, then choose Mesh > Combine.
To apply Smoke to a group of polygonal surfaces, simply combine the surfaces with Mesh > Combine.
- If you emit from a NURBS or polygonal object, the size and shape of the object affects the quality of the smoke. You’ll need
to use an object large enough to generate an adequate smoke area. If you emit smoke from a curve, avoid using a curve with
abrupt changes in direction.
- It’s often useful to use the Smoke effect on the same geometry more than once. By setting options differently with each usage,
you can create a complex look not possible with a single usage. For instance, by using two emitters with different emission
rates and different sprite sequences, you can create a combination of burning smoke and steaming smoke.
- If you want to animate the movement of the smoke around the workspace, consider using the Smoke effect on a particle object.
You can work with per particle expressions on particle objects, so you have more flexibility in altering the smoke’s motion.
- You’ll often need to emit smoke from part of an object rather than from its entire geometry. In some instances, the part of
the object where you want the smoke won’t have geometry present. A common technique in such cases is to emit from an invisible
geometric object in that area.
For example, suppose you want to blow smoke out of the end of a hollow exhaust pipe, but the pipe has no object where you
can conveniently emit the smoke. You can create a disk of the correct size and shape, position it inside the pipe, and apply
an emitter to the disk. Make the disk invisible by selecting .
- If you create your own smoke images, for instance, with paint software such as VizPaint or StudioPaint, remember to save the
alpha channel (transparency data) when you create the images.
To use the Smoke effect
- To use smoke images supplied with Maya, copy the images Smoke.0 through Smoke.50 from the following directory on the Maya DVD to the /sourceimages directory of your current project:
To use your own images, put them in the /sourceimages directory of your current project.
- Do one of the following:
- Select the object or CVs, edit points, vertices, or particles that you want to emit smoke.
- To create a positional emitter, deselect all objects.
- Select Effects > Create Smoke >
 .
.
- Set attributes in the window (see Edit attributes of the Smoke effect) and click Create.
The Smoke effect creates an emitter, emitted particle object, expressions, turbulence field, and other fields needed to make
the smoke.
- Play the animation.
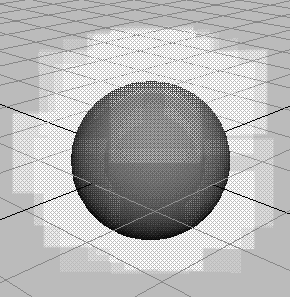
Emitted particles appear as squares in the workspace because the particles are displayed as the Sprite render type.
Here’s an example with Shading > Smooth Shade All turned on.
- Hardware render the scene to see the smoke.
See Rendering for details.
Edit attributes of the Smoke effect
The following pages explain attributes for tuning the Smoke effect. The Smoke effect creates several custom attributes in
the emitted particle object it creates. The custom attributes control a combination of field and emitter attributes to lessen
the settings you would otherwise need to make to tune the smoke.
Attributes in the window
The following attributes appear in the window when you select Effects > Create Smoke >  . Changes you make to the options window affect smoke you create after you make the changes.
You can edit most of these attributes after you use the Smoke effect by selecting the emitted particle object and opening
the section of the .
Additional tips
You can do the following additional steps to tune the smoke’s appearance:
- Change the size and orientation of the smoke by altering the and values of the emitted particle object.
- Key a change in the value of to make the particles appear to move faster or slower.
- Edit attributes of the sprites. See Sprites.
- Edit any expressions created by the Smoke effect. To learn which expressions are created by the effect, apply Smoke to an
object in an otherwise empty scene. Use the to see the additions.
- Turn off the field by disconnecting it using the Editor.
- Animate the emitter to move the smoke in your scene.
 .
.

 . Changes you make to the options window affect smoke you create after you make the changes.