


Blending the Front and
Back Images of a Layer
There are two different methods you can use to blend the front and back images of a layer: Basic Blend and Curves Blend.
Basic Blend is appropriate for layers that do not have a matte component. It allows you to add the front and back images, and adjust the colour and opacity of the result image. In effect, since you are using the entire front image, the back image does not influence the result.
Curves Blend is suitable for layers that have a matte component. It allows you to use front and back matte curves to adjust the luminance of the front and back mattes, and also perform logical operations on the front and back images.
The two methods are mutually exclusive—you can set the blending in both the Basic Blend and Curves Blend menus, but it is the menu that is displayed that takes effect.
Use Basic Blend to adjust the opacity and colour of an MBlend layer that has no matte component. This results in adding a second defined layer to the first one. You can control the opacity of the second layer.
The MBlend menu appears and the name of the layer you selected appears in the Layer Name field.


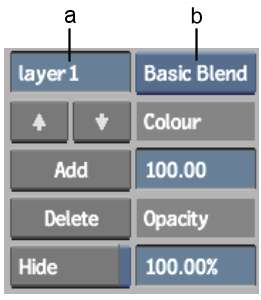
(a) Layer Name field (b) Blend box
By default, if the layer does not have a matte component (that is, there are no nodes in the Matte pipe), the Basic Blend option is selected in the Blend box, and the Basic Blend controls are displayed at the right of the menu.
Use Curves Blend to adjust the blending of the front and back images of a CBlend or MBlend node layer that has a matte component.
The CBlend or MBlend menu appears and the name of the layer you selected appears in the Layer Name field.

(a) Layer Name field (b) Blend box (c) Logic Ops box
For MBlend nodes, if the layer has a matte component (that is, there are nodes in the Matte pipe), the Curves Blend option is selected in the Blend box and the Matte Curves graph is displayed at the right of the menu.