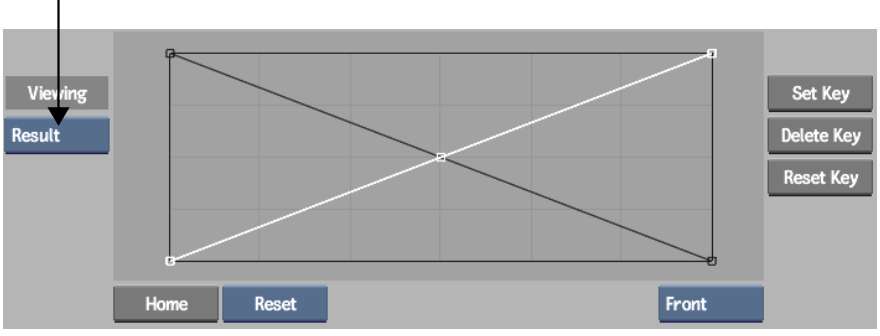
The Result node is the last node in the pipeline—you cannot connect other nodes to its Output tab. Use the Result node to:
When you click the Result node, the Matte Curves menu appears. Use this menu to adjust the luminance curves and select processing options.
Adjusting the Front and Matte Luminance Curves
When you create a matte for the front clip, the Modular Keyer automatically creates a matte for the back clip to specify which part of the back clip is used for the composite. By default, the back matte is the inverse of the front matte.
You can adjust the luminance of the front matte and back matte separately in the Matte Curves menu. For example, increase the luminance of the back matte so that more of the back clip shows through at the edges of the key. This creates a better blend at the edges.
To learn how to set the matte curves to create an additive key, see Creating an Additive Key for CG Images.
The following calculation is applied to each pixel of the image to create the composite. The calculation is applied in three passes, one each for the R, G, and B values of the front and back images, and the pixel is given the resulting R, G, and B values.
Result = F * FrontLUT + B * BackLUT
To adjust the luminance curves:
The Matte Curves menu appears.


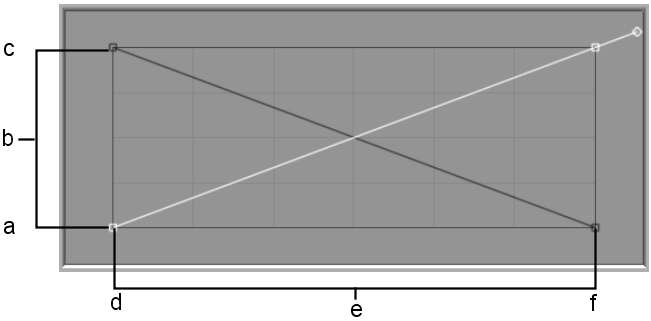
(a) Result box (b) Front matte curve (c) Matte box (d) View box (e) Back matte curve
| Select: | To view: |
|---|---|
| Result | The composite clip. |
| Matte | The front matte. You cannot see changes made to the back matte when this view is selected. |
| Bmatte | The back matte. You cannot see changes made to the front matte when this view is selected. |
| Comp | The composite with a coloured background. The default colour is white. To select a different colour, click the colour swatch below the Edit Mode box. The colour picker appears. See Colour Picker. |
(a) 255 (White) (b) Output (remapping of luminance values) (c) 0 (Black) (d) 0 (Black) (e) Input (current luminance values) (f) 255 (White)
In Move edit mode, click a point to display its tangent handle and drag the handle to adjust the curve. Use other modes in the Edit Mode box (Add, Delete, or Break, for example) to further adjust the curve, adding or deleting points, or breaking tangent handles as needed. For more information on using edit modes, see Animation.
Creating an Additive Key for CG Images
Computer graphics clips with a pre-multiplied alpha channel in which the area to be keyed out is black, should only use the back matte. This is because the front curve calculation has already been applied to the front image.
To use only the back matte, re-map the entire front matte curve to white (255). This causes the curves calculation to ignore the front matte and use the entire front image. The curves calculation maps all the black areas of the front clip as transparent.
To create an additive key, adjust the front matte curve using the Matte Curves menu in the Result node.
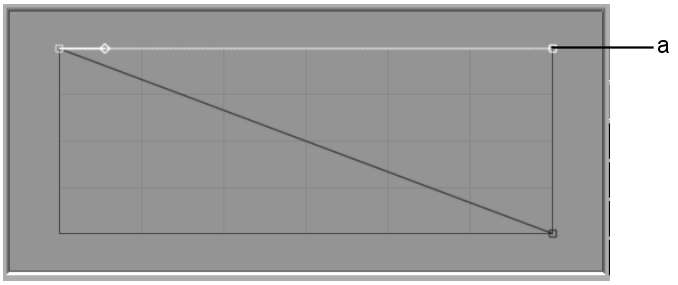
(a) Front matte curve
All pixels in the front matte are mapped to white (255 in 8-bit mode, 4095 in 12-bit mode). The black pixels on the front clip are calculated as transparent.
You can process the composite clip, the front matte, the back matte, or the composite using a coloured background instead of the back clip.
When using the Modular Keyer node in Batch, the Result node only outputs a full composite when all of the input is the same resolution. Otherwise, the Result node will discard information for the back clip and process a composite with a coloured background instead. See Modular Keyer Node.
| Select: | To process: |
|---|---|
| Result | The composite clip. |
| Matte | The front matte. |
| Bmatte | The back matte. |
| Comp | The composite with a colour background. The default colour is white. To select a different colour, click the colour swatch to the left of the Result box. The colour picker appears. See Colour Picker. |


