Chapter 17, Animation
| Accessing the Channel Editor | Editing Keyframes | ||
Chapter 17, Animation |
|||
To create an animation, you select channels with animatable parameters, and then you add keyframes at points in time where the parameters change. The following procedure outlines the basic steps required to create an animation.
In the Channel Hierarchy, select the channel or parent folder you want to animate. See Selecting Channels.
Move the cursor to the frame you wish to mark as a keyframe and then add a keyframe. See Adding Keyframes.
Set the value by dragging the keyframe or by using the individual controls in the appropriate tool.
Set the interpolation and extrapolation (if needed) for the keyframe. See Setting Interpolation and Setting Extrapolation.
Move to the next frame and add another keyframe.
Set the keyframe value at the new position.
Make any additional modifications to the animation curve.
Move to the start of the shot and play the animation.
If necessary, use the Track Editor to adjust the animation timing. See The Track Editor.

To create an animation, you select channels with animatable parameters, and then you add keyframes at points in time for which the parameters change. You select animation channels in the Channel Hierarchy. Once you select a channel, its curve appears in the Animation Curves window.
In the Main menu, click Animation, and then click Curves.
In the Channel Hierarchy, expand a folder and click a channel to select it. To select all channels in the folder, select the folder.
Note: You can also select a channel in the Animation Curves window by clicking the inactive curve. You can see inactive curves in the Animation Curves window only when the Hide Inactive Curves button in the Animation Setup menu is disabled.

 "Show full-size image")
|
|
|
Selected channels are highlighted.
Click a selected channel to deselect it.
Note: Deselecting a channel does not change the selection state of that channel's keyframes.
You can add keyframes at any point in your animation curves. There are three methods of adding keyframes:
Add a single keyframe to the selected channel(s) at the current position.
Interactively add keyframes to any point on the selected curves. There must be at least one keyframe on a channel before you can interactively add keyframes.
Set keyframes automatically when you adjust a parameter in any menu. For example, set up an animation directly in the Colour menu and then fine-tune the animation curve in the Animation Curves window.
In the Channel Hierarchy, select the channel to which you want to add a keyframe.
Position the cursor at the frame you wish to mark as a keyframe.
Click Add.
 "Show full-size image")
When you add a keyframe to a channel, an orange indicator appears to the left of the channel in the Channel Hierarchy.
Set the channel value as needed by dragging the keyframe.
Once you add keyframes to a shot, markers appears in the Shot timebar indicating the location of the keyframes.
 "Show full-size image")
You must explicitly add one keyframe using the Add button or Autokey before you can add keyframes interactively in Add mode.
Display the Animation controls.

 "Show full-size image")
|
|
Enable Return.
Note: If Return mode is enabled, you are returned to Edit mode after adding one keyframe. For information on working in Edit mode, see Editing Keyframes.
In the Channel Hierarchy, select the channel to which you want to interactively add keyframes.
In the Animation controls, enable Add.
Move the mouse cursor over the animation curve.
Keyframes appear as you approach each frame.
Click the animation curve to add a keyframe at that frame.
Note: The new keyframe is automatically set to Bezier interpolation.
Once you add keyframes to a shot, markers appears in the Shot timebar indicating the location of the keyframes.
 "Show full-size image")
Enable AutoK.

 "Show full-size image")
Note: Autokey is available from all menus in Lustre.
Access the tool you want to use to create the animation. For example, in the Main menu, click Colour, and then click Grading.
Move the Shot timebar to the frame where you want to add a keyframe.
Adjust the colour parameters.
A keyframe is added automatically to the channels you modified.
Move to another frame and adjust the colour parameters and set another keyframe.
Keep adjusting colour as needed.
Once you have added keyframes to a shot, markers appears in the Shot timebar indicating the location of the keyframes.

 "Show full-size image")
Interpolation defines the shape of an animation curve between keyframes. You can choose from the following interpolation settings depending on how you want the channel values to change over time.
Linear--Joins keyframes with a straight line.
 "Show full-size image")
Constant--Produces a square curve. The value of one keyframe is held at a constant value until the next keyframe. This setting can produce abrupt changes between keyframes.

 "Show full-size image")
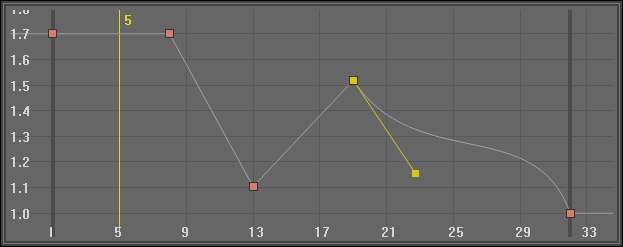
Bezier--Produces a smooth curve with a smooth transition between keyframes. Each keyframe on the curve has tangent handles. You can change the shape of the animation curve by dragging the tangent handles.
 "Show full-size image")
Note: You can create animation curves with mixed interpolation types.
Select the keyframe for which you want to set the interpolation.
In the Animation controls, click the appropriate interpolation type button.
 "Show full-size image")
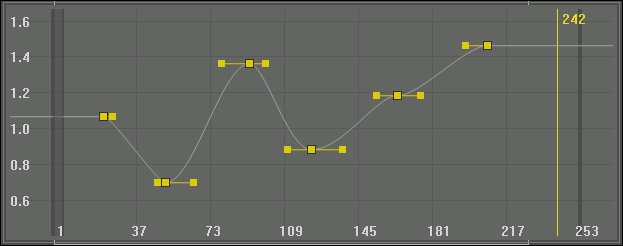
Create an animation with at least four keyframes. Do not worry about the interpolation setting at this point.
Click Animation, and then click Curves to display the Channel Editor.
Make sure you are in Edit mode and then select the first keyframe. See Editing Keyframes.
Click Constant to set the interpolation for the first keyframe to Constant.
Select the second keyframe.
Click Linear.
Select the third keyframe, and then click Bezier.
Your animation curve may resemble the following.
 "Show full-size image")
Extrapolation defines the shape of the animation curve outside the keyframes. You can set up a cycle in which channel values change repeatedly in the same manner over time. You can set the extrapolation before the first keyframe separately from the extrapolation after the last keyframe.
 "Show full-size image")
You can specify how keyframes are extrapolated using the following settings.
Constant--Creates an extrapolated animation curve that stays at the same value as the first or last keyframe.

 "Show full-size image")
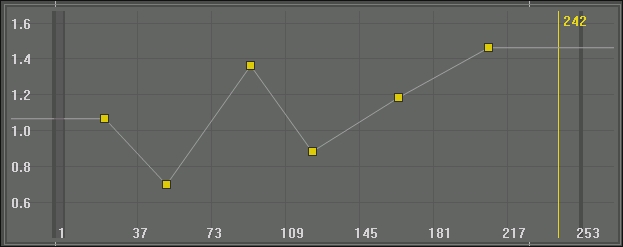
Linear--Creates an animation curve that changes in a linear fashion before the first or after the last keyframe.
 "Show full-size image")
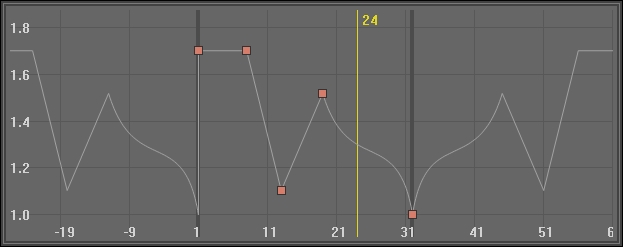
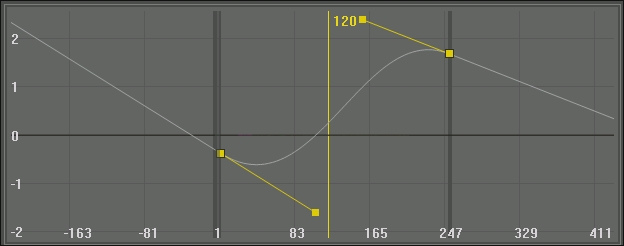
Repeat--Creates a mirror image of the animation curve before the first or after the last keyframe.

 "Show full-size image")
Cycle--Creates a pattern of repeating keyframes before the first of after the last keyframe.
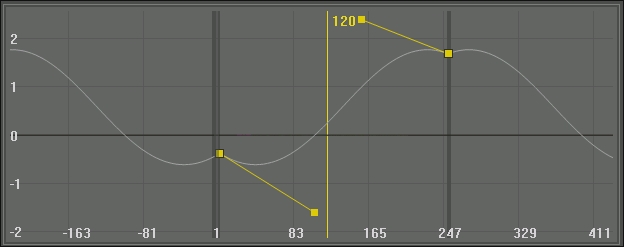
 "Show full-size image")
Select the keyframe for which you want to set the extrapolation.
Click Animation, and then click Setup.
The Animation Setup menu appears.
 "Show full-size image")
|
|
In the PreType controls, click one extrapolation type button to set the extrapolation before the first keyframe.
In the PostType controls, click one extrapolation type button to set the extrapolation after the last keyframe.
