Chapter 17, Animation
| Animating with Keyframes | Copying and Pasting Keyframes | ||
Chapter 17, Animation |
|||
 Synchronizing Keyframe Functionality
As you create animations, you may need to edit keyframe values, modify animation curves, and manipulate keyframes. Make sure that you are in Edit mode when selecting and editing keyframes.
Note: You cannot edit keyframes in Add mode or Remove mode.
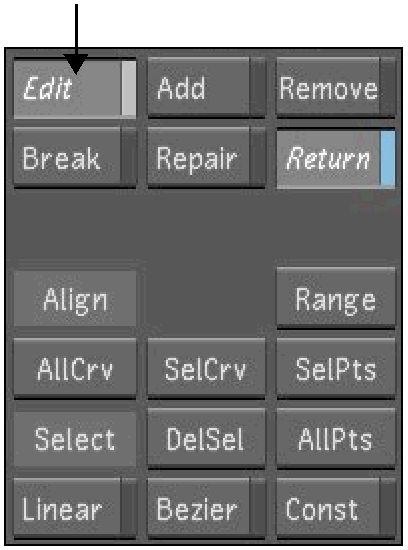
Click Animation, and then click Curves.
In the Animation controls, enable Edit.
 "Show full-size image")

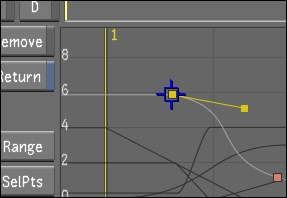
You need to select keyframes in order to edit them. You can select one keyframe at a time, marquee select a group of keyframes, or select all keyframes in a given channel.
Selected keyframes are yellow. Unselected keyframes are red.
In the Animation > Curves menu, position the cursor over the keyframe and click.
 "Show full-size image")
The keyframe is selected.
In the Animation > Curves menu, click a keyframe to select it and then hold down Ctrl and click additional keyframes to add them to the selection.
Note: To deselect a selected keyframe, hold down Ctrl and click the keyframe. This is useful when you make a marquee selection but you would like not to include one or more keyframes in the selection.
 "Show full-size image")
If you release the Ctrl key and then click a keyframe, this keyframe is selected and the previous selection is cleared.
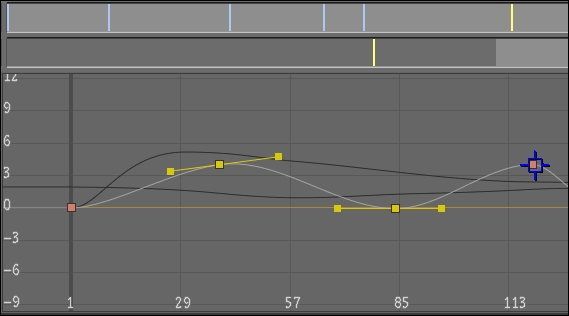
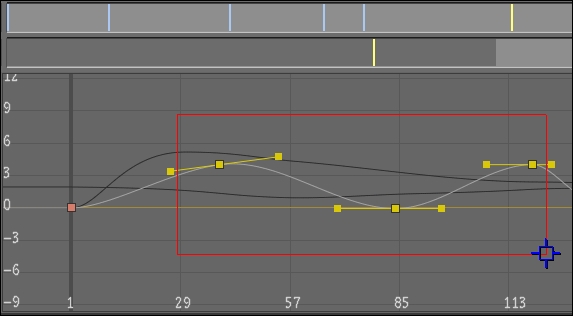
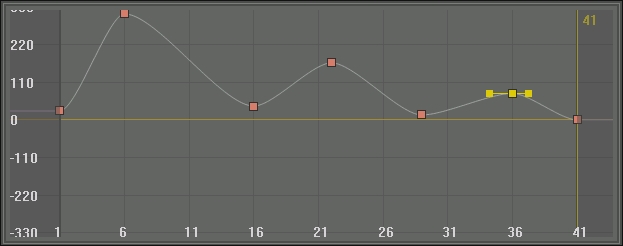
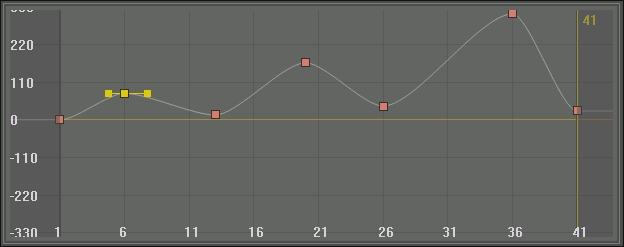
In the Animation > Curves menu, drag to draw a marquee selection rectangle around the keyframes you want to select.
 "Show full-size image")
Keyframes inside the marquee selection are selected.
To zoom in on the selected area, hold down the Alt key when drawing the marquee selection.
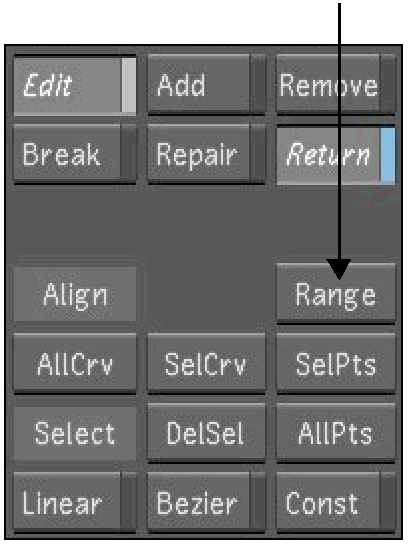
In the Animation > Curves menu, click AllPts in the Animation Controls.
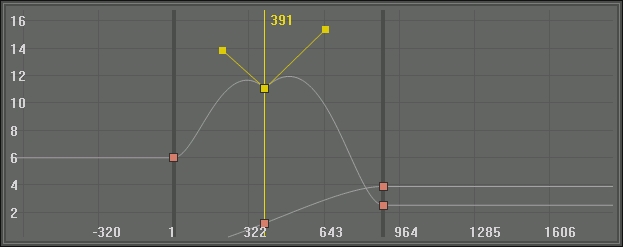
The rate at which your animation changes depends on the slope of the animation curve. A steep slope results in a more rapidly changing animation. A gradual slope represents a slower change in channel values over time. By changing the shape of the animation curve, you can modify the speed at which the animation occurs between keyframes. Although you can use Constant or Linear interpolation to create animations, with Bezier interpolation you have much more control over the shape of the animation curve, and therefore, the speed of the animation.
You can hide curves that are not selected. This can make it easier to manage your keyframes and modify animations.
In the Channel Hierarchy, select the animated channel you want to modify.
Click Range to view the entire curve between the first and last keyframes.
 "Show full-size image")
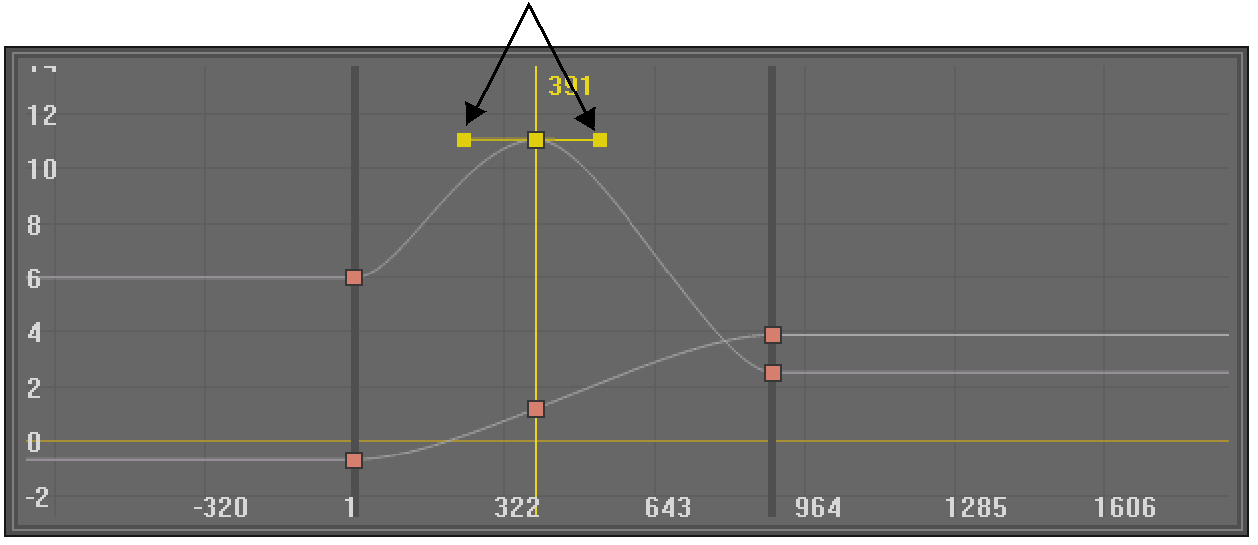
Select the first keyframe and set the interpolation to Bezier.
A pair of Bezier tangent handles appear for the selected keyframe.
 "Show full-size image")
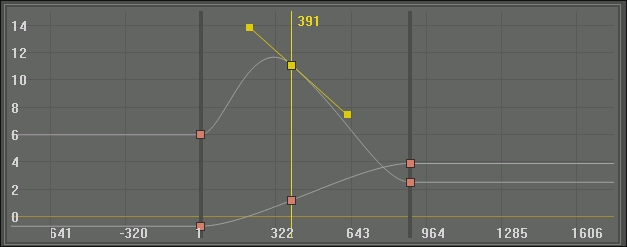
Drag one of the tangent handles.
The shape of the curve changes as you move the tangent handle.
 "Show full-size image")
Note: When you drag a tangent handle, its adjacent tangent handle moves in the opposite direction. If you want to move the tangent handles independently, you need to first break them. See Breaking Tangent Handles.
You can lengthen a tangent handle independently without breaking the pair.
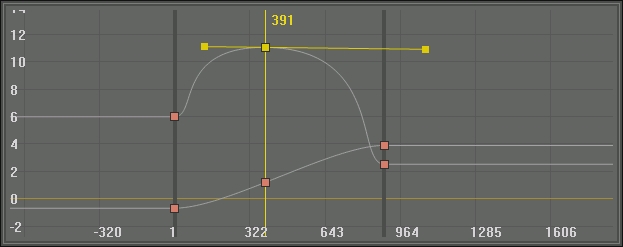
 "Show full-size image")
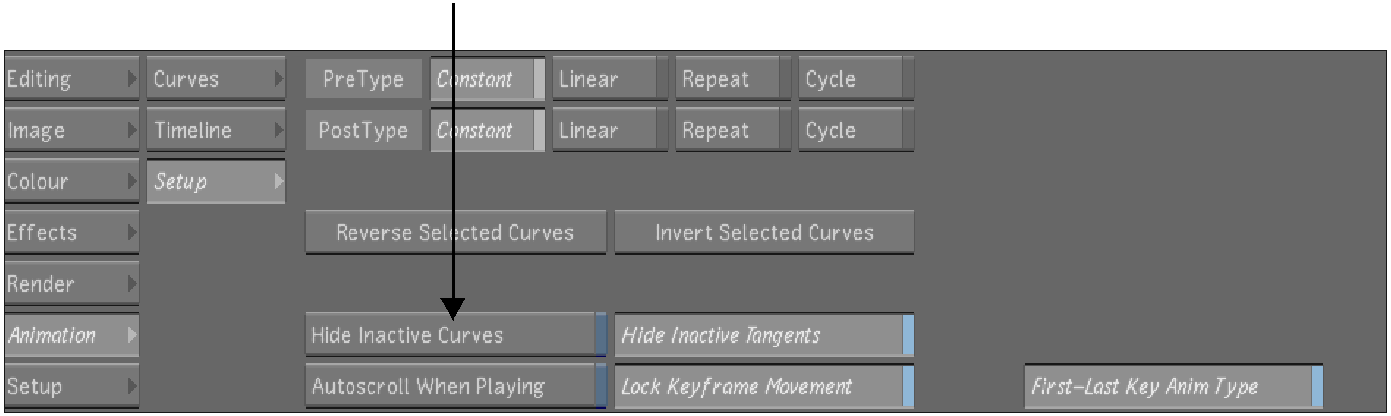
Click Animation, and then click Setup to display the Setup controls.
Enable Hide Inactive Curves.
 "Show full-size image")
When you assemble with the Record base of assembly, dissolved shots become one shot on the timeline and the dissolve start and end points are automatically keyframed. The First-Last Key Anim Type button ensures consistent keyframe animation functionality between the control surface and the Lustre user interface. This means that if you modify colour settings that occur before the dissolve, the colour settings will fade into the next shot correctly whether you are using the control surface or the user interface.
Click Animation, and then click Setup to display the Setup controls.
Enable First-Last Key Anim Type.

 "Show full-size image")
Normally when you move one Bezier tangent handle, the other moves in the opposite direction. You can break tangent handles so that you can adjust each tangent independently and create abrupt changes in your animation.
 "Show full-size image")
In Edit mode, select the keyframes you want to break. You can also click AllPts to select all keyframes.
 "Show full-size image")
|
|
|
Enable Break.
If you want to break the tangents for more than one keyframe, disable Return.
If Return mode is enabled, you are returned to Edit mode after performing one break operation.
In the Animation Curves window, click and drag the selected Bezier handle you want to break.
If Return mode is disabled, click additional keyframes to break the tangent handles and modify them as needed.
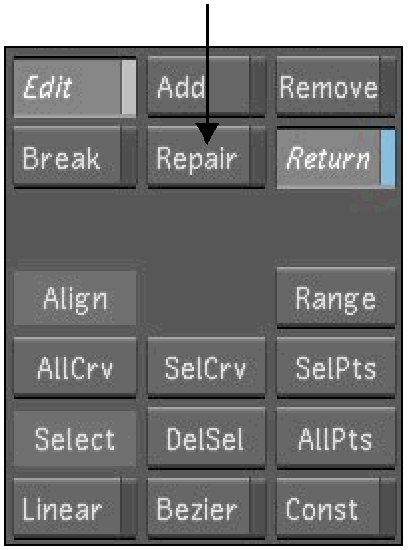
Use Repair mode to reset broken tangent handles to an unbroken state.
In Edit mode, select the broken keyframes you want to repair.
Click Repair.
 "Show full-size image")
All broken tangent handles for the selected keyframes are restored to an unbroken state.
You can hide tangent handles for keyframes that are not selected.
Click Animation, and then click Setup to display the Setup controls.
Enable Hide Inactive Tangents.

 "Show full-size image")
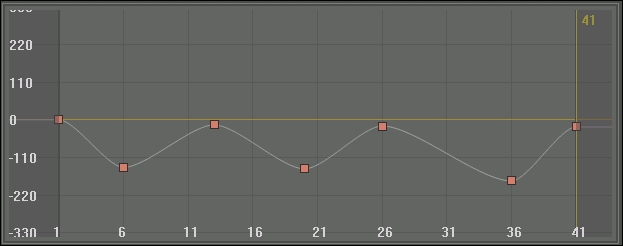
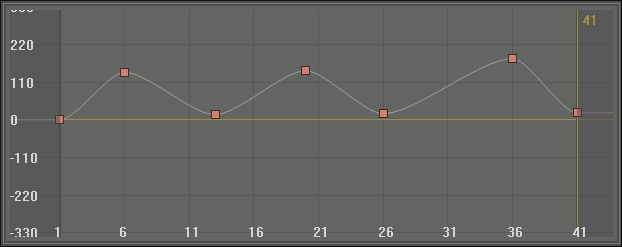
You can reverse the order of keyframes in time. When you reverse keyframes, the first keyframe takes the place of the last, and the last takes the place of the first.
 "Show full-size image")
| Before reversing the animation curve |
 "Show full-size image")
| After reversing the animation curve |
Click Animation, and then click Setup.
In the Channel Hierarchy, select the channel you want to reverse.
Click Reverse Selected Curves.

 "Show full-size image")
The selected channel's keyframes are reversed.
You can invert the value of keyframes. When you invert keyframes, a mirror of the value is produced about the horizontal time axis.
 "Show full-size image")
| Before inverting the animation curve |
 "Show full-size image")
| After inverting the animation curve |
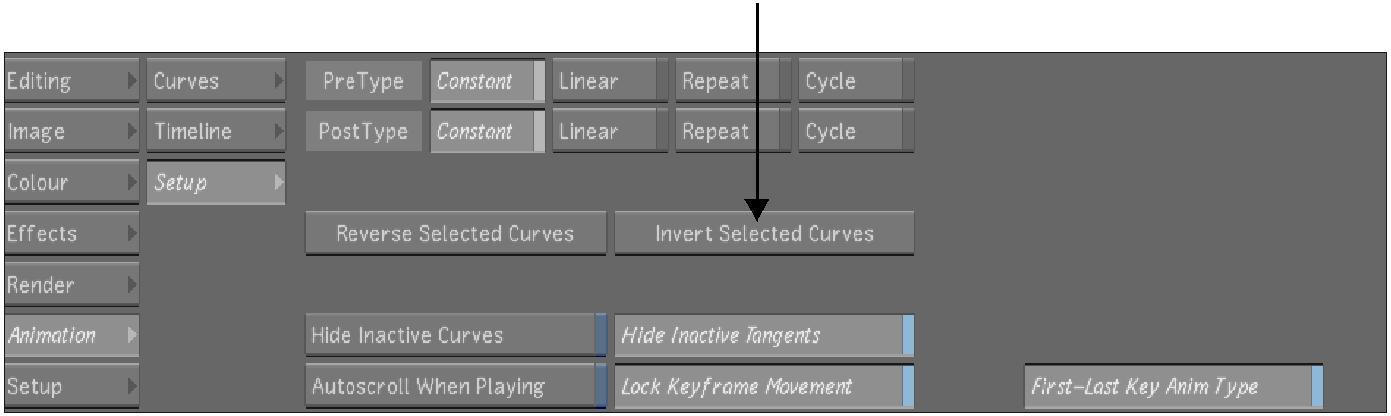
Click Animation, and then click Setup.
In the Channel Hierarchy, select the channel you want to invert.
Click Invert Selected Curves.
 "Show full-size image")
The selected channel's keyframes are inverted.
You can delete keyframes when they are no longer needed. You can:
Delete a single keyframe.
Delete a selection of keyframes.
Delete keyframes interactively, enabling you to click directly on keyframes in the Animation Curves window to delete them.
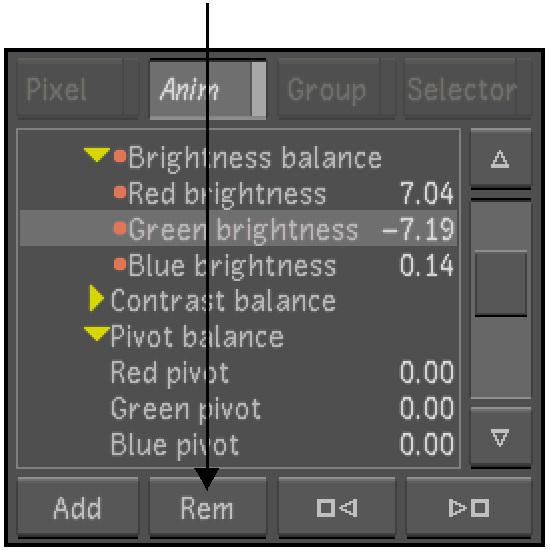
Make sure you are in Edit mode.
In the Animation Curves window, select the keyframe you want to delete.
Note: In menus other than the Animation menu, scrub to the frame with the keyframe you want to delete.
Click Rem.
 "Show full-size image")
The selected keyframe is deleted.
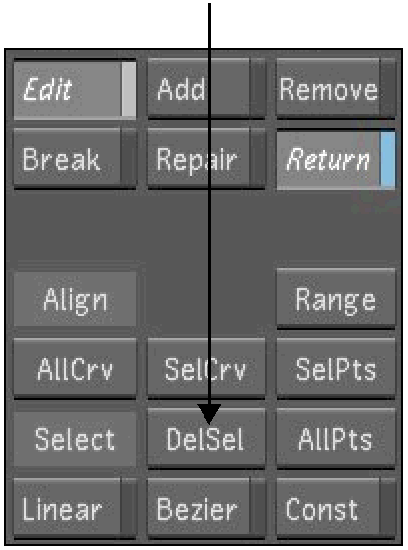
Make sure you are in Edit mode.
In the Animation Curves window, select the keyframes you want to delete.
Click DelSel and then confirm the deletion. You can also press Delete.
 "Show full-size image")
The selected keyframes are deleted.
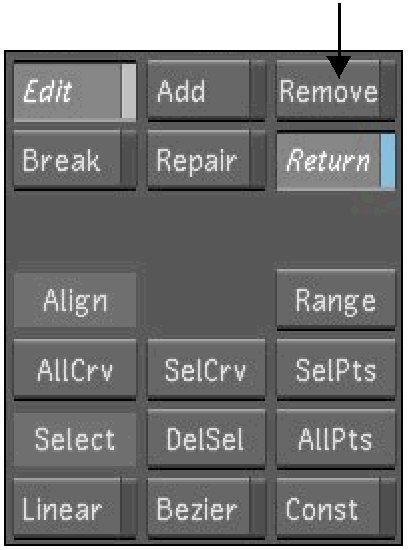
In the Animation controls, enable Remove.
 "Show full-size image")
Disable Return if you want to delete multiple keyframes.
If Return mode is enabled, you are returned to Edit mode after deleting one keyframe.
In the Animation Curves window, click a keyframe to delete it.
You can click to delete as many keyframes as needed.