Chapter 3, Project Management
| Setting Up the User Interface | Recommended Directory Structure for Projects | ||
Chapter 3, Project Management |
|||
Use templates to define re-usable presets for future projects or users.

When you are choosing your project settings, you can create a template for your future projects.
From the Project Template group, within the Project settings page, you can complete the following:
Create a new project template.
Create a new project template from an existing project.
Create a new project template from an existing project template.
Do one of the following:
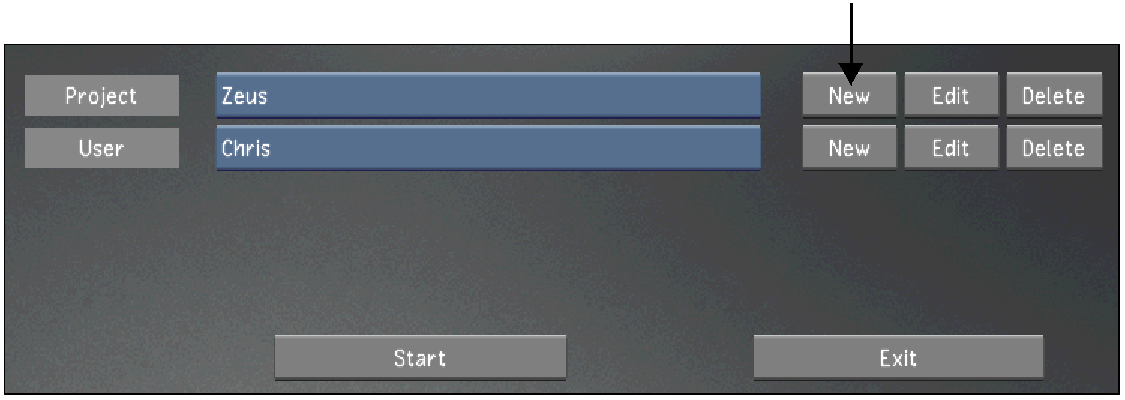
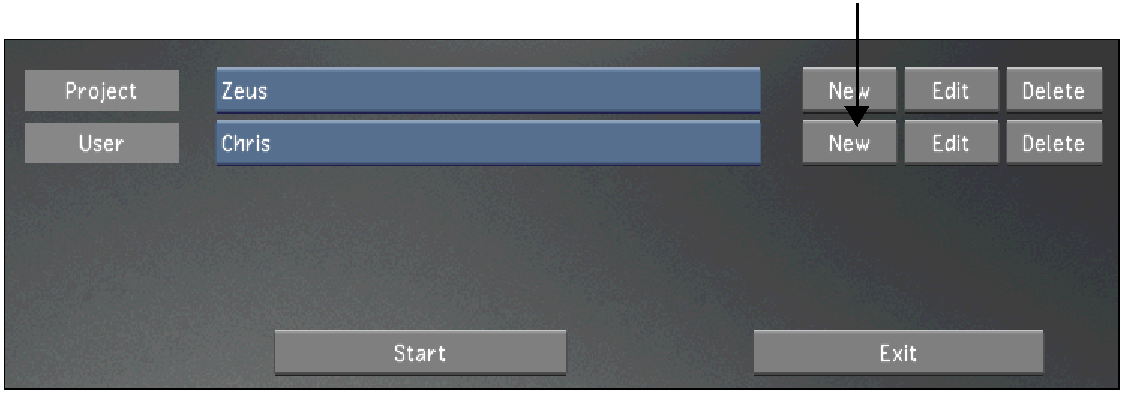
From the Main menu, click Setup, then Settings, and then click New in the Project group.
From the Lustre splash screen, click New in the Project group.

 "Show full-size image")
Configure the settings for the template. Use Reset to reset all settings, from every menu, to their defaults.
| Select: | To configure: |
| Project | The name and location of the project. See Project menu. |
| Calibration | Default system calibration settings and define the default Print LUTs for a project. See Calibration menu. |
| Rendering | Default rendering settings for a project. See Rendering menu. |
| Engineering | Default video and graphics settings for a project. See Engineering menu. |
| Network Rendering | Default Backburner/Burn, Slave Render, and Wiretap directory paths and settings for a project. See Network Rendering menu. |
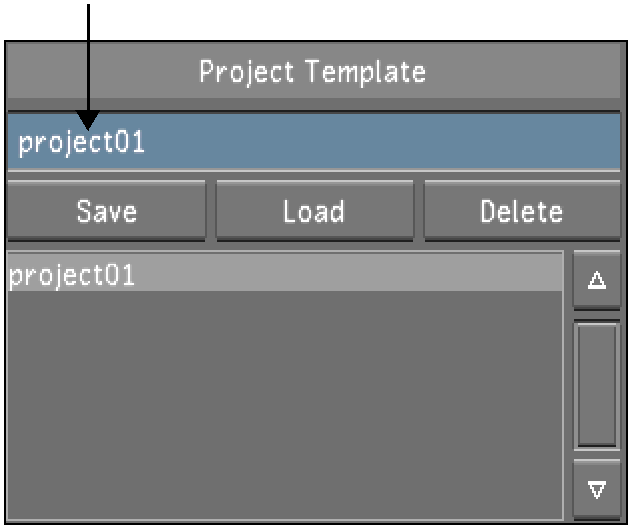
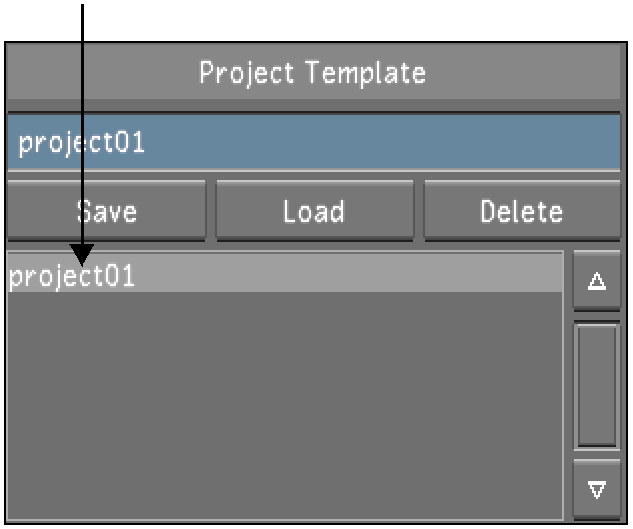
When you are done editing the settings, click Project, and enter a project name in the Project Template field.
 "Show full-size image")
In the Project Template group, click Save.
To exit, click Exit Project.
Do one of the following:
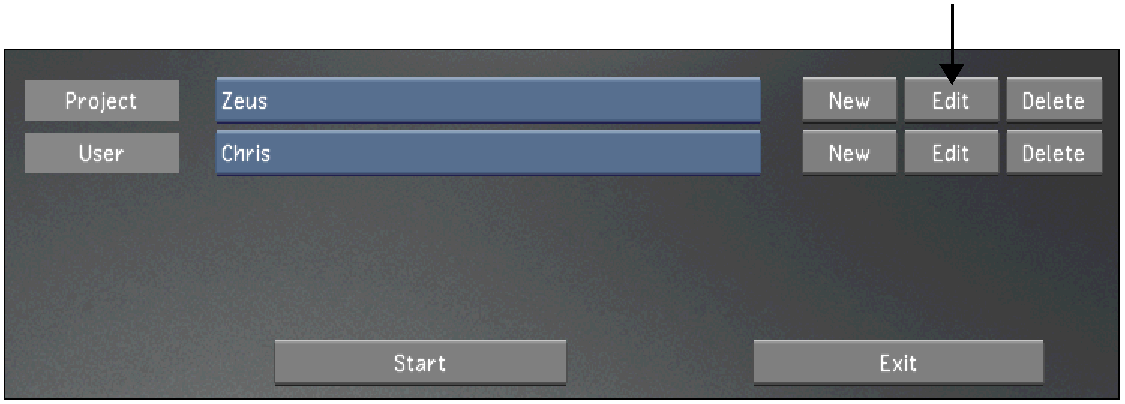
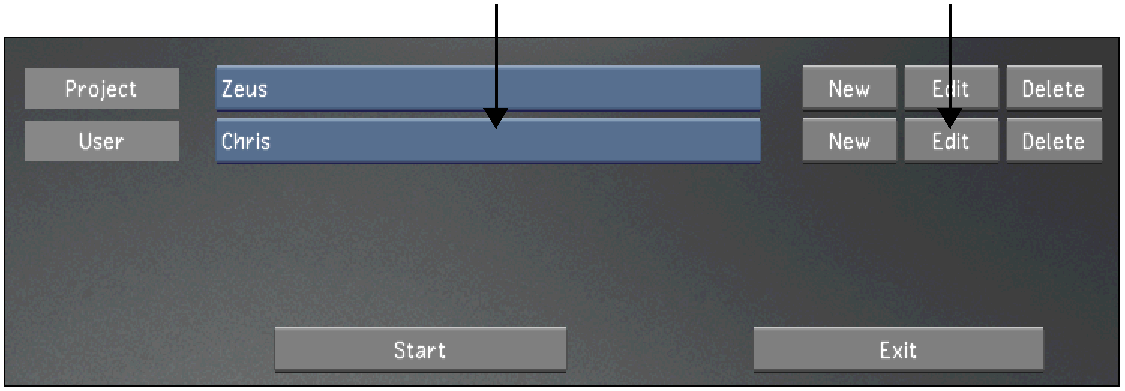
From the Main menu, click Setup, and then Settings. In the Project group, select the baseline project, and then click Edit.
From the Lustre splash screen, select the baseline project, and then click Edit in the Project group.
 "Show full-size image")
Configure the project. Use Reset to reset all settings, from every menu, to their defaults.

|
Warning: Rename the new project, or you will overwrite the original project's settings with the new settings. |
| Select: | To configure: |
| Project | The name and location of the project. See Project menu. |
| Calibration | Default system calibration settings and define the default Print LUTs for a project. See Calibration menu. |
| Rendering | Default rendering settings for a project. See Rendering menu. |
| Engineering | Default video and graphics settings for a project. See Engineering menu. |
| Network Rendering | Default Backburner/Burn, Slave Render, and Wiretap directory paths and settings for a project. See Network Rendering menu. |
Click Project and enter a name in the Project Template field.

 "Show full-size image")
To save the template, click Save in the Project Template group.
Click Exit Project.
Do one of the following:
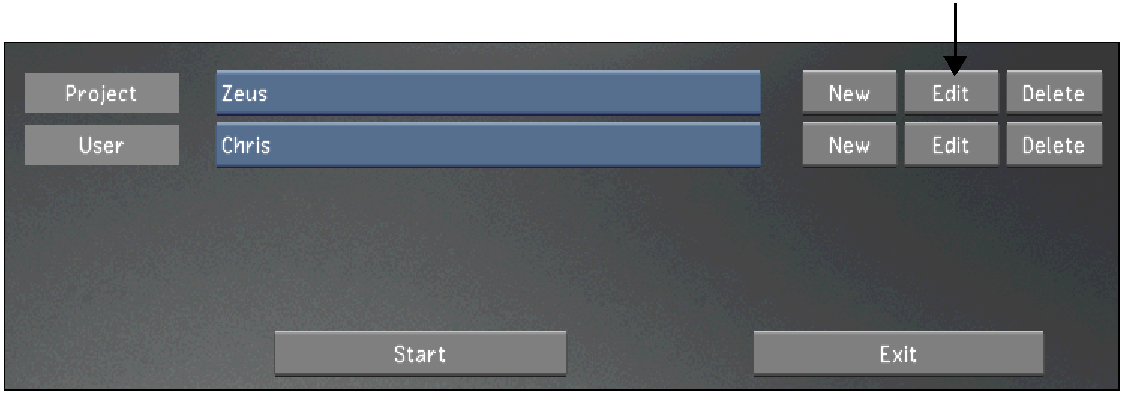
From the Main menu, click Setup, and then Settings. Select the project to edit, and then click Edit in the Project group.
From the Lustre splash screen, select the project to edit, and then click Edit in the Project group.
 "Show full-size image")
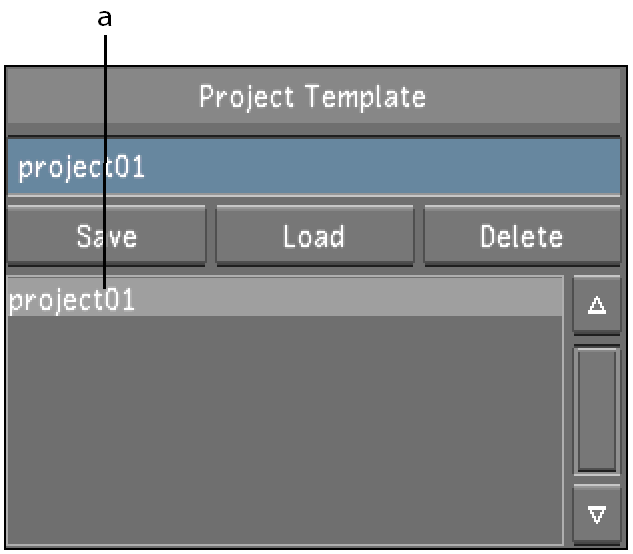
From the Project Template list, select a template.
 "Show full-size image")
|
Click Load.
In the Project Template field, enter a new template name, and then click Save.
|
|
Warning: Rename the new template, or you will overwrite the original template with the new settings. |
Configure the template. Use Reset to reset all settings, from every menu, to their defaults.
| Select: | To configure: |
| Project | The name and location of the project. See Project menu. |
| Calibration | Default system calibration settings and define the default Print LUTs for a project. See Calibration menu. |
| Rendering | Default rendering settings for a project. See Rendering menu. |
| Engineering | Default video and graphics settings for a project. See Engineering menu. |
| Network Rendering | Default Backburner/Burn, Slave Render, and Wiretap directory paths and settings for a project. See Network Rendering menu. |
To save the template, click Save in the Project Template group.
Click Exit Project.
As you create project after project, there may come a time when you need to change a few of the settings and you do not want to create an entire new template. You can accomplish this by using the edit feature.
Do one of the following:
From the Main menu, click Setup, then Settings, and then click New in the Project group.
From the Lustre splash screen, click New in the Project group.
 "Show full-size image")
From the Project Template list, select the template to edit.
 "Show full-size image")
Click Load.
Configure the template. Use Reset to reset all settings, from every menu, to their defaults.
| Select: | To configure: |
| Project | The name and location of the project. See Project menu. |
| Calibration | Default system calibration settings and define the default Print LUTs for a project. See Calibration menu. |
| Rendering | Default rendering settings for a project. See Rendering menu. |
| Engineering | Default video and graphics settings for a project. See Engineering menu. |
| Network Rendering | Default Backburner/Burn, Slave Render, and Wiretap directory paths and settings for a project. See Network Rendering menu. |
To save the template, click Save in the Project Template group.
Click Exit Project.
When creating a user, you can save the setup as a template for other users.
From the User Template section in the Display & Interface settings, you can do the folllowing:
Create a new user template.
Create a new user template from an existing user profile.
Create a new user template from an existing user template.
Do one of the following:
From the Main menu, click Setup, then Settings, and then click New in the User group.
From the Lustre splash screen, click New in the User group.

 "Show full-size image")
Configure the new user. Use Reset to reset all settings, from every menu, to their defaults.
| Select: | To configure: |
| Display & Interface | The default display and interface settings for this user. See Display & Interface Settings. |
| System & Menu | The system, match grade, assemble, and playout settings for this user. See System & Menu Settings. |
| Tools | Keyframe interpolation, animation, and dust settings for this user. See Tools Settings. |
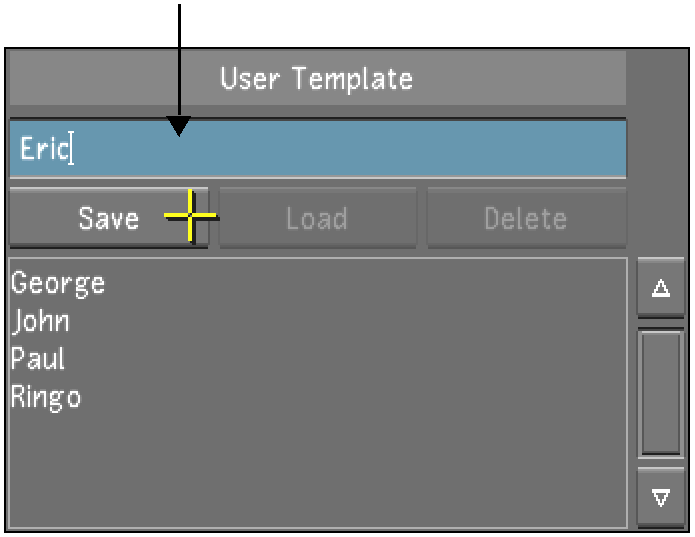
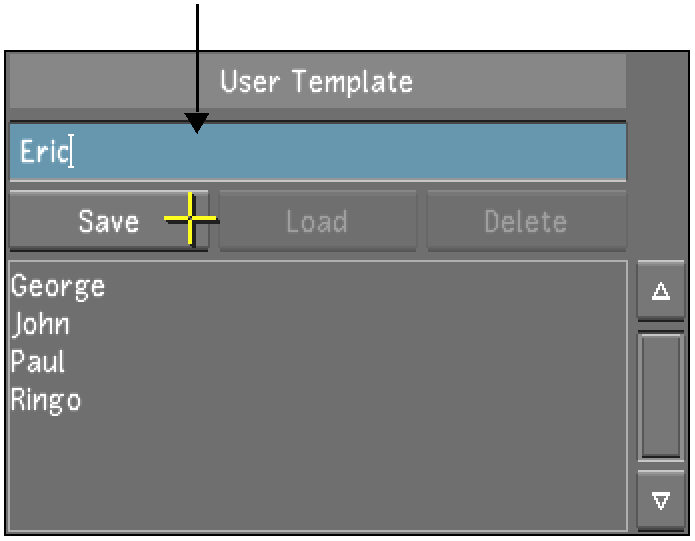
Click Display & Interface, and enter a name in the User Template field.
 "Show full-size image")
To save the template, click Save in the User Template group.
Click Exit User.
Do one of the following:
From the Main menu, click Setup, and then Settings. Select the baseline user, and then click Edit in the User group.
From the Lustre splash screen, select the baseline user, and then click Edit in the User group.
 "Show full-size image")
Configure the new template. Use Reset to reset all settings, from every menu, to their defaults.
| Select: | To configure: |
| Display & Interface | The default display and interface settings for this user. See Display & Interface Settings. |
| System & Menu | The system, match grade, assemble, and playout settings for this user. See System & Menu Settings. |
| Tools | Keyframe interpolation, animation, and dust settings for this user. See Tools Settings. |
Click Display & Interface and enter a new name in the User Template field.
 "Show full-size image")
To save the template, click Save in the User Template group.
Click Exit User.
Do one of the following:
From the Main menu, click Setup, then Settings, and then click New in the User group.
From the Lustre splash screen, click New in the User group.

 "Show full-size image")
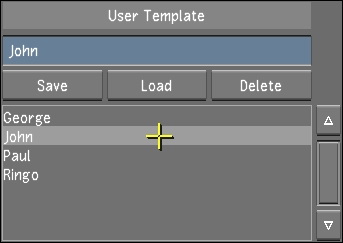
From the User Template list, select the template to use as baseline.
 "Show full-size image")
Click Load.
In the User Template field, enter a new template name, and then click Save.
|
|
Warning: Rename the new template, or you will overwrite the original template with the new settings. |
Configure the template. Use Reset to reset all settings, from every menu, to their defaults.
| Select: | To configure: |
| Project | The name and location of the project. See Project menu. |
| Calibration | Default system calibration settings and define the default Print LUTs for a project. See Calibration menu. |
| Rendering | Default rendering settings for a project. See Rendering menu. |
| Engineering | Default video and graphics settings for a project. See Engineering menu. |
| Network Rendering | Default Backburner/Burn, Slave Render, and Wiretap directory paths and settings for a project. See Network Rendering menu. |
From the User Template list, select the new template.
To save the template, click Save in the User Template group.
Click Exit User.
The template editing feature is available for you to make minor changes to existing templates as they are needed.
Do one of the following:
From the Main menu, click Setup, then Settings, and then click New in the User group.
From the Lustre splash screen, click New in the User group.
 "Show full-size image")
In the User Template group, select the user template to edit.
Click Load.
Configure the template. Use Reset to reset all settings, from every menu, to their defaults.
| Select: | To configure: |
| Project | The name and location of the project. See Project menu. |
| Calibration | Default system calibration settings and define the default Print LUTs for a project. See Calibration menu. |
| Rendering | Default rendering settings for a project. See Rendering menu. |
| Engineering | Default video and graphics settings for a project. See Engineering menu. |
| Network Rendering | Default Backburner/Burn, Slave Render, and Wiretap directory paths and settings for a project. See Network Rendering menu. |
To save the template, click Save in the User Template group.
Click Exit User.
