You can either import render passes from a pre-comp file generated by any 3D application or import Maya passes directly from the Maya (.ma or .mb) file.
A Maya pre-comp file contains the same information as the corresponding .ma or .mb file of the 3D scene. However, pre-comp files are faster to import into Composite and more stable to use. An advantage of using pre-comp files is that they are self-contained. That is, you don't need to have Maya installed and licensed on your system like you do for importing Maya files. Before importing a Maya file, see Importing FBX Files.
To import a pre-comp or Maya file:

The Script Output floating window displays the progress of the import, and the Pre-Compositing Import Options dialog box displays. See Viewing Output and Error Messages.

If images are missing, you are prompted to locate the folder that contains the images.

If Composite cannot find a pre-compositing template referenced by the pre-comp file, the following dialog box is displayed:

For more information, see Pre-Compositing Templates.
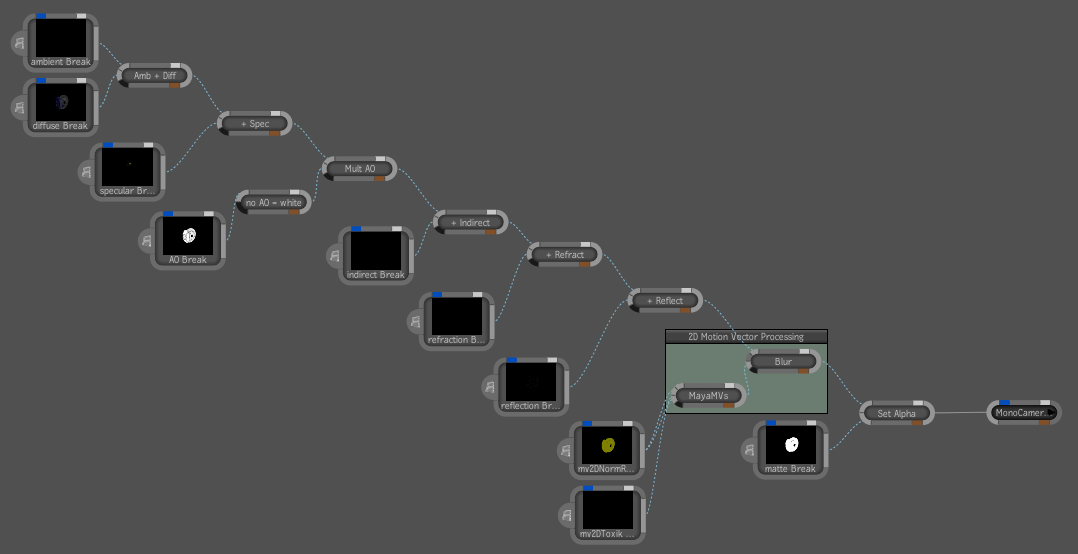
The render layers and passes are imported. The scene composition, named after the scene anchor and camera(s) anchor, is created in the folder you specified during import. This folder contains a Layers folder and a Passes folder, unless you specified a different name during import. Render layer compositions are named after the scene anchor, the camera(s) anchor, and the layer anchor. Render pass compositions are named after the scene anchor, the camera(s) anchor, the layer anchor, and the pass anchor.

The composition and associated render layer compositions are opened, and the chain of Blend & Comp nodes in the scene composition matches the order and blend modes in the render layers.


In the tool UI, select the Import Image tab.

Notice that the Path field displays path of the image sequence that is imported for that render pass. And, the image format, pixel format, rate, frame range and pre-multiplication import options are properly set.
 Except where otherwise noted, this work is licensed under a Creative Commons Attribution-NonCommercial-ShareAlike 3.0 Unported License


