


Learning Resources > Tutorials > Getting Started with Maya > Assets > Lesson 2: Using assets
in a scene >
Assigning an existing template
to an asset
You can use assets to replace the existing police car in the scene with the fire truck model you created in Lesson 1, without losing the existing animation.
First you need to make sure that the published attributes of the police car and fire truck match precisely. To do this, you can reuse the template you created in Lesson 1 from the fire truck to define the police car.
To assign a template to an asset
 ).
).![]()
The police car currently has no published attributes, so the right panel remains empty even when the asset is pinned.
 .
.
If you didn’t start at Lesson 1, navigate to Getting Started/Assets/assets/templates and select the file emergency_vehicle.template.
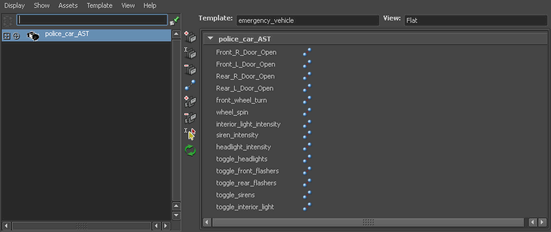
The published names defined by the template appear in the right panel. However, right now they are unbound to anything in the police car asset because it had no matching published attribute names.