


Learning Resources > Tutorials > Getting Started with Maya > Character Setup > Lesson 2: Smooth skinning >
Influence objects
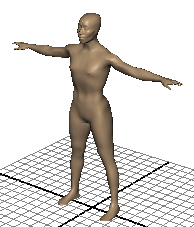
You can create an object and use it to influence the shape of smooth skin. The object, called an influence object, acts like a surgical implant against which the skin deforms. For example, you can create a sphere and use it to simulate a muscle or bone that bulges as you pose the character in certain positions. You can also use an influence object to smooth deformation and maintain volume in regions that collapse while bending.
In the next steps, you’ll use a sphere as an influence object to simulate an elbow jutting out as Jackie’s arm bends. To use an influence object, the skeleton must be in the bind pose—the original pose at which the skin was bound to Jackie.
To return the skeleton to the bind pose
After you use an IK handle to pose a character, you must do this step before you can return the skeleton to the bind pose.
You must do this step to enable the IK solvers so you can manipulate IK handles in the scene again.
To position a sphere to be used as an influence object
 click
Jackie’s surface (anywhere but on the skeleton) and select Actions
> Template from the marking menu.
click
Jackie’s surface (anywhere but on the skeleton) and select Actions
> Template from the marking menu.
By making Jackie a template, you won’t accidentally select Jackie in subsequent steps.
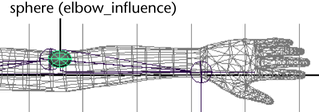
The exact position and scale of the sphere is unimportant. You can make slight position and scale adjustments later to enhance the deformations that result from its use.
To make the sphere an influence object
 . In
the Add Influence Options, select Edit
> Reset Settings, and then click the Add button.
. In
the Add Influence Options, select Edit
> Reset Settings, and then click the Add button.
Maya completes the operation within a few moments. To ensure the influence object stays in the correct position at the elbow, you will parent it to the left_shoulder joint.
The order of selection is important. The parent object should be selected last.
The elbow_influence nodes appear in the skeleton hierarchy below the left_shoulder joint.
The elbow_influenceBase is known as a base object. It stores vertex position information for the influence object. The reason for parenting the base object to the left_shoulder joint is so that the influence object’s vertices stay in the correct position at the elbow whenever the elbow moves to a new position. Other than this step, you do not work with the base object.
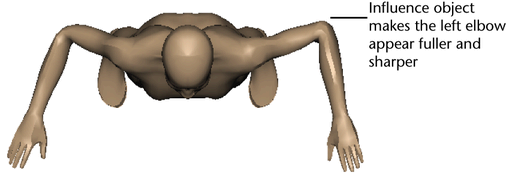
The left elbow looks more natural than the right elbow. To tune the elbow’s deformation during bending, change the position, scale, and rotation of elbow_influence.
Do not be concerned if the influence object pokes through the skin. It won’t be displayed when you render the animation.