


Learning Resources > Tutorials > Getting Started with Maya > Rendering > Lesson 2: Shading surfaces >
Using the Hypershade editor
After you create a texture node, you will often want to return to the associated material node to make changes. Because material and texture nodes do not have icons that represent them in your scene view, you need a special editor, called Hypershade, to select them and edit their attributes. In this section, you learn how to work with Hypershade.
To view and edit material attributes using Hypershade
This layout is convenient because it’s common practice to drag and drop items from Hypershade (using the middle mouse button) onto objects in the perspective view. You can also open Hypershade as a separate window ( Window > Rendering Editors > Hypershade).
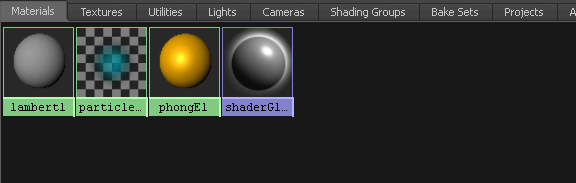
This tab shows all the materials currently in your scene. It is especially useful when you have a complex scene and you need to locate a material to edit it. The materials you will recognize are the default Lambert material and the Phong E material. You can ignore the others. They exist in all scenes, by default, for use with other Maya features.
In addition to the Materials tab, Hypershade includes other tabs to help you keep track of textures, lights, and other nodes related to rendering.
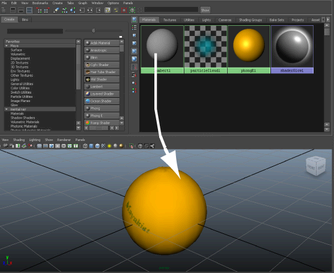
Hypershade is designed for quick, drag-and-drop operations such as this.
A graph appears in the Work Area tab in the bottom section.
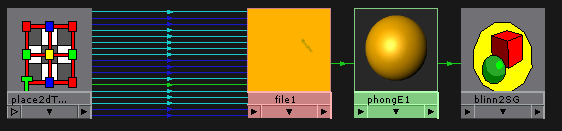
This graph shows all material and texture nodes applied to this object. While the Materials tab shows a catalog of the materials in the scene, the Work Area tab shows whatever material, texture, or other node you are currently working on. The Graph menu has several menu items that change the contents of the Work Area display.
The Work Area shows connection lines between the nodes. The lines have arrows that all point in one direction. For a closer look at these arrows, dolly into the view using the same keyboard and mouse shortcuts you would use in the scene view.
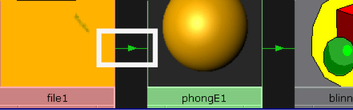
The arrows depict Maya’s internal information input and output, called a stream. The next step shows the importance of this connection stream.
The sphere reverts to the default gray color because you have broken the connection between these nodes and the texture is no longer assigned to it. This is a simple illustration of how the connection stream works. The file1 texture node is upstream from the connection you deleted, so it no longer inputs data into the material; Maya ignores it.
In practical terms, this is an example of how you can disconnect a texture from a material without actually deleting the texture. For example, you may want to remove the file texture from this material and connect it to another material instead. In a later step, you will learn about using Hypershade to make connections between textures and materials.
Renaming is not as important in this scene as it would be in more complex scenes with several materials.
The Rename operation is one of several useful menu items that appear when you right-click a material swatch. Another handy menu item is Assign Material to Selection. You can use this operation to assign a material to multiple selected objects rather than assign it one object at a time.