Learning Resources > Tutorials > Getting Started with Maya > Rendering > Lesson 2: Shading surfaces >
Creating a texture within
the Hypershade editor
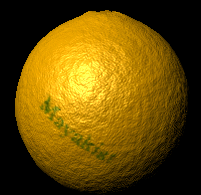
To mimic the skin of an orange, you will add a bump map texture. A bump map creates the illusion that the surface has bumps or other types of surface relief. You will map the texture using the Create Bar in Hypershade.
The Create Bar is similar to the Create Render Node window you have used already. It is built into Hypershade for greater convenience.
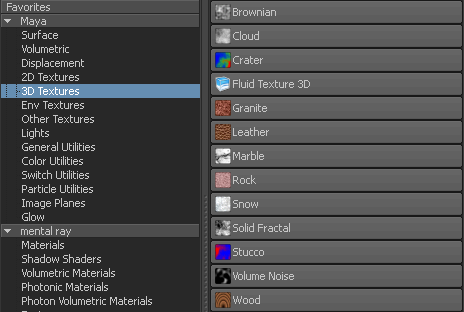
The Mayakist logo file texture is a 2D texture, which wraps evenly around the surface. Next, you create a 3D texture. A 3D texture is for making objects appear to have been carved out of a solid substance, such as marble or wood.
To create a bump texture within the Hypershade Editor
For this bump effect, you use a Brownian 3D texture. Experience has shown that a Brownian texture is the best texture for approximating the bumps on an orange skin. Becoming skillful with textures is a matter of observation, experimentation, and experience.
Maya connects or applies Brownian to the Orange material’s bump map attribute.
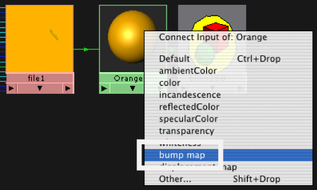
The pop-up menu shows a list of common material attributes. Although you can map textures to any material attribute, these are the most commonly mapped attributes.
By default, you can assign only one texture per attribute. Attributes that already have an assigned texture appear in italics. (For a discussion about assigning multiple textures to an attribute, see Layered textures.)
This drag-and-drop method of applying a texture is essentially the same as clicking the map icon next to a material’s attribute slider. Using Hypershade offers a faster, more graphical alternative to using the Attribute Editor.
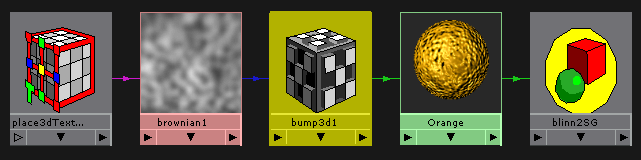
Also notice that bumps from the bump map appear in the Orange material’s swatch. The Orange material swatch is the same as the Material Sample that appears in the Attribute Editor for the material node. (The bumps also appear in a rendered image, but not in the scene view.)
This node is the link between the texture and the material. It converts visual information, such as the mottled Brownian pattern, into the appearance of surface relief.
The most important attribute in the bump3d1 node is Bump Depth, which controls the intensity of the bumps.
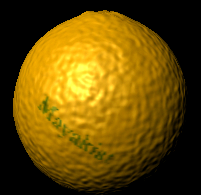
These values produce a rendered image closer to real orange skin.
Our recommendation for these values is based on experimentation. For Brownian and some other textures, it’s usually faster to get desirable results by experimenting with the settings rather than trying to understand the definition of each attribute.