Learning Resources > Tutorials > Getting Started with Maya > NURBS Modeling > Lesson 2: Sculpting a NURBS
surface >
Preparing a surface for
sculpting
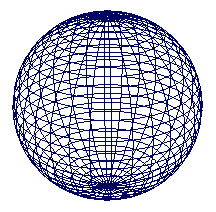
Because a head is roughly spherical, you can create a primitive sphere as a quick starting point for creating a head and face.
To prepare a sphere for sculpting
 . In
the options window, select Edit > Reset Settings,
enter the following values, then click the Create button:
. In
the options window, select Edit > Reset Settings,
enter the following values, then click the Create button:
The Radius sets the sphere’s size in grid units. A value of 6 creates a sphere big enough to use the grid for size comparison.
The Number of Sections sets the number of vertical curves, called isoparms, for the sphere. Isoparms show the outline of the surface shape. The more isoparms a surface has, the more CVs it has. (By default, CVs are not displayed.) More CVs means better precision as you edit a surface. The Number of Spans sets the number of horizontal isoparms.
The drawback to having too many CVs is that you’ll have a harder time making smooth shape changes to broad regions. Lots of CVs also means slower processing time as you work with the surface. It’s best to make surfaces with as few CVs as necessary.
We chose 30 Sections and Spans for this lesson because experience has shown that this allows adequate facial subtlety without slowing Maya operation on a workstation of modest processing power.
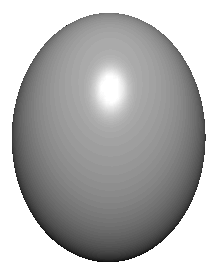
Modifying the surface material for easier viewing
Because you will do subtle surface modeling in this lesson, it’s helpful to display Egghead with bright highlights so you can clearly see the effects of the changes you make. In the next steps, you’ll assign a Blinn material to Egghead to give its surface bright highlights. The steps have no explanations, as the shading subject matter is the focus of a later lesson.
To assign a Blinn surface material
The Attribute Editor will immediately be displayed for the Blinn material.