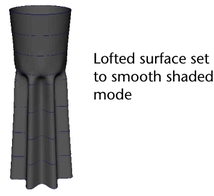
You’ve created a total of nine curves. In the next steps, you loft these curves into a surface that matches the contours of their perimeters. Above the midpoint of the surface, the shape will change from a flower-shaped perimeter to a circular perimeter.
To loft a surface for the salt shaker’s body
The order of selection is important when shift-selecting for a loft operation. You must start with the bottom flower-shaped circle and end with the top circular-shaped circle. Alternatively, you can drag a selection box around the circles. The surface to be lofted will be based on the selection order of the curves.
