Next, you will create
a granite 3D solid texture that will be used for the tabletop.
Watch Part
3 of the tutorial.
Creating a granite texture
- Open the Multi-lister window, and
display only the shaders (Render > Multi-lister >
Shaders).
- Double-click the Tabletop shader
to open the Tabletop control window.
- In the Tabletop Control Window,
change the Shading Model to Phong.
This will allow you to create a more reflective surface for the
tabletop. Phong is good for polished stone -- the highlights are
based on the light’s color.
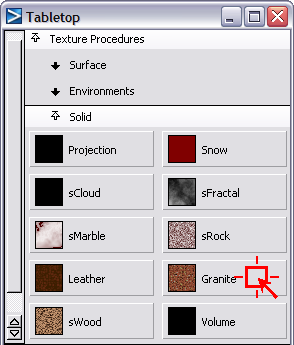
- Click the Map button
next to the Color field to open the Texture
Procedures window.
- In the Solid section,
click the Granite button.
The Granite Control window
opens.
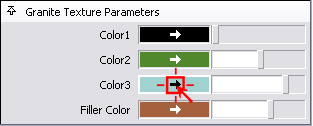
- Within the Granite Texture Parameters, there
are four variables that control the color of the granite. Click
the color swatch next to the Filler Color parameter.
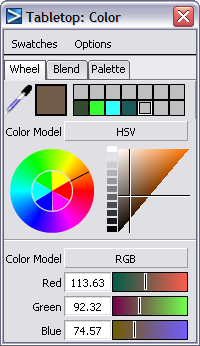
The Color Editor opens.
- Select a teal color, or set the red value
to 51, green to 255,
and blue to 255. Drag the cross hair cursor
on the color triangle toward the bottom apex, which will darken
the color.
- Now, you will change the colors of the
small aggregate stone flecks within the granite. Click the Color2 parameter
to open the Granite:Color 2 Editor.
Darken the color by moving the cross hairs down
on the triangle.
- Click the Color3 parameter
to open the Granite: Color 3 Editor.
Darken it, as well.
- Look at the Tabletop swatch
in the Multi-lister. It displays the
edited Granite texture.
NoteThe flat brown shader
originally assigned to the Tabletop shader
is invisible, because color textures supersede the shader color.
- Close the Color Editor, Granite
Control Window, and Multi-lister.
Rendering the scene
Now, you will render
the scene to see the granite texture on the tabletop.
- Select the Render command (Render > Render).
The File Browser opens
to the pix directory of
the Lessons project.
- Click the Save button
to overwrite the previous file named render4.
A dialog appears, asking
if you want to overwrite the file. Click OK.
The rendering process
begins.
- Click the Show button
on the Render Monitor to view the rendered image.
The tabletop now has
a granite surface. Although the camera angle that you are using
does not show the thickness of the tabletop, if you were to re-position
the camera to view the table thickness and re-rendered the scene,
the table would look like it was cut from a solid piece of granite.
- Click the close box on the window bar
of the rendered image to close it.
Save your work
- Save your work in the wire file of the Lessons directory.
- Name your file myadv_rend3.wire.