When you click one of the view navigation buttons, you can change these basic view properties: zooming, panning, and orbiting.
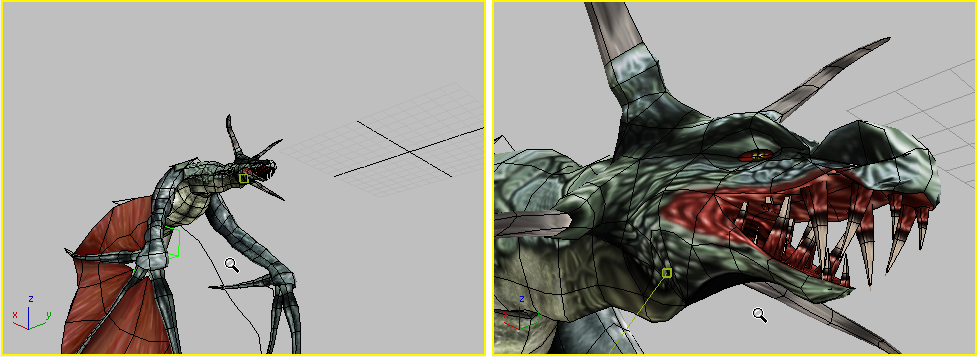
Before and after zooming a viewport
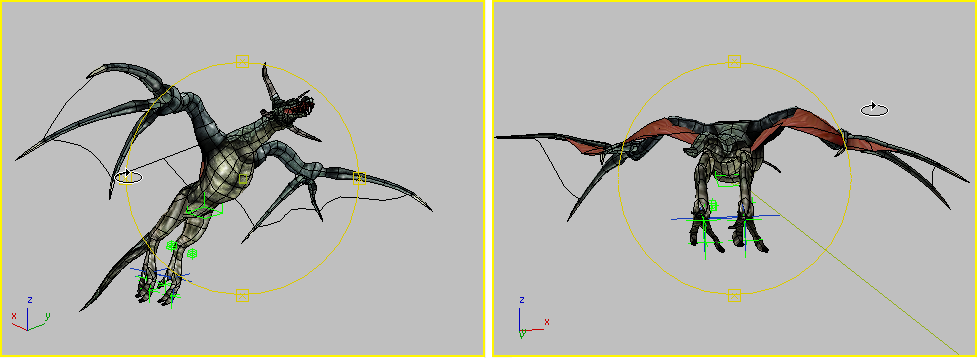
Before and after orbiting a viewport

 Click Zoom or Zoom All and drag in a viewport to change the view magnification. Zoom changes only the active view, while Zoom All simultaneously
changes all non-camera views.
Click Zoom or Zoom All and drag in a viewport to change the view magnification. Zoom changes only the active view, while Zoom All simultaneously
changes all non-camera views.
 If a perspective view is active, you can also click Field of View (FOV). The effect of changing FOV is similar to changing the lens on a camera. As FOV gets larger you see more of your scene and
perspective becomes distorted, similar to using a wide-angle lens. As FOV gets smaller you see less of your scene and the
perspective flattens, similar to using a telephoto lens.
If a perspective view is active, you can also click Field of View (FOV). The effect of changing FOV is similar to changing the lens on a camera. As FOV gets larger you see more of your scene and
perspective becomes distorted, similar to using a wide-angle lens. As FOV gets smaller you see less of your scene and the
perspective flattens, similar to using a telephoto lens.
 Click Zoom Region to drag a rectangular region within the active viewport and magnify that region to fill the viewport. Zoom Region is available
for all standard views.
Click Zoom Region to drag a rectangular region within the active viewport and magnify that region to fill the viewport. Zoom Region is available
for all standard views.
In a perspective viewport, Zoom Region mode is available from the Field of View flyout.

 Click the Zoom Extents or Zoom Extents All flyout buttons to change the magnification and position of your view to display
the extents of objects in your scene. Your view is centered on the objects and the magnification changed so the objects fill
the viewport.
Click the Zoom Extents or Zoom Extents All flyout buttons to change the magnification and position of your view to display
the extents of objects in your scene. Your view is centered on the objects and the magnification changed so the objects fill
the viewport.
 The Zoom Extents, Zoom Extents Selected buttons zoom the active viewport to the extents of all visible or selected objects in the scene.
 The Zoom Extents All, Zoom Extents All Selected buttons zoom all viewports to the extents of all objects or the current selection.
Click Pan View and drag in a viewport to move your view parallel to the viewport plane. You can also pan a viewport by dragging with the middle mouse button held down while any tool is active.
Click Orbit, Orbit Selection, or Orbit Sub-Object to rotate your view around the view center, the selection, or the current sub-object selection respectively. When you rotate a head-on viewport, such as a Top view, it is converted to an Orthographic view, as reflected by the viewport label.
 With Orbit Sub-Object, selected sub-objects or objects remain at the same position in the viewport while the view rotates
around them.
With Orbit Sub-Object, selected sub-objects or objects remain at the same position in the viewport while the view rotates
around them.
 With Orbit Selected, selected objects remain at the same position in the viewport while the view rotates around them. If
no objects are selected, the function reverts to the standard Orbit function.
With Orbit Selected, selected objects remain at the same position in the viewport while the view rotates around them. If
no objects are selected, the function reverts to the standard Orbit function.
 With Orbit, objects near the edges of the viewport can rotate out of view.


 Pan View