Command entry:
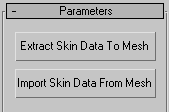
Utilities panel

More button
SkinUtilities
Skin Utilities provide a method for copying skin data (envelopes and vertex weights) from one model to another. Skin Utilities
work by embedding the skin data in a copy of the source mesh, then using the object copy to map the data onto the target mesh.
To use Skin Utilities, first make sure these requirements are met:
- Have two meshes to which the Skin modifier has been applied, both in the current scene.
- Assign bones to the Skin modifiers for both meshes.
TipSkin Utilities work by matching bones from one character to another, so the task of copying the skin data is greatly simplified
if you use similar naming conventions for the bones in each rig.
Procedures
To use Skin Utilities:
- Load a scene that contains two skinned meshes, one from which you want to extract the skin data, the other to which you want
to paste it.
-
 Select the source mesh, the mesh with the correct envelopes and vertex weights.
- Choose Utilities panel More button Skin Utilities.
- Click Extract Skin Data To Mesh.
A new object is created, identical to the selected object. This is a new mesh with all envelope-assigned and manually-assigned
vertex weights “baked” into the mesh. The object is named with the prefix SkinData_ followed by the same name as the original object.
-
 Move the skin data mesh on top of the mesh to which you would like to paste the skin data, so the two meshes are coincident.
- If necessary, adjust the skin data object at the Vertex sub-object level to make it fit the other mesh as closely as possible.
- Select both the skin data object, and the object to which you want to paste the data.
- Click Import Skin Data From Mesh.
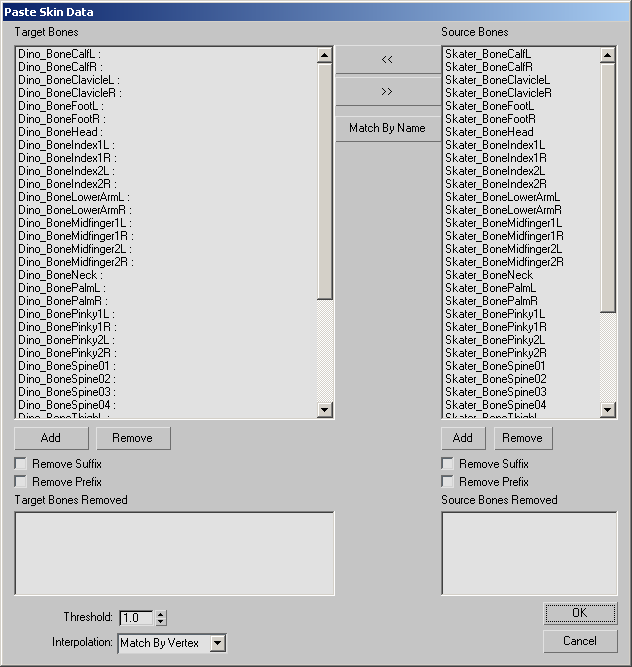
3ds Max opens the Paste Skin Data dialog.
- Match up the bones by highlighting one on each side of the dialog, and clicking the left arrow to move the source bone to
its match on the left side.
You can also highlight several bones on each side at once, and click the left arrow to move them all over at the same time.
Only bone pairs on the left side of the dialog will be pasted.
- If the meshes' vertices do not match exactly, set the Interpolation method to Match by Face, and increase the Threshold to
a unit value that will allow the meshes' faces to match up.
- Click OK to paste the vertex weights and close the dialog.
- Delete the skin data mesh.
Interface
- Extract Skin Data to Mesh
-
Extracts the skin data from the selected mesh and embeds it in a new mesh named SkinData_ followed by the original object name.
NoteThe skin data is stored in channels. To see the data, select the
SkinData_ mesh and use the
Channel Info Utility.
- Import Skin Data From Mesh
-
Opens the Paste Skin Data dialog. Before clicking this option, you must select the SkinData_ mesh and the mesh to which you want to paste the data.
Paste Skin Data dialog
To use the Paste Skin Data dialog, highlight matching Target Bones and Source Bones, and click the left arrow to match them.
Only matched sets of bones listed under Target Bones will be mapped when you click OK.
- Target Bones
-
Lists target bones available for matching, and lists matches moved from the Source Bones listing with the left arrow.
- Source Bones
-
Lists source bones available for matching.
- Add
-
Adds removed bones back to the source or target list.
- Remove
-
Removes highlighted bones from the source or target list.
- Remove Suffix
-
If bone names end with an underscore followed by text, this removes the suffix from the displayed bone names from the underscore
to the end of the name. Use this option to remove suffixes and make source and target bone names match, which will allow you
to use the Match by Name option.
- Remove Prefix
-
If bone names start with text followed by an underscore, this removes all characters from the displayed bone names up to and
including the underscore. Use this option to remove prefixes and make source and target bone names match, which will allow
you to use the Match by Name option.
-
 Left Arrow
-
Matches highlighted target bones to highlighted source bones. The source bone name is moved to the left side of the dialog,
where it follows the target bone name. You can also match more than one source bone to a single target bone by highlighting
the target bone and the source bones and clicking the left arrow. When you click OK, only the matches listed on the left side
of the dialog will be mapped.
-
 Right Arrow
-
On a highlighted match on the left side of the dialog, removes the match and moves the source bone to the right side of the
dialog.
- Match by Name
-
Matches the source and target bones by name. You can use this option only if you have removed prefixes or suffixes to make
the displayed source and target bone names match exactly.
- Threshold
-
Sets the unit distance that the utility will search for vertex or face matches. Default=1.0.
- Interpolation
-
Sets the method by which pasting will take place. Use the Match by Vertex option only if the meshes are identical. Otherwise,
use Match by Face. Default=Match by Vertex.