The Height Map Displacement shader displaces the geometry of surfaces, and is specifically intended for use with height maps generated by normal maps; see Creating and Using Normal Bump Maps.
 Smoothing option must be off. If such materials are applied to
all
objects in the scene, you can turn off Smoothing globally. Otherwise, turn off smoothing for each object whose material uses a height map via the Object Properties mental ray panel (turn off Use Global Settings and then turn off Smoothing).
Smoothing option must be off. If such materials are applied to
all
objects in the scene, you can turn off Smoothing globally. Otherwise, turn off smoothing for each object whose material uses a height map via the Object Properties mental ray panel (turn off Use Global Settings and then turn off Smoothing).
Also, avoid using a paint program to modify the height map. The values in the height map depend on the shape of both the low-res and high-res models, and it's easy to damage the mathematical accuracy. If you paint any changes onto the map, you must be careful to preserve the faceted look, and avoid the temptation to blur away the facets.
You might try painting in Additive and Subtractive mode to add or subtract to the displacement, because Normal mode will set a fixed displacement, making it difficult for an artist to control the result.
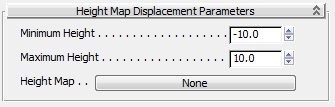
Height Map Displacement (3dsmax) Parameters rollout
Be sure to enter the same values for Minimum and Maximum Height as the equivalents on the Projection Options dialog, as specified below.
The “Min Height” value specified on the Render to Texture: Projection Options dialog when creating the height map. Default=-10.0.
The “Max Height” value specified on the Render to Texture: Projection Options dialog when creating the height map. Default=10.0.


 Material Editor