Animation is based on a principle of human sight called persistence of vision. If you view a series of related still images in quick succession, you perceive them as continuous motion. Each individual image is referred to as a frame, and the illusion of motion comes from the fact that your visual system retains each frame for a short time after you see it.
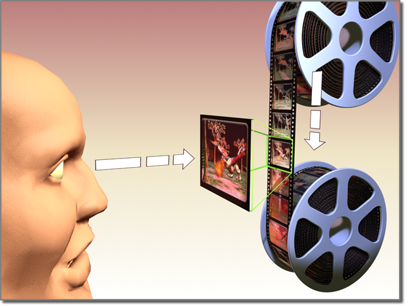
A frame is a single image in an animated film.
Historically, the main difficulty in creating animation has been the effort required of the animator to produce a large number of frames. One minute of animation might require between 720 and 1800 separate images, depending on the quality of the animation. Creating images by hand is a big job. That’s where the technique of keyframing comes in.
Most of the frames in an animation are routine, incremental changes from the previous frame directed toward some goal. Traditional animation studios realized they could increase the productivity of their master artists by having them draw only the important frames, called keyframes. Assistants could then figure out what belonged on the frames in between the keyframes. The in-between frames were called tweens.
Once all of the keyframes and tweens were drawn, the images had to be inked or rendered to produce the final images. Even today, production of a traditional animation usually requires hundreds of artists to generate the thousands of images needed.
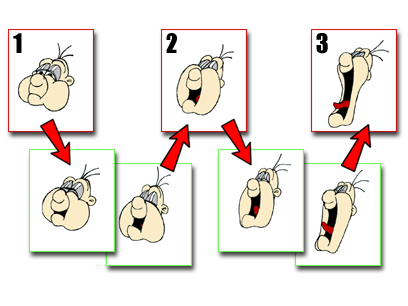
The frames marked 1,2, and 3 are key frames. The other frames are tweens.
This program is your animation assistant. As the master animator, you create the keyframes that record the beginning and end of each animated sequence. The values at these keyframes are called keys. 3ds Max calculates the interpolated values between each pair of keys to produce the completed animation.
3ds Max can animate just about any parameter in your scene. You can animate modifier parameters, such as a Bend angle or a Taper amount, material parameters, such as the color or transparency of an object, and much more.
Once you have specified your animation parameters, the renderer takes over the job of shading and rendering each frame. The result is a high-quality animation.
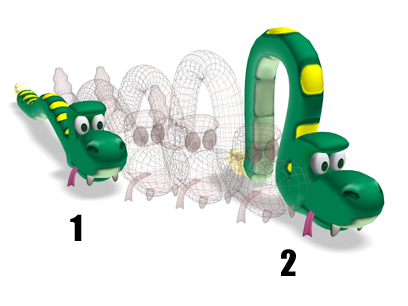
The object's position at 1 and 2 are the keyframed models at different times. The computer generates the in-between frames.
Traditional animation methods, and early computer animation programs, are rigidly locked to the concept of producing animation frame by frame. This is okay if you always work in a single format or do not need to specify an animated effect at a precise time.
Unfortunately, animation comes in many formats. Two of the more common formats are film at 24 frames per second (FPS) and NTSC video at 30 FPS. Also, the need for accurate time-based animation versus frame-based animation is critical as animation becomes more common for scientific and legal presentation.
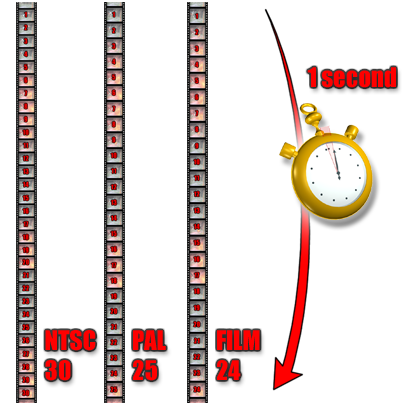
Different animation formats have differing frame rates.
3ds Max is a time-based animation program. It measures time, and stores your animation values, with an internal precision of 1/4800 of a second. You can configure 3ds Max to display time in a format best suited for your work, including traditional frames format. See Time Configuration .
Many of the examples in the following sections describe time using the frames method for the sake of tradition and familiarity. Keep in mind that you are really animating using a very precise time-based method, and frames aren’t created until you instruct 3ds Max to render your animation.
You can locate the basic animation tools in the following areas of the interface:
Provides detailed animation editing capabilities in several floating or dockable windows. See Track View .
Provides quick access to keyframes and interpolation controls. Can be expanded for function curve editing. See Track Bar.
Use this panel to adjust transform controllers that affect all position, rotation, and scale animation. See Working with Controllers.
Use this panel to adjust all parameters governing the linkage of two or more objects. These include inverse kinematics parameters and pivot point adjustments. See Hierarchy Panel.
Use these controls to move through time in the viewport displays. You can move to any point in time, and play animations in the viewports. The time controls, documented in Animation and Time Controls, include:
To get started with animation, see Using Auto Key Mode .


