The Time Configuration dialog provides settings for frame rate, time display, playback, and animation. You use this dialog to change the length of your animation, or stretch or rescale it. You also use it to set the start and end frames of the active time segment and your animation.
To define the active time segment:
 (Time Configuration).
 Animation group, set Start Time to specify the beginning of your active time segment.
You can enter positive or negative values in any spinner, but you must use the same format used by the time display.
You can change the active time segment without affecting the keys you've created. For example, if you have keys scattered over a range of 1000 frames, you can narrow your active time segment to work on only frames 150 to 300. You can only work on the 150 frames in the active segment, but the remainder of the animation stays intact. Returning the active segment from 0 to 1000 restores access and playback of all the keys.
Changing the active time segment has the following effects: it restricts the range of time you can use with the time slider, and it restricts the range of time displayed when using the animation playback buttons.
The default setting for the active time segment runs from frames 0 to 100, but you can set it to any range.
To stretch out your existing animation over a longer time:
Animation group, click Re-scale Time.
The animation is rescaled to the new number of frames.
This also works to compress animations into a shorter space of time. To avoid losing frames during the rescaling, see “To use sub-frame animation” in this set of procedures.
To add frames onto your existing animation:
This procedure adds new frames to the end of your animation, without affecting your existing work.
Animation group End Time field, enter the number of the last frame of the animation.
For example, if your existing animation is 100 frames long and you want to add 50 frames, enter 150.
The number you entered is now the new length of the animation, shown on the time slider.
To move to an exact time in your animation:
Animation group, enter the frame number in the Current Time field, and press Enter.
To set the frame rate of your animation:
In the Time Configuration dialog Frame Rate group, do one of the following:
To configure viewport playback:
Playback group, turn on or off the Real Time and Active Viewport Only boxes.
To play your animation in reverse or back and forth:
Playback group, turn off the Real Time.
 (Play Animation) or the / key.
To play your animation only once:
Playback group, turn off Loop.
(Play Animation) or the / key.
To play your animation in multiple viewports:
Playback group, turn off Active Viewport Only. Click OK.
Play your animation.
Time Display group, turn on FRAME:TICKS or MM:SS:TICKS. Click OK.
To play an animation with sound:
Playback group, be sure you have Real Time turned on. If Real Time is not on, the sound will not play back during the animation.
These are the controls for the Time Configuration dialog. You can display this dialog by right-clicking any of the time control buttons to the right of the Auto Key button.
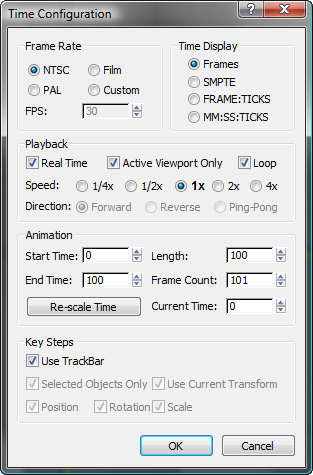
These four option buttons, labeled NTSC, Film, PAL, and Custom let you set the frame rate in frames-per-second (FPS). The first three buttons force the standard FPS for that choice. The Custom button lets you specify your own FPS by adjusting the spinner.
Specifies the method for displaying time in the time slider and throughout 3ds Max. Choices are Frames or in minutes, seconds and ticks.
Specifies the method for displaying time in the time slider and throughout 3ds Max (in frames, in SMPTE, in frames and ticks, or in minutes, seconds, and ticks).
For example, if the time slider is at frame 35, and the Frame Rate is set to 30 fps, the time slider would display the following numbers for the different Time Display settings:
SMPTE is the Society of Motion Picture Technical Engineers standard used to measure time for video and television production.
Real Time causes viewport playback to skip frames to keep up with the current Frame Rate setting. A choice of five playback speeds is available: 1x is normal speed, 1/2x is half speed, and so on. The speed settings affect only the playback in the viewports.
These speed settings can also be used with the Motion Capture utility.
When Real Time is off, viewport playback occurs as rapidly as possible and displays all frames.
Set the animation to play forward, reverse, or ping-pong (forward and then reverse, repeating). This affects only the playback in the interactive renderer. It does not apply when rendering to any image output file. These options are available only when Real Time is off.
You can recall these settings automatically upon startup or reset by saving a maxstart.max file. See Startup Files and Defaults.
Sets the active time segment displayed in the time slider. Choose any time segment before or after frame 0. For example, you can set an active time segment from –50 to 250.
Stretches or shrinks the animation for the active time segment to fit into the new time segment you specify. Relocates the position of all keys in all tracks. As a result, the animation plays over a greater or lesser number of frames, making it faster or slower.
Controls in this group let you configure the method used when you turn on Key Mode.
Considers only the transforms of selected objects when you use Key Steps mode. If you turn this off, the transforms of all (unhidden) objects in the scene are considered. Default=on.
Disables Position, Rotation, and Scale and uses the current transform in Key Mode. For example, if the Rotate button is selected in the toolbar, you stop at each rotation key. If none of the three transform buttons are on, Key Mode considers all transforms.
To make the following control available, turn off Use Current Transform.


