Command entry:
Tools menu

Manage Scene States
Command entry:Right-click to open the quad menu.
Display (upper-right quadrant)
Manage Scene States
The Manage Scene States dialog is a modeless dialog where you can select, save, rename, and delete scene states.
Procedures
To save a scene state:
- Set up the scene in the viewport.
TipIt is best to first render the scene to see if it is set up the way you want before saving it. If it isn't, make the desired
changes and render again before proceeding to the next step.
- Right-click in a viewport and choose Save Scene State from the quad menu.
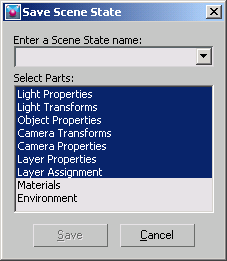
- In the Save Scene State dialog, highlight the parts you want saved in the scene state, then enter a descriptive name. For
descriptions of these parts, see Managing Scene States.
- Click the Save button. This saves the scene state to the MAX file.
To restore a scene state:
- Right-click in a viewport and choose Restore Scene State from the quad menu.
- Choose the scene state to restore from the flyout list.
- Highlight the parts you want restored with the scene state. Only the parts that were originally saved with the scene state
are listed.
- Click Restore.
The scene state is restored in the viewport.
To rename a scene state:
- Right-click in a viewport and choose Manage Scene States from the quad menu.
- In the scene state list, highlight the scene state you want to rename.
- Click the Rename button.
- In the Rename Scene State dialog, enter a new name for the scene state.
- Click OK. The new name is displayed in the scene state list.
To delete a scene state:
- Right click in a viewport and choose Manage Scene States from the quad menu.
- In the scene state list, highlight the scene state you want to delete.
- Click the Delete button. The scene state is deleted from the MAX file.
NoteYou can undo to restore the deleted scene state.
To save changes to an existing scene state:
- In the Manage Scene States dialog, highlight the scene state you want to overwrite.
- Click the Save button.
The Scene State Manager displays a message confirming if you want to overwrite the scene state.
- Click OK.
Interface
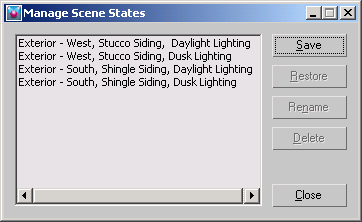
The dialog lists all the scene states that are saved in the MAX file.
- Save
-
Opens the Save Scene State dialog where you enter a name for the current scene state. To select a continuous range of parts, drag or Shift+click. To make a noncontinuous selection, use Ctrl+click.
- Restore
-
- Rename
-
- Delete
-
Deletes the highlighted scene state(s) without first warning you if you are sure you want to delete the scene. To select a
continuous range of entries, drag or Shift+click. To select noncontinuous entries, use Ctrl+click.
- Close
-
Closes the Manage Scene States dialog.
Save Scene State
- Enter a Scene State name
-
A text field where you enter a descriptive name for the scene state.
- Select Parts
-
Lists the parts you can save in the scene state. By default, all parts are highlighted except for Materials and Environment.
When you make a different selection set, it is “sticky,” which means the next time the dialog is displayed, the parts you
highlighted previously are highlighted.
- Save
-
Saves the scene state with the name you supplied and the parts you selected. The scene state is saved in the MAX file.
- Cancel
-
Closes the dialog without saving the scene state.
Restore Scene State
- Enter a Scene State name
-
Displays the scene name that was selected in the Manage Scene States dialog. Use the drop-down list to select a different
scene state to restore.
- Select Parts
-
Displays a list of scene parts from which you can restore for the scene state. To highlight a continuous range of parts, drag
or Shift+click. To highlight noncontinuous items, use Ctrl+click.
- Restore
-
Click to restore the scene state in the active viewport.
- Cancel
-
Closes the dialog without restoring the selected scene state.
Rename Scene State
- Enter a Scene State Name
-
Enter a new name in the Name field for the highlighted scene state. Click OK to accept the change or Cancel to close the dialog
without renaming the scene state.