 Command entry:In Softimage, use Send To 3ds Max to transmit a scene containing ICE data.
  Particle View Click Birth File in an event or add a Birth File operator to the particle system and then select it.
Command entry:Particle View Click Birth File in an event or add a Birth File operator to the particle system and then select it.
Particle View Click Birth File in an event or add a Birth File operator to the particle system and then select it.
Command entry:Particle View Click Birth File in an event or add a Birth File operator to the particle system and then select it.
The Birth File operator enables interoperability between 3ds Max and applications that generate particle cache files using the Maya nCache format, including Maya and Softimage. Specifically, you use the Send To function to send a scene to Softimage, use ICE to add particle effects, and then send the scene back to 3ds Max. The returned scene now contains a Particle Flow system whose particles are generated by a Birth File operator from a point-cloud file.
The main file for the nCache format uses the .xml extension, and is accompanied by one or more MC (Maya cache) files: one per cached frame. Each MC file describes a consecutive frame in the particle animation. The Birth File operator forms the basis for the Send To feature, which streamlines the use of Softimage ICE to populate 3ds Max particle simulations. In the context of the Send To workflows, the operator is automatically added and configured.
For further information about this process, see the Softimage help.
Example: To use Softimage ICE particles with 3ds Max:
To follow this procedure, have Autodesk Softimage 2012 and Autodesk 3ds Max 2012 installed on the same computer.
 Send To Softimage Send As New Scene.
It doesn't matter whether or not Softimage is already open.
After a few moments, the objects are sent to Softimage. If a warning dialog appears, click OK to continue.
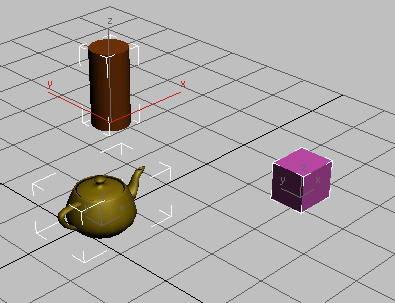
Create Basic Emission.
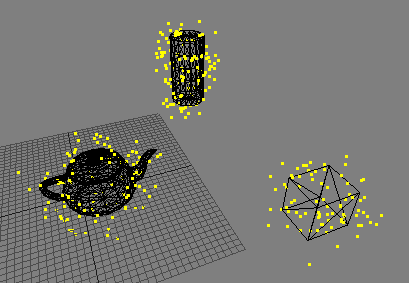
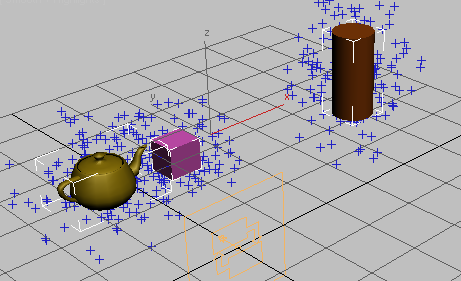
The Basic Emission setup causes particles to emanate from the objects.
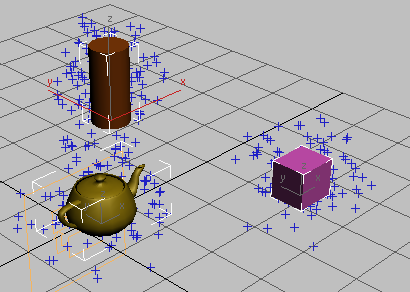
 Update Current 3ds Max scene.
Alternatively, click the Update button near the bottom-right corner, near the message "Connected to 3ds Max."
As in Softimage, all objects seem to emit particles.
The operator parameters appear on a rollout on the right side of the Particle View dialog.
The data files all have the filename extension .mc. This stands for "Maya cache" (this feature uses the Maya nCache data format) and indicates that each data file represents a cached frame from the original particle animation in Softimage.
This is an important point: Softimage doesn't send an actual particle system, but only cached data resulting from its particle animation. Thus, it's not possible to change the particle-animation setup in 3ds Max and send it back to Softimage. When using this interoperability feature, you do all particle-system setup and modification in Softimage. However, you can modify the particle system to an extent by changing other settings in 3ds Max, as you'll see in the next few steps.
The particles remain in place, because they're still using the same cached animation data.
 (Update).
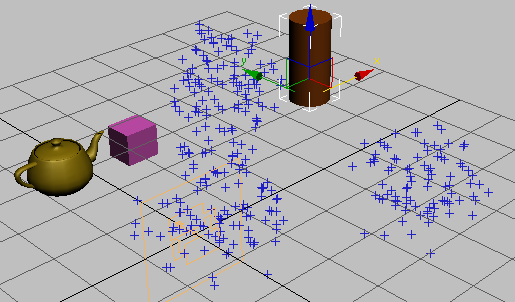
Back in Softimage, the object positions change to reflect the update. If necessary, change the view to see this.

This happens because the ICE particle system refers to the objects dynamically, automatically updating the particle positions if the emitter objects move.
This shows that the cached particle animation has been updated.
For the last part of this procedure, you'll experiment with changing a parameter in the Particle Flow system.
After the last cached particle-animation frame, which should be 100, the particles simply stop moving.
This time the particles disappear after the last cached frame.
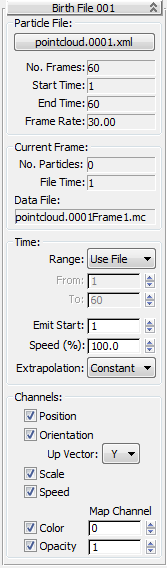
The user interface appears in the parameters panel, on the right side of the Particle View dialog.
The current frame data are of interest if the Speed (%) value (see following) is not 100.0. In such a situation the current frame in 3ds Max might not be the same as the active MC frame, so this group tells you which frame of the nCache file Particle Flow uses to populate the current frame. For example, if the current frame is 30 and the Speed (%) value is 80.0, the File Time value is 24.
Use these toggles to specify which data channels to use from the MC file sequence. The point-cloud (XML) file specifies the channels for which data is available; channels without specified data are unavailable in this group.
This setting can compensate for the fact that various programs use different axes for the vertical direction. Maya lets you choose between Y-up and Z-up, Softimage uses Y-up only, while 3ds Max uses Z-up. Because the incoming particle file does not specify the up vector, you need to choose it. The default is Y-up because it will be the right convention most of the time.
You can observe the effect of this setting if you use the Shape Instance operator in your event with Orientation (see preceding) on in the Birth File operator. If you use a cone, for example, you will see that the final orientation of the particles depends on the Up Vector setting.
Use the numeric setting to specify the map channel to which the incoming color information should be applied. This value must be used in the material associated with a Material Static operator.
Use the numeric setting to specify the map channel to which the incoming opacity information should be applied. This value must be used in the material associated with a Material Static operator.


 Birth File Operator