The Safe Frame provides a guide to help avoid rendering portions of your image that might be blocked in the final output.
Safe frame borders show which portions of a viewport will be visible when rendered to video.
For example, to ensure that no unintentional black areas are visible on a television screen, broadcasters intentionally "overscan" the video image. The result is that portions of an image around the edges are not visible on a typical set. In addition, portions of images on 35mm slides can be partially covered by the slide mounts.
You can adjust the size of the safe frame as a percentage of the outer display rectangle with the Safe-Frame controls on the Viewport Configuration dialog. Depending upon its size, the safe frame can be used as the equivalent of a "title safe frame" (the area inside which it is safe to display titles), or an "action safe frame" (the area inside which action may occur without significant loss of information).
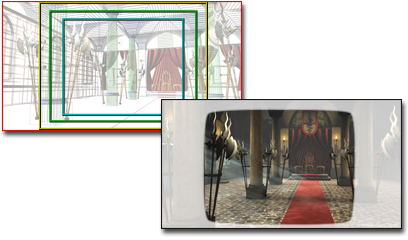
To view the frames, choose Show Safe Frames from the Point-Of-View (POV) viewport label menu. Three rectangles, one yellow, one green, and one pale blue, appear in the camera viewport. The outer, yellow video rectangle shows the area and aspect ratio of your current display. The middle, green rectangle represents the action safe zone. The inner, pale blue rectangle shows the title safe zone.
To turn off the display, choose Show Safe Frames again.


