


In both freeform and footstep animation, pivots allow you to rotate the biped’s hands and feet around various points.
For example, by activating a pivot on the ball of a foot, you can rotate the foot around the ball of the foot. The biped’s hands and feet have the same number of pivots, and pivot location is similar. Pivots are active only if the biped hand or foot is in world or object coordinate space. In a walking motion, you can pivot on the heel first, then on the ball of the foot, and finally onthe toes. Pivots are essentially extensions of the IK chain.

By setting a planted key for the hand, the hand is anchored in world space: you can move the biped or the collarbone and the hand remains planted. Pivots on the hands make it easy to animate hands and fingers.
While pivots are used in both freeform and footstep animation, the pivots are only visible and accessible when in Freeform mode.
To understand interactive IK limb manipulation using character studio, it is useful to distinguish two types of limb joints: primary and secondary.
The primary joints are the shoulder, elbow, hip, and knees. Animals use primary joints to coordinate the positioning of hands and feet, as these joints have the most influence and flexibility in positioning tasks. Even the placement of fingers and toes over specific spots is the task of the primary joints.
The secondary joints are the wrists, ankles, toes, and fingers. These joints are typically used for grasping and support rather than positioning, so they most frequently exercise independent joint angle control suited to a particular task, such as rotating the foot to raise the heels during walking, or curling the fingers around an object. Because these joints have little influence on end effector position, they are rarely engaged for positioning tasks. For example, if you want to place your finger on your nose, you will most naturally rotate only your shoulder and elbow, keeping your wrist stationary.
character studio mimics the IK behavior of "natural" systems. The primary joints are used for IK positioning, while the secondary joints are independently and precisely controlled by the animator. The secondary joints will not rotate unless the animator explicitly selects and rotates them. Therefore, if an IK pivot is set, and the limb is interactively manipulated, (say, the finger is moved onto the nose), only the primary joints adjust to satisfy the IK constraint. The secondary joints remain in place and will never "drift" in an IK solution; they simply obey the values set by the animator. Because there is no drift for the secondary joints, the animator does not have to tediously assign "tension" values to hold them in place.
If an IK pivot point constraint has been set, some by-products of character studio "natural IK" are that:
After an IK pivot has been placed, applying 1) and 2) gives the animator exact control over all possible IK solutions. The IK pivots can be easily moved by applying 3) and 4). In general, you don't need to remember these "rules," because the system works in an intuitive way. You merely need to position the pivots as desired, set the IK constraint, and then fine-tune the posture of the limb, if desired, by rotating the secondary joints and using the special rotation to adjust the primary joints.
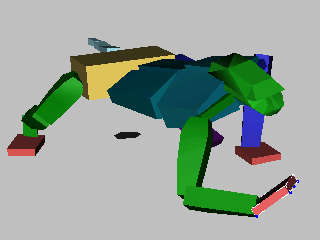

Using IK constraints and pivots on the biped hands and feet allows you to animate quadrupeds.
 Select a biped hand or foot.
 (Set Key), and then choose Object.
You can also select an object if you like at this point, by selecting a non-biped object in the viewport.
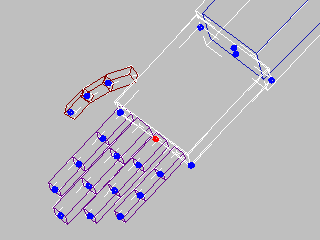
Pivots are shown as red dots on the hands and feet. Use wireframe viewport shading if you have problems seeing the choices.
 Rotate the hand or foot around the selected pivot.