Standard snaps give you control in creating, moving, rotating, and scaling objects. You access the 3ds Max snap features from buttons on the main toolbar.
Snapping to: endpoints, midpoints, edges
You make most snap settings on Grid And Snap Settings, a modeless dialog with four panels. You can move this dialog to any convenient location on your screen and turn options on and off as you work. Panels are reset to defaults for each new session.
You can also make commonly used snap settings on the Snaps toolbar. In addition, a Snaps quad menu gives you quick access to some snap options.
Snap settings are stored in the 3dsmax.ini file rather than in the MAX file. This means that the state of the snap settings persists from session to session without your having to modify the maxstart.max file.
Grid And Snap Settings Dialog and Snaps Toolbar
The most commonly used grid and object snaps appear on the Grid and Snap Settings dialog. This is the general sequence for using these snaps:
 (Snaps Toggle) on the main toolbar, and then right-click this button to display the Grid And Snap Settings dialog.
Two sets of snap types are available: Standard (the default) and NURBS. Both are discussed in Snap Settings.
You can also make commonly used snap settings on the Snaps toolbar.
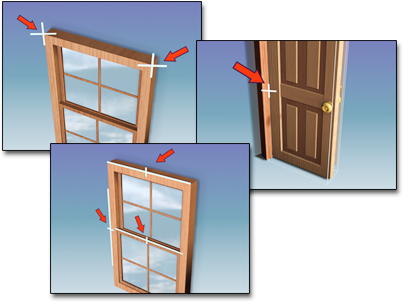
As you move the cursor, each snap type is marked by a distinctive icon shown on the Snap panel. The current icon indicates the type and position of the next snap.
Grid points and grid lines are secondary to the other snap types. For example, if both Grid Point and Vertex are active, 3ds Max snaps to a vertex in preference to an equally close grid point.
For more information on snaps, see 2D Snap, 2.5D Snap, 3D Snap and Snap Settings.
Snap Override bypasses currently selected snaps. You use a keyboard-mouse combination or a keyboard shortcut to define a new snap for the next click. You can override on the fly, one snap at a time.
For example, while creating a spline between grid points, you might need to snap to a vertex or midpoint of an object. This is the general procedure:
In addition, the Snap Override quadrant lets you reuse the last override you used (listed by name), and gives you an option for None. None turns off snapping entirely on the next click. The Snap quad menu also contains an Options quadrant, with toggles for snapping within current transform constraints (default=off) and snapping to frozen objects (default=off).
Snaps help you precisely control the dimensions and placement of objects when you create them or transform them. There is also a Spinner snap for controlling the entry of values.
You can access a number of snap features from the Options tab of the Grid And Snap Settings dialog. Right-click any of the snap buttons on the main toolbar to display the Grid And Snap Settings dialog or choose Tools menu Grids And Snaps Grid And Snap Settings, then click the Options tab.
This command displays the Grid and Snap Settings dialog. This modeless dialog establishes settings and options for snaps, the home grid, and user-defined grids.


