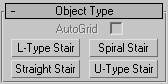
You can create four different types of stairs in 3ds Max: Spiral Stair, Straight Stair, L-Type Stair, or U-Type Stair.
By default, 3ds Max assigns seven different material IDs to stairs. The aectemplates.mat material library includes Stair-Template, a multi/sub-object material designed to be used with stairs. Each component of the stair/material is listed below along with its corresponding Material ID.
| Material ID | Railing/Material Component |
|---|---|
| 1 | Treads of the stairs |
| 2 | Front riser of the stairs |
| 3 | Bottom, back, and sides of the risers of the stairs |
| 4 | Center pole of the stairs |
| 5 | Handrails of the stairs |
| 6 | Carriage of the stairs |
| 7 | Stringers of the stairs |
 Left and Right.
 Create panel AEC Extended Railing to create the first railing.
Pick Railing Path and select one of the rail paths on the stairs.
Create panel AEC Extended Railing to create the first railing.
Pick Railing Path and select one of the rail paths on the stairs.
3ds Max remembers the parameters you set. When you create the next railing, it will have the same parameters as you set for the first railing.
This rollout lets you set the stairs object's name and color. For detailed information, see Object Name and Wireframe Color.

3ds Max keeps one Rise option locked while you adjust the other two. To lock an option, you click a push pin. To unlock an option you click a raised push pin. 3ds Max locks the spinner value of the parameter with the depressed push pin and allows the spinner values of the parameter with the raised push pins to change.
Controls the number of risers. There will always be one more riser than steps. This implied riser is between the top step of the stair and the upper floor.

Linear stair with five risers
1 through 4. Risers
5. The implied riser
6. The upper floor you snap to
7. The lower floor you snap to
8. The steps
These controls are available only when you turn on Stringers on the Parameters rollout Generate Geometry group.
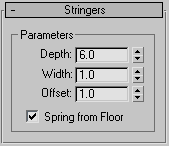
Controls whether the stringer starts at the floor, flush with the start of the first riser, or if the stringer extends below the floor. You control the amount the stringer extends below the floor with the Offset option.

Left: The stringer extending below the floor. (Spring From Floor off.)
Right: The stringer springing from the floor. (Spring From Floor on.)
These controls are available only when you turn on Carriage on the Parameters rollout Generate Geometry group.

 Carriage Spacing
Sets the spacing of the carriage. When you click this button, the Carriage Spacing dialog displays. Specify the number of carriages you want using the Count option. For more information on spacing options in this dialog, see Spacing Tool.
Controls whether the carriage starts at the floor, flush with the start of the first riser, or if the carriage extends below the floor. You control the amount the carriage extends below the floor with the Offset option.

Left: The carriage springing from the floor. (Spring From Floor on.)
Right: The carriage extending below the floor. (Spring from Floor off.)
These controls are available only when you turn on one or more of the Handrail or Rail Path options on the Parameters rollout
Generate Geometry group. Also, Segments and Radius aren't available if neither of the Handrail options is on.

The L-Type Stair object lets you create a staircase with two flights at right angles to each other.
The Spiral Stair object lets you specify the radius and number of revolutions, add stringers and a center pole, and more.
The Straight Stair object lets you create a simple staircase, with optional stringers, carriage, and handrail.
The U-Type Stair object lets you create a two-flight staircase, with the two flights parallel to each other and a landing between them.


 (Geometry)