The sample slots let you maintain and preview materials and maps. Each slot previews a single. You can change the material by using the Compact Material Editor controls, and you can apply the material to objects in the scene. The easiest way to do this is to drag the material from the sample slot to objects in viewports. See Dragging and Dropping Maps and Materials.
You can display a sample slot in a window of its own. This magnifies the sample slot, which can make it easier to preview the material. You can resize the magnified window to make it even larger. To magnify a sample slot, double-click it, or right-click and choose Magnify from the pop-up menu. See Sample Slot Right-Click Menu.
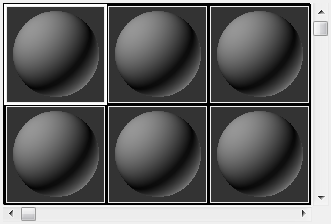
The Material Editor has 24 sample slots. You can view them all at once, six at a time (the default), or 15 at a time. When you view fewer than 24 slots at once, scroll bars let you move among them. See Material Editor Options and get.
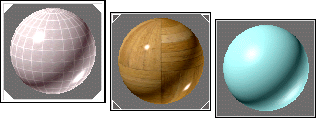
A material in a slot is shown on a sample object. By default, the object is a sphere. Use the Sample Type flyout to change the sample object.
Sample slot showing a material
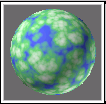
By default, a standalone map in a slot fills the whole slot. This is when the slot shows only a map; for example, when you drag the map onto the slot from elsewhere in the 3ds Max interface. When a map is assigned to a material, the slot shows it as part of the material, mapped to the sample object. See Get Material and Material Editor Options .

Sample slot showing a map
A sample slot is "hot" when the material in the slot is assigned to one or more surfaces in the scene. When you use the Compact Material Editor to adjust a hot sample slot, the material in the scene changes at the same time.
The corners of a sample slot indicate whether the material is a hot material:
Left: "Hot" material applied to currently selected object.
Middle: "Hot" material assigned to scene but not to currently selected object.
Right: "Cool" material: active but not assigned to scene.
A material is "cool" if it is not applied to any object in the scene.
To make a hot sample slot cool, click Make Material Copy . This copies the material in the sample slot on top of itself so that it's no longer used in the scene.
You can have the same material (with the same name) in more than one sample slot, but only one slot containing that material can be hot. You can have more than one hot sample slot, as long as each has a different material.
If you drag to copy a material from a hot slot to another slot, the destination slot is cool, and the original slot remains hot.
The active sample slot is displayed with a white border around it.
The sample slot shows a sample object shaded with a material. (By default, the sample object is a sphere.) The sample object is lit by a light source above it and slightly toward the viewer. For the sphere, the highlight is in the upper-left quadrant. The diffuse color shows most clearly above and to the left of the highlight, shading toward the ambient color at the sphere's lower right.
The new shape is displayed in the sample slot, with the material mapped to it.
To render the current map level:
3ds Max opens the Render Map Dialog.
A Rendered Frame Window appears displaying the map. If Save To File is on, the image is also saved to disk.
When you right-click the active sample slot, a pop-up menu is displayed. For other sample slots, click or right-click once to select them, then right-click to use the pop-up menu.
3ds Max opens the Render Map dialog when you use Render Map on the sample slot right-click menu to render the map displayed in a sample slot


 (Material Editor): Compact