CV curve sub-objects are similar to object-level CV curves. The main difference is that you can't give CV curves a renderable thickness at the sub-object level.
Drawing Three-Dimensional Curves
When you create a CV curve, you can draw it in three dimensions. There are two ways to do this:
With the Ctrl–key method, further mouse movement lifts the latest point off the construction plane. There are two ways to use this:
While you are offsetting the CV, a red dotted line is drawn between the original CV on the construction plane and the actual CV offset from the plane. You can move the mouse into an inactive viewport, in which case 3ds Max sets the height of the CV using the CV's Z axis in the inactive viewport. This lets you set the height of the CV with accuracy.
Snaps also work when you change the height of a CV. For example, if you turn on CV snapping, you can set a CV to have the same height as another CV by snapping to that other CV in an inactive viewport.
To create a CV curve sub-object:
 (CV Curve).
While you are creating a CV curve, you can press Backspace to remove the last CV you created, and then previous CVs in reverse order.
If Draw In All Viewports is on, you can draw in any viewport, creating a 3D curve.
To lift a CV off the construction plane, use the Ctrl key as described earlier in this topic under "Drawing Three-Dimensional Curves."
As with splines, if you click over the curve's initial CV, a Close Curve dialog is displayed. This dialog asks whether you want the curve to be closed. Click No to keep the curve open or Yes to close the curve. (You can also close a curve when you edit it at the Curve sub-object level.) When a closed curve is displayed at the Curve sub-object level, the initial CV is displayed as a green circle, and a green tick mark indicates the curve's direction.
CV Curve rollout (creation time)
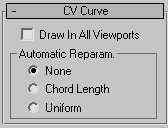
Lets you use any viewport while you are drawing the curve. This is one way to create a 3D curve. When off, you must finish drawing the curve in the viewport where you began it. Default=on.
While Draw In All Viewports is on, you can also use snaps in any viewport.
Automatic Reparameterization group
The controls in this group box let you specify automatic reparameterization. They are similar to the controls in the Reparameterize dialog, with one addition: all choices except for None tell 3ds Max to reparameterize the curve automatically; that is, whenever you edit it by moving CVs, refining, and so on.
Chooses the chord-length algorithm for reparameterization.
Chord-length reparameterization spaces knots (in parameter space) based on the square root of the length of each curve segment.
CV Curve rollout (modification time)
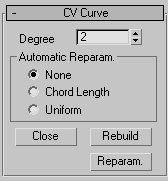
Sets the degree of the curve. The higher the degreevalue, the greater the continuity. The lower the degree, the more discontinuous the curve segments become. The degree can't be less than one or greater than the number allowed by the number of CVs in the curve. Degree 3 curves are adequate to represent continuous curves, and are stable and well behaved. Default=3.
Setting the degree greater than 3 isn't recommended, because higher-degree curves are slower to calculate and less stable numerically. Higher-degree curves are supported primarily to be compatible with models created using other surface modeling programs.
The number of CVs in a CV curve must be at least one greater than the curve's degree.
Automatic Reparameterization group
The controls in this group box let you specify automatic reparameterization. They are similar to the controls in the Reparameterize dialog, with one addition: all choices except for None tell 3ds Max to reparameterize the curve automatically; that is, whenever you edit it by moving CVs, refining, and so on.
Chooses the chord-length algorithm for reparameterization.
Chord-length reparameterization spaces knots (in parameter space) based on the square root of the length of each curve segment.
Displays the Rebuild CV Curve dialog to let you rebuild the CV curve.
Displays the Reparameterize dialog to let you re parameterize the CV.


 Modify panel