The 3D Displacement shader displaces the geometry of surfaces. The effect is similar to the Displacement map component of a standard material. You can apply mental ray displacement to any kind of object, unlike the standard Displacement map, which is restricted to surface models (meshes, patches, polys, and NURBS surfaces).
Displaced surfaces are smooth if the displaced polygons share normals; otherwise, the displaced surfaces are faceted. Also, unless normals are shared, faces can become separated in the displaced mesh. To prevent this, make sure adjacent surfaces belong to the same shading group.
When the mental ray renderer is the active renderer, mental ray displacement is the only displacement method used, unless your scene includes a Displace modifier, which always uses standard 3ds Max displacement.
Global settings for the mental ray displacement method are in the Displacement group on the Render Setup dialog  Renderer panel Shadows And Displacement rollout.
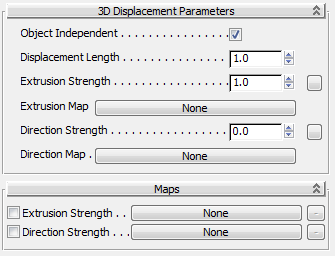
3D Displacement Parameters rollout
This is the length of displacement when Object Independent is on, the extrusion map is at 100 per cent (white) and the Extrusion Strength equals 1.0. Lower gray levels in the extrusion map, or other values of Extrusion Strength, scale the amount of displacement. When Object Independent is off, this value is disregarded. Default=1.0.
Click to display the Material/Map Browser and choose a map to use for the displacement. Displacement maps apply the gray scale of the map to generate the displacement. Lighter colors in the 2D image push outward more strongly than darker colors, resulting in a 3D displacement of the geometry.
Click to display the Material/Map Browser and choose a shader to use for the map direction. The direction of the displacement is perturbed according to the RGB values of the shader output or map pixels. Red values offset in the U axis, Green values offset in V, and Blue values offset in W (using the object-local UVW coordinates).
The controls on this rollout let you assign a map or shader to the Factor or Direction Strength parameters. Click the button for a component to display the Material/Map Browser and assign the map or shader. Use the toggle at the left to turn the effect of the map off or on.
 The button to the right of each main shader button is for shaders that can return multiple parameters. If a shader that returns
multiple parameters is assigned to the component, the button's tooltip shows the parameter name.
The button to the right of each main shader button is for shaders that can return multiple parameters. If a shader that returns
multiple parameters is assigned to the component, the button's tooltip shows the parameter name.


 Material Editor Material/Map Browser