Command entry:
Main toolbar


(Render Setup)
Render Setup dialog
Renderer panel
Camera Effects rollout
Camera Shaders group
Click the Output button.
Material/Map Browser
Maps
mental ray
Glare
Notemental ray shaders appear in the Browser only if the currently active renderer supports them.
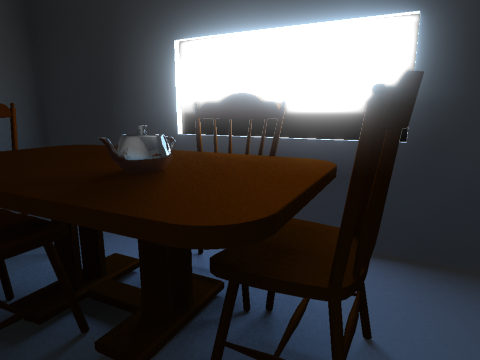
The Glare shader, when used as a camera output shader, creates a halo around very bright areas in the rendered image. It’s applied in two dimensions after rendering, so it can
partially obscure darker objects between the bright area and the camera for greater realism.
NoteThe glare effect from this shader is intended purely for illustrative purposes. It is not designed to be physically accurate
and is not suited for precise simulation purposes.
Procedure
To use the Glare shader:
Using and adjusting the Glare output shader requires first assigning it on the Render Setup dialog, and then instancing it
in the Material Editor. This procedure delineates the steps for doing so.
- Make sure mental ray is the assigned renderer.
- Open the Render Setup dialog (press F10) and on the Renderer panel, go to the Camera Effects rollout.
- On the Camera Effects rollout, turn on the Output check box.
By default, a Glare shader is already assigned to the map button for the Output channel.
- Render the scene.
If the results are satisfactory, you can stop here. The remaining steps concern adjusting the shader settings.
- Open the Material Editor (press M), and, if necessary, the Render Setup dialog.
- If you are using the Compact Material Editor, drag the Output button from the Camera Shaders group on the Render Setup dialog
to an unused sample slot. If you are using the Slate Material Editor, you can drag the output button to the active View. When
the Instance (Copy) Map dialog prompts you, make sure Instance is chosen, then click OK.
- Adjust the Glare Parameters and render the scene again. Repeat this step until you are satisfied with the result.
Interface
- Quality
-
Lets you set the tradeoff between detail and speed. Lower Quality settings cause Glare to run more quickly, but can result
in a boxy-looking glare halo, while a higher Quality value gives a better overall effect at the cost of rendering time. A
mid-level setting is appropriate for most scenes.
- Spread
-
Controls how sensitive Glare is to bright objects. Lower values for Spread produce smaller glare halos while higher values
cause larger glare halos. Very high values can cause dark objects to have halos.
TipThe best way to enlarge an object's halo is to increase its brightness, not to increase the Spread value.
- Streaks
-
When on, uses an image file you specify to create a streaking effect, such as is visible when looking at bright images through
glass or, in photographs, through a camera lens.
- Streak Image
-
Click to choose an image file to be used to create the streak effect. This file takes effect only when Streaks is on.
- Streaks Weight
-
Controls the blending between the "normal" glare and the streaks image. A value of 0.0 disables streaks, while a value of
1.0 makes the streaks fully visible.
- Resolution for Glare Processing
-
An absolute value specifying the image size, in pixels, on which the Glare computation occurs. If you image is rendered at
5000 x 5000 and Resolution for Glare Processing is set to 350, Glare will effectively compute on a 350 x 350 image internally
and reapplied on the final image, possibly resulting in an inadeqate glare effect.
- Replace Rendered Image with Glare Only
-
Generates an overlay image of the glare effect only; the original underlying image is removed. This mode is useful when render
speed is critical, so that Glare can be run on a lower-resolution image to produce an overlay, which you can then composite
with a higher-resolution underlying image.